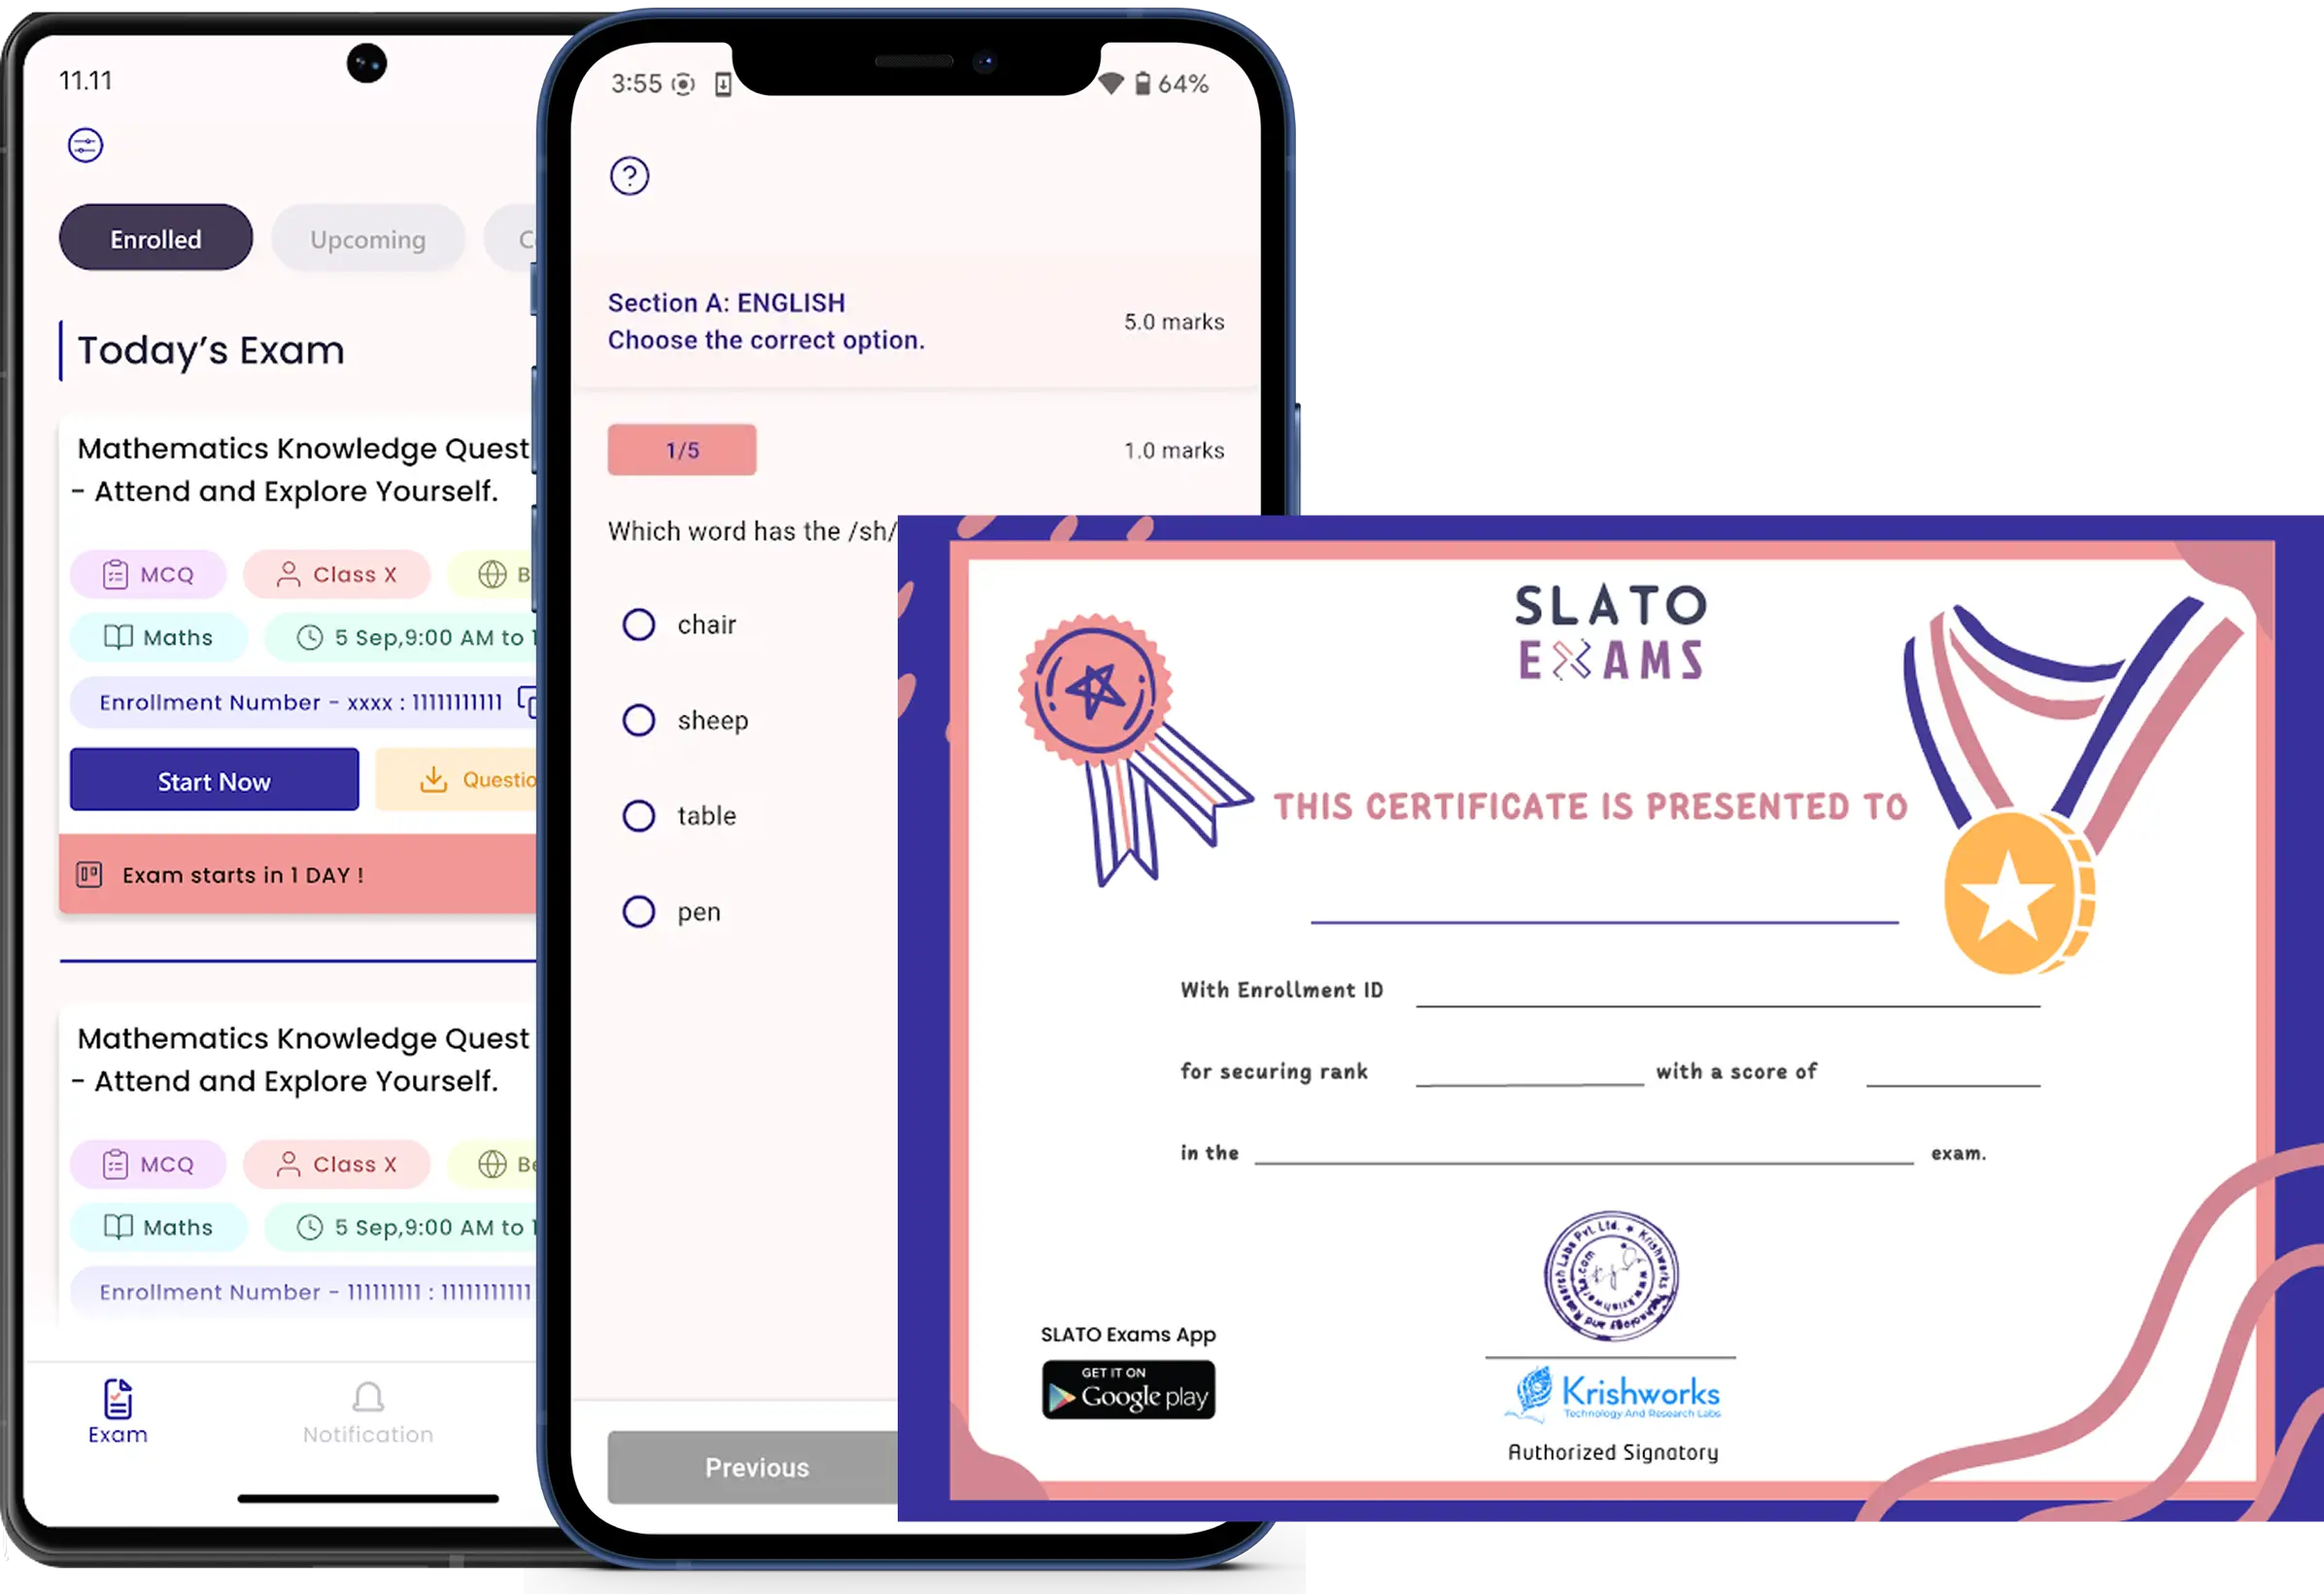
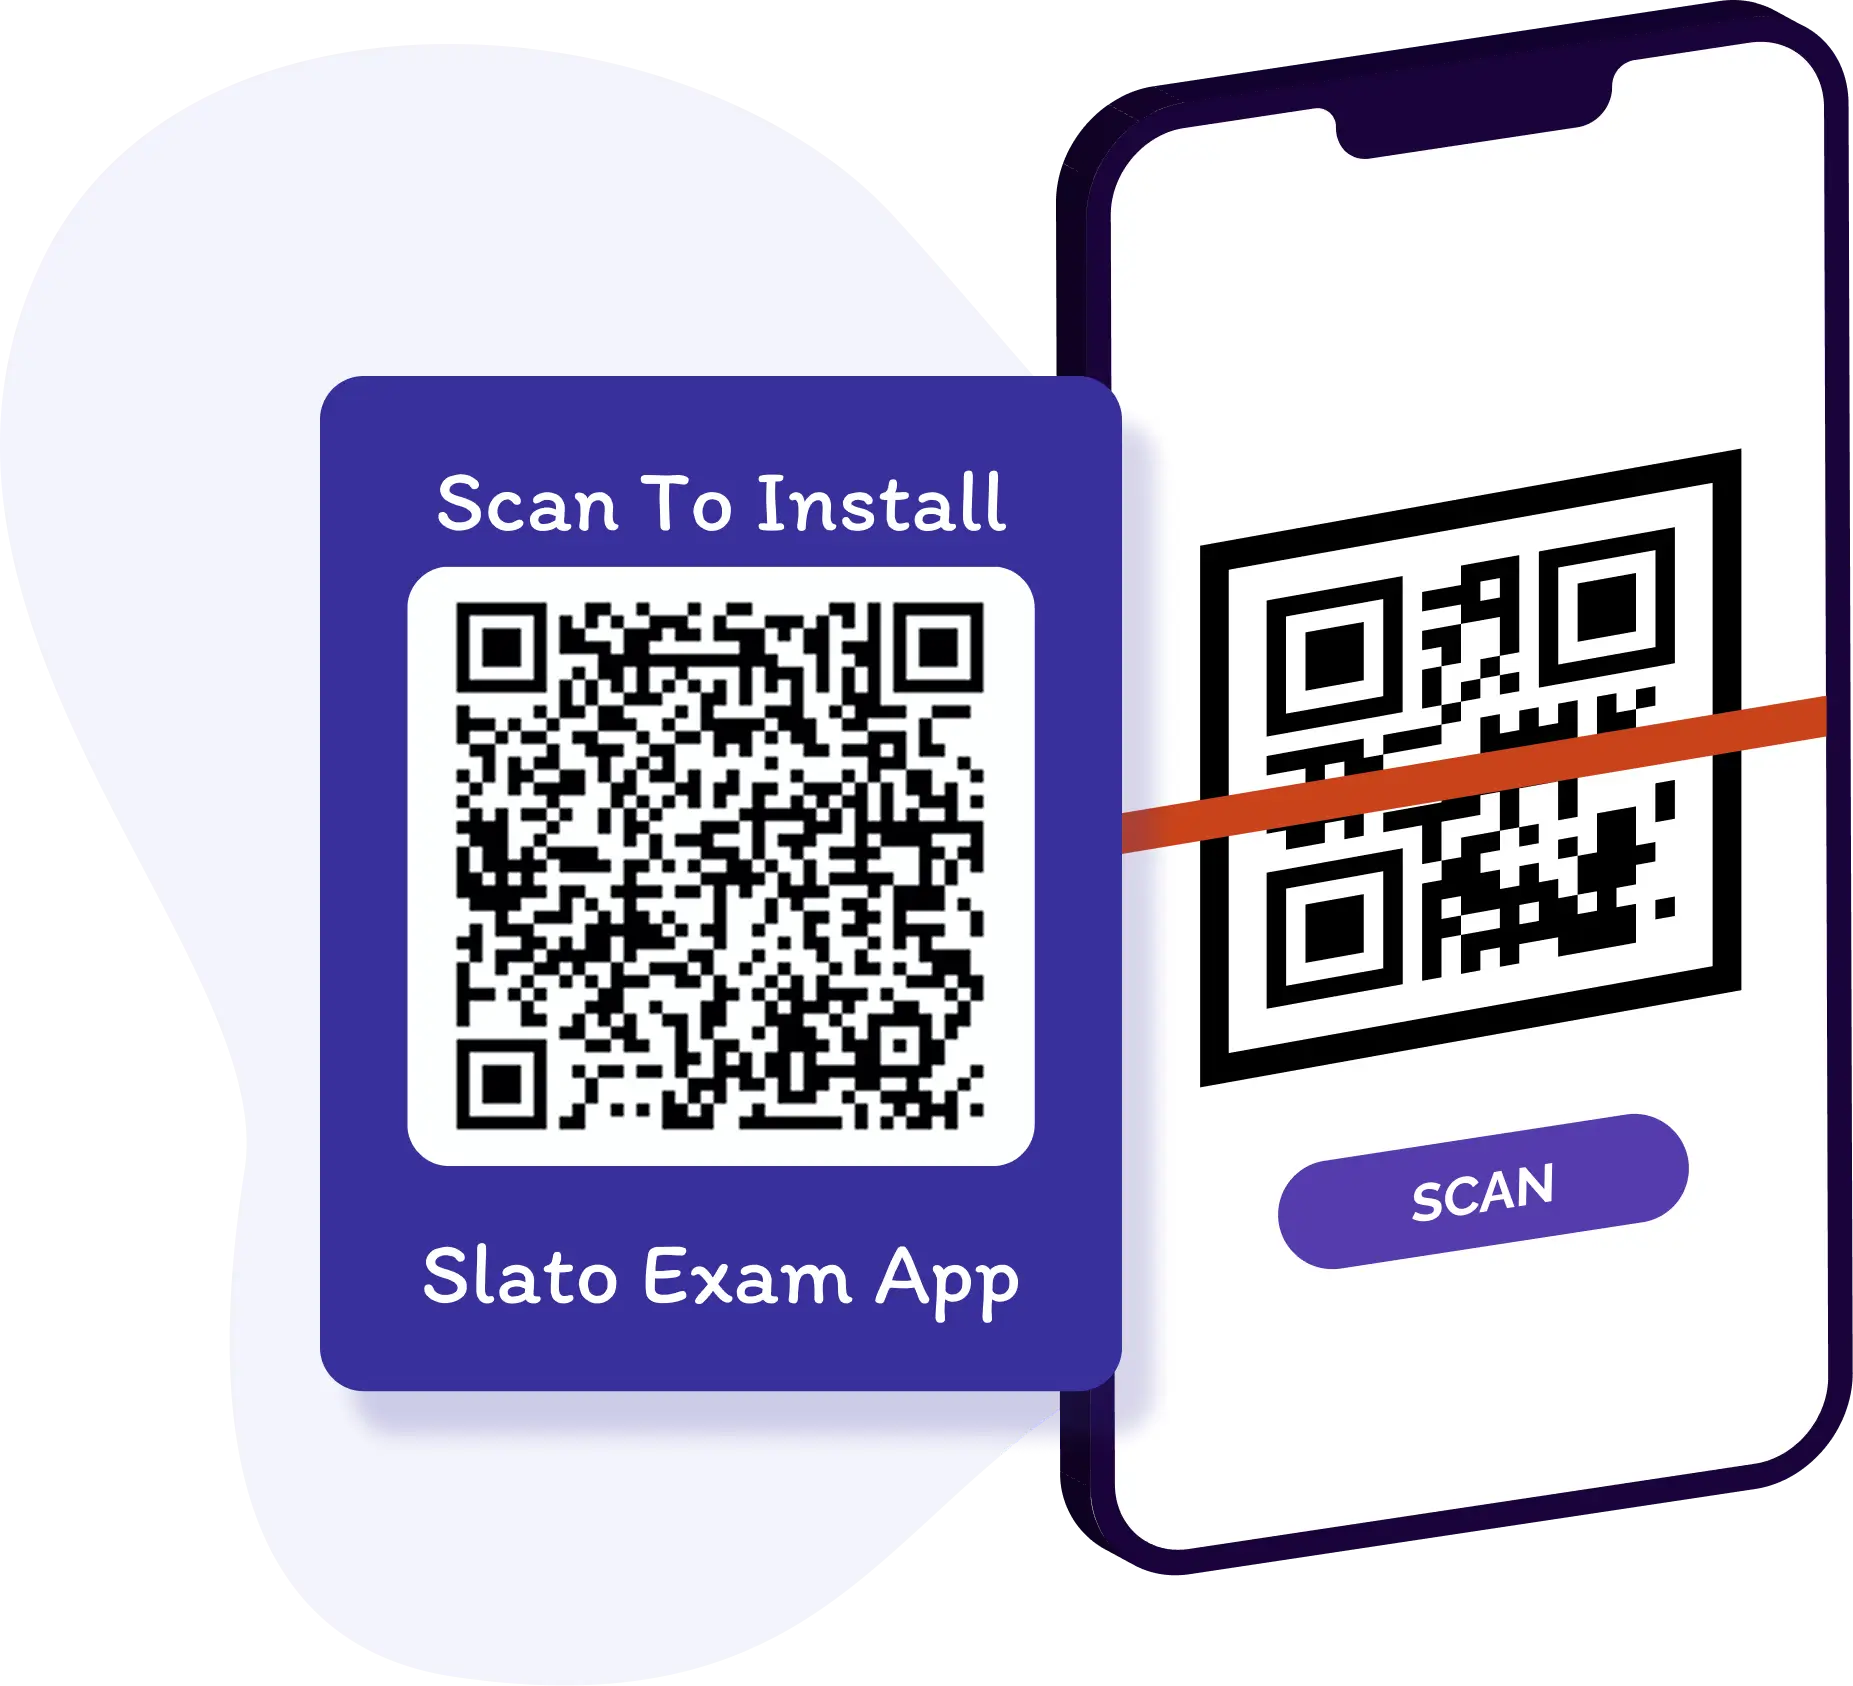
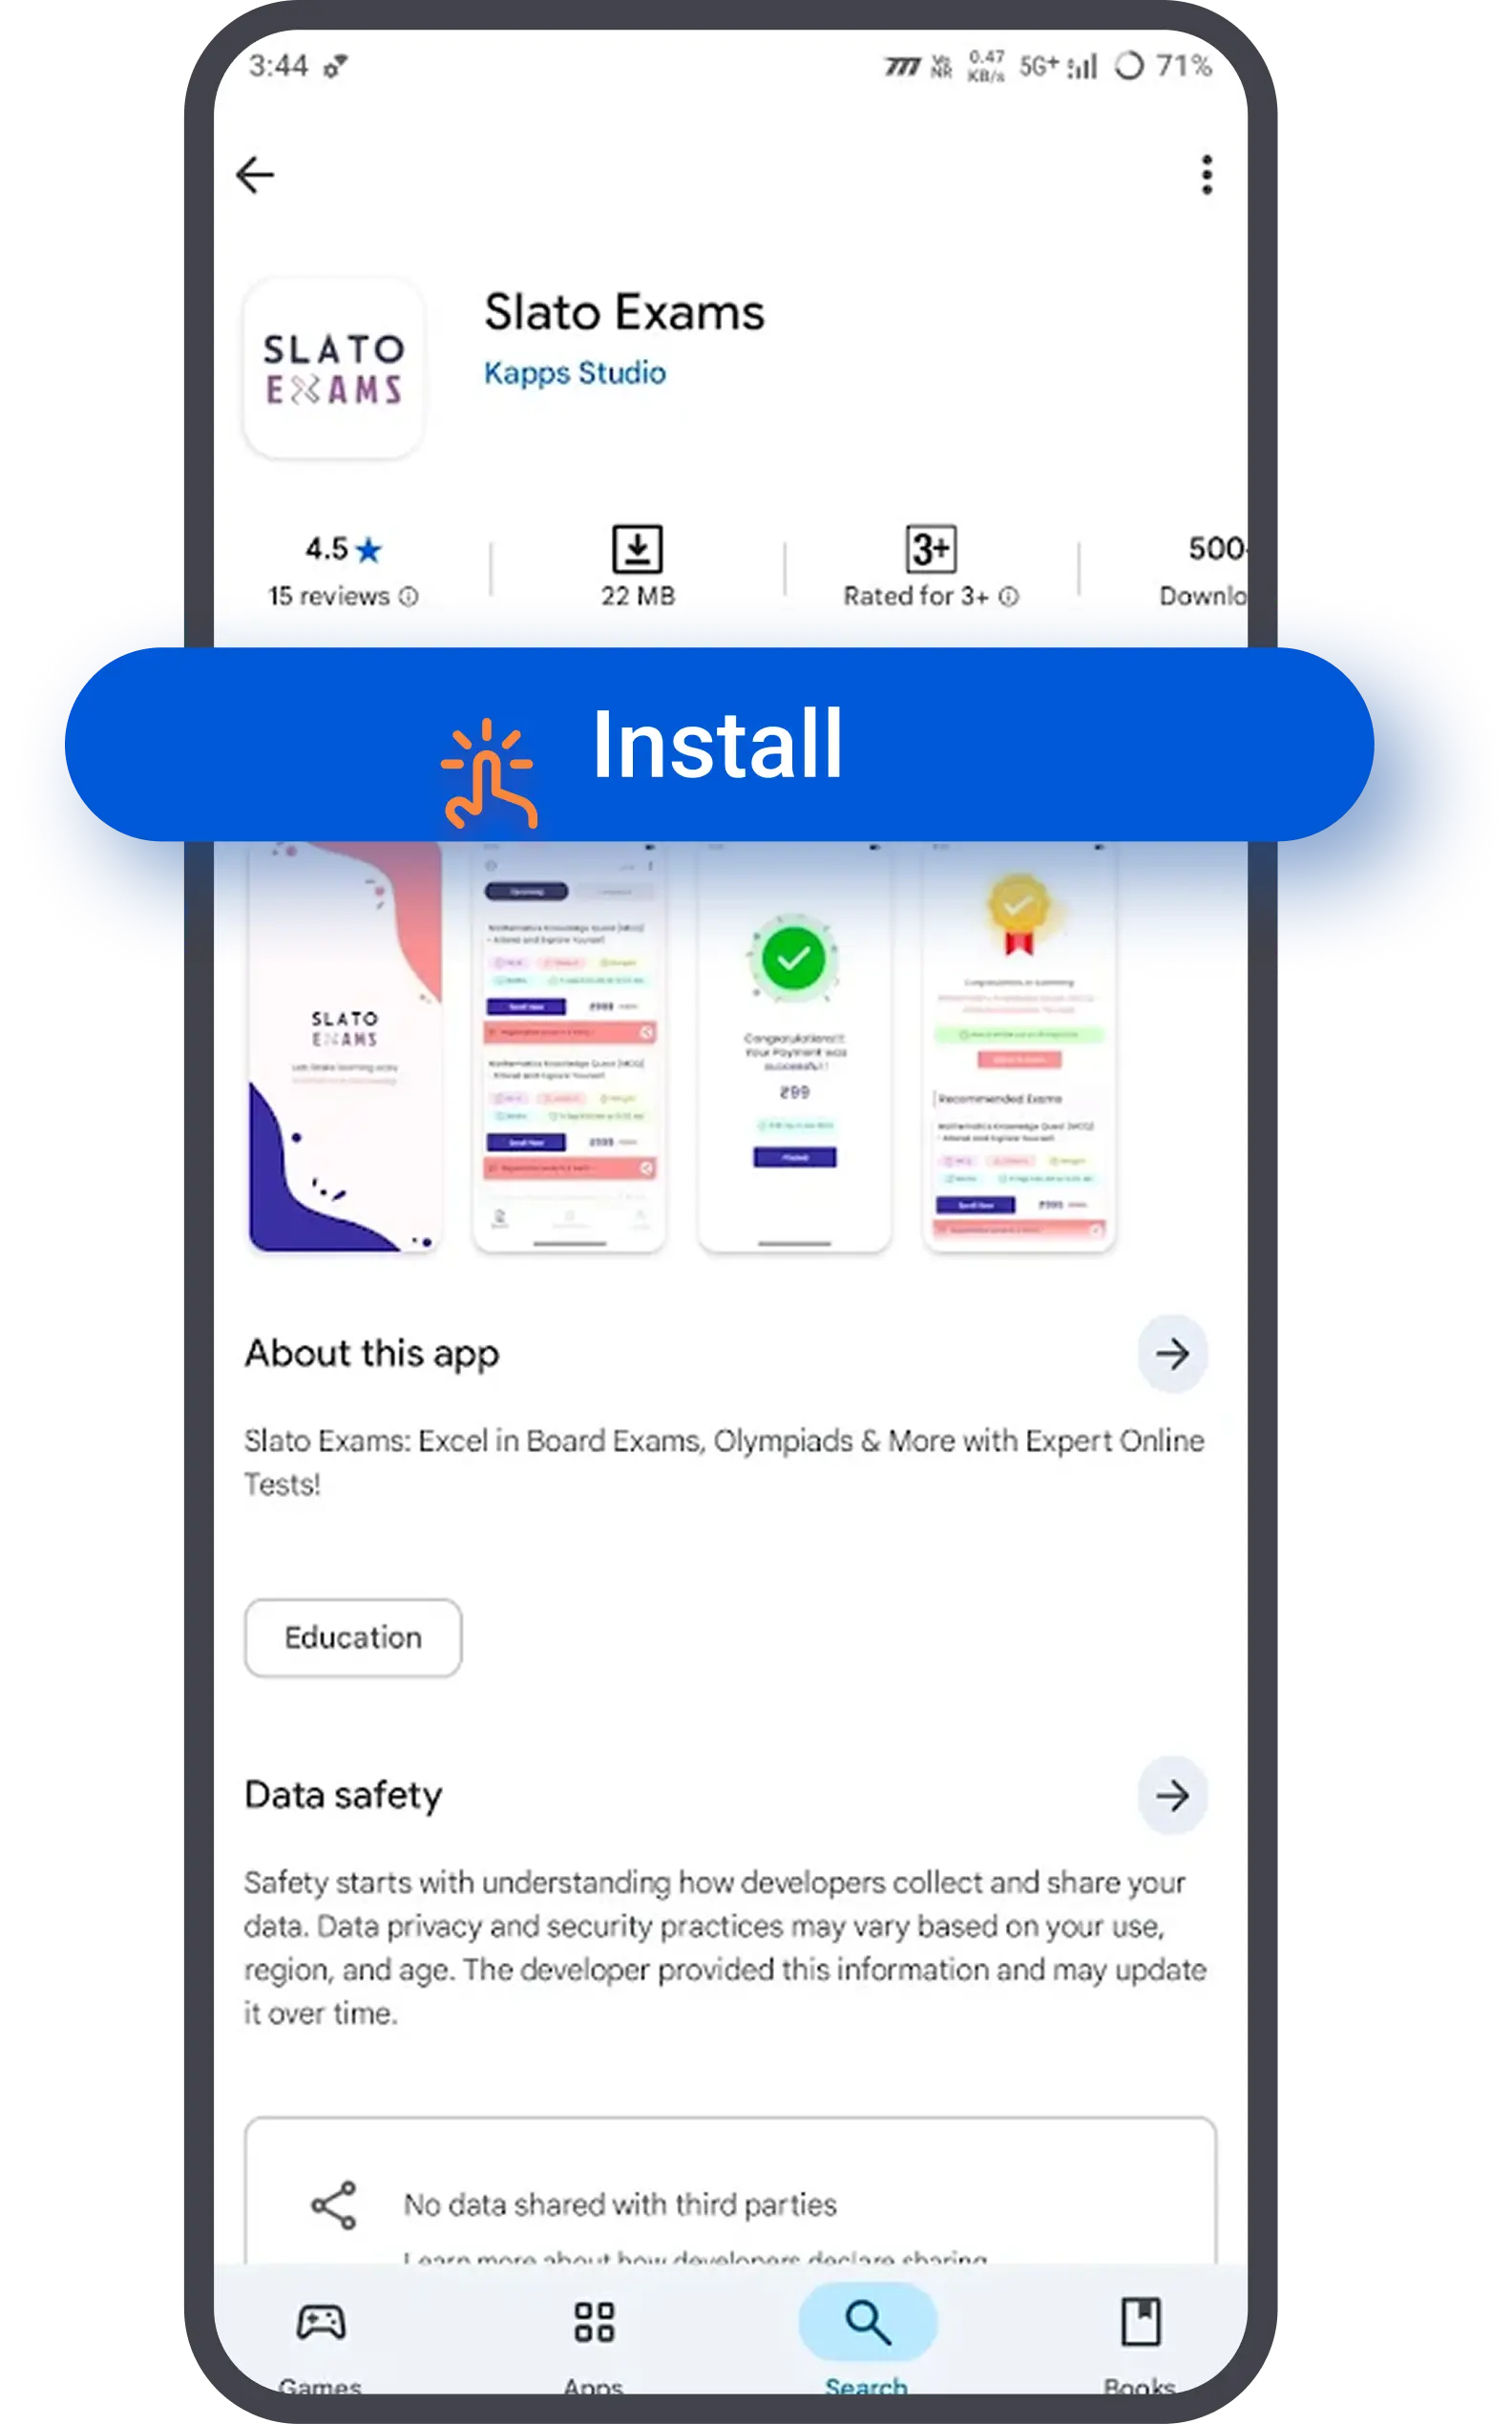
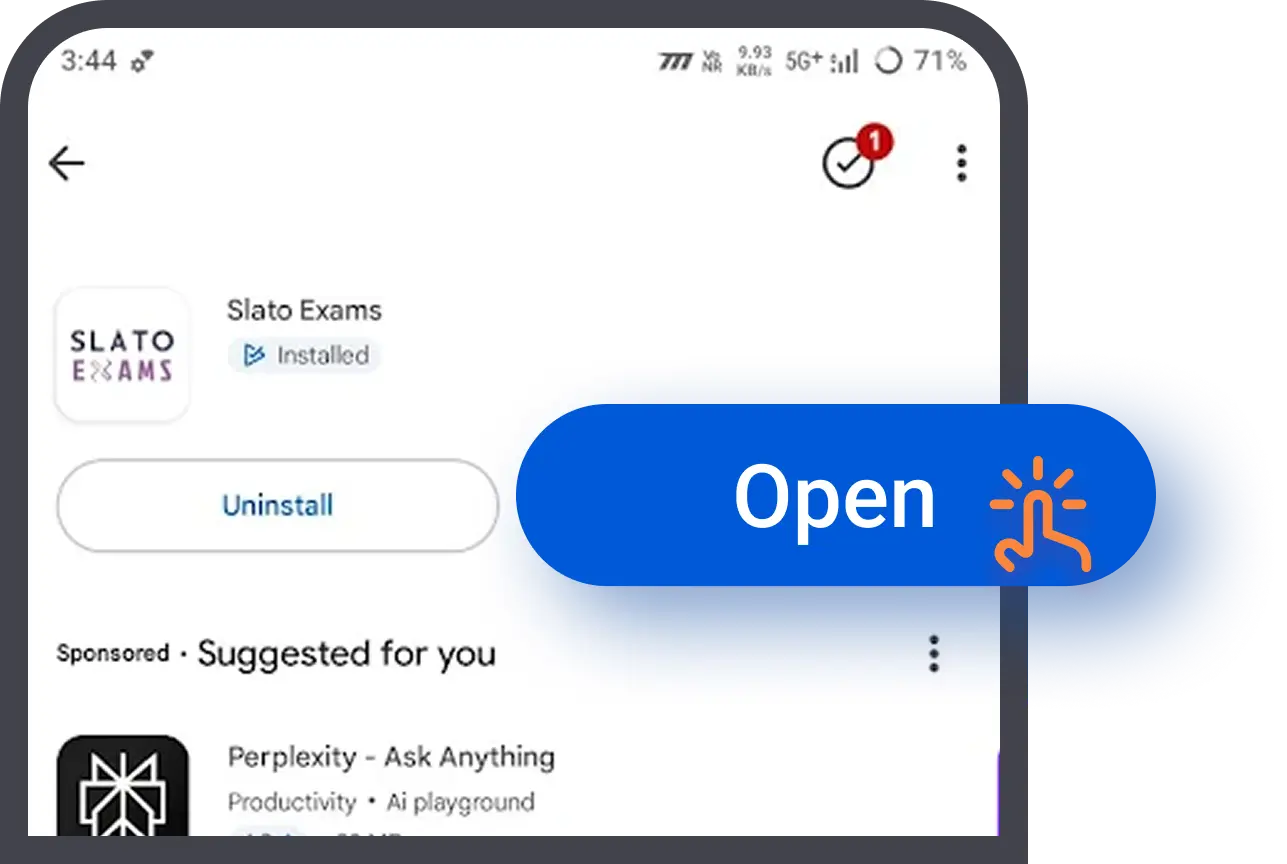
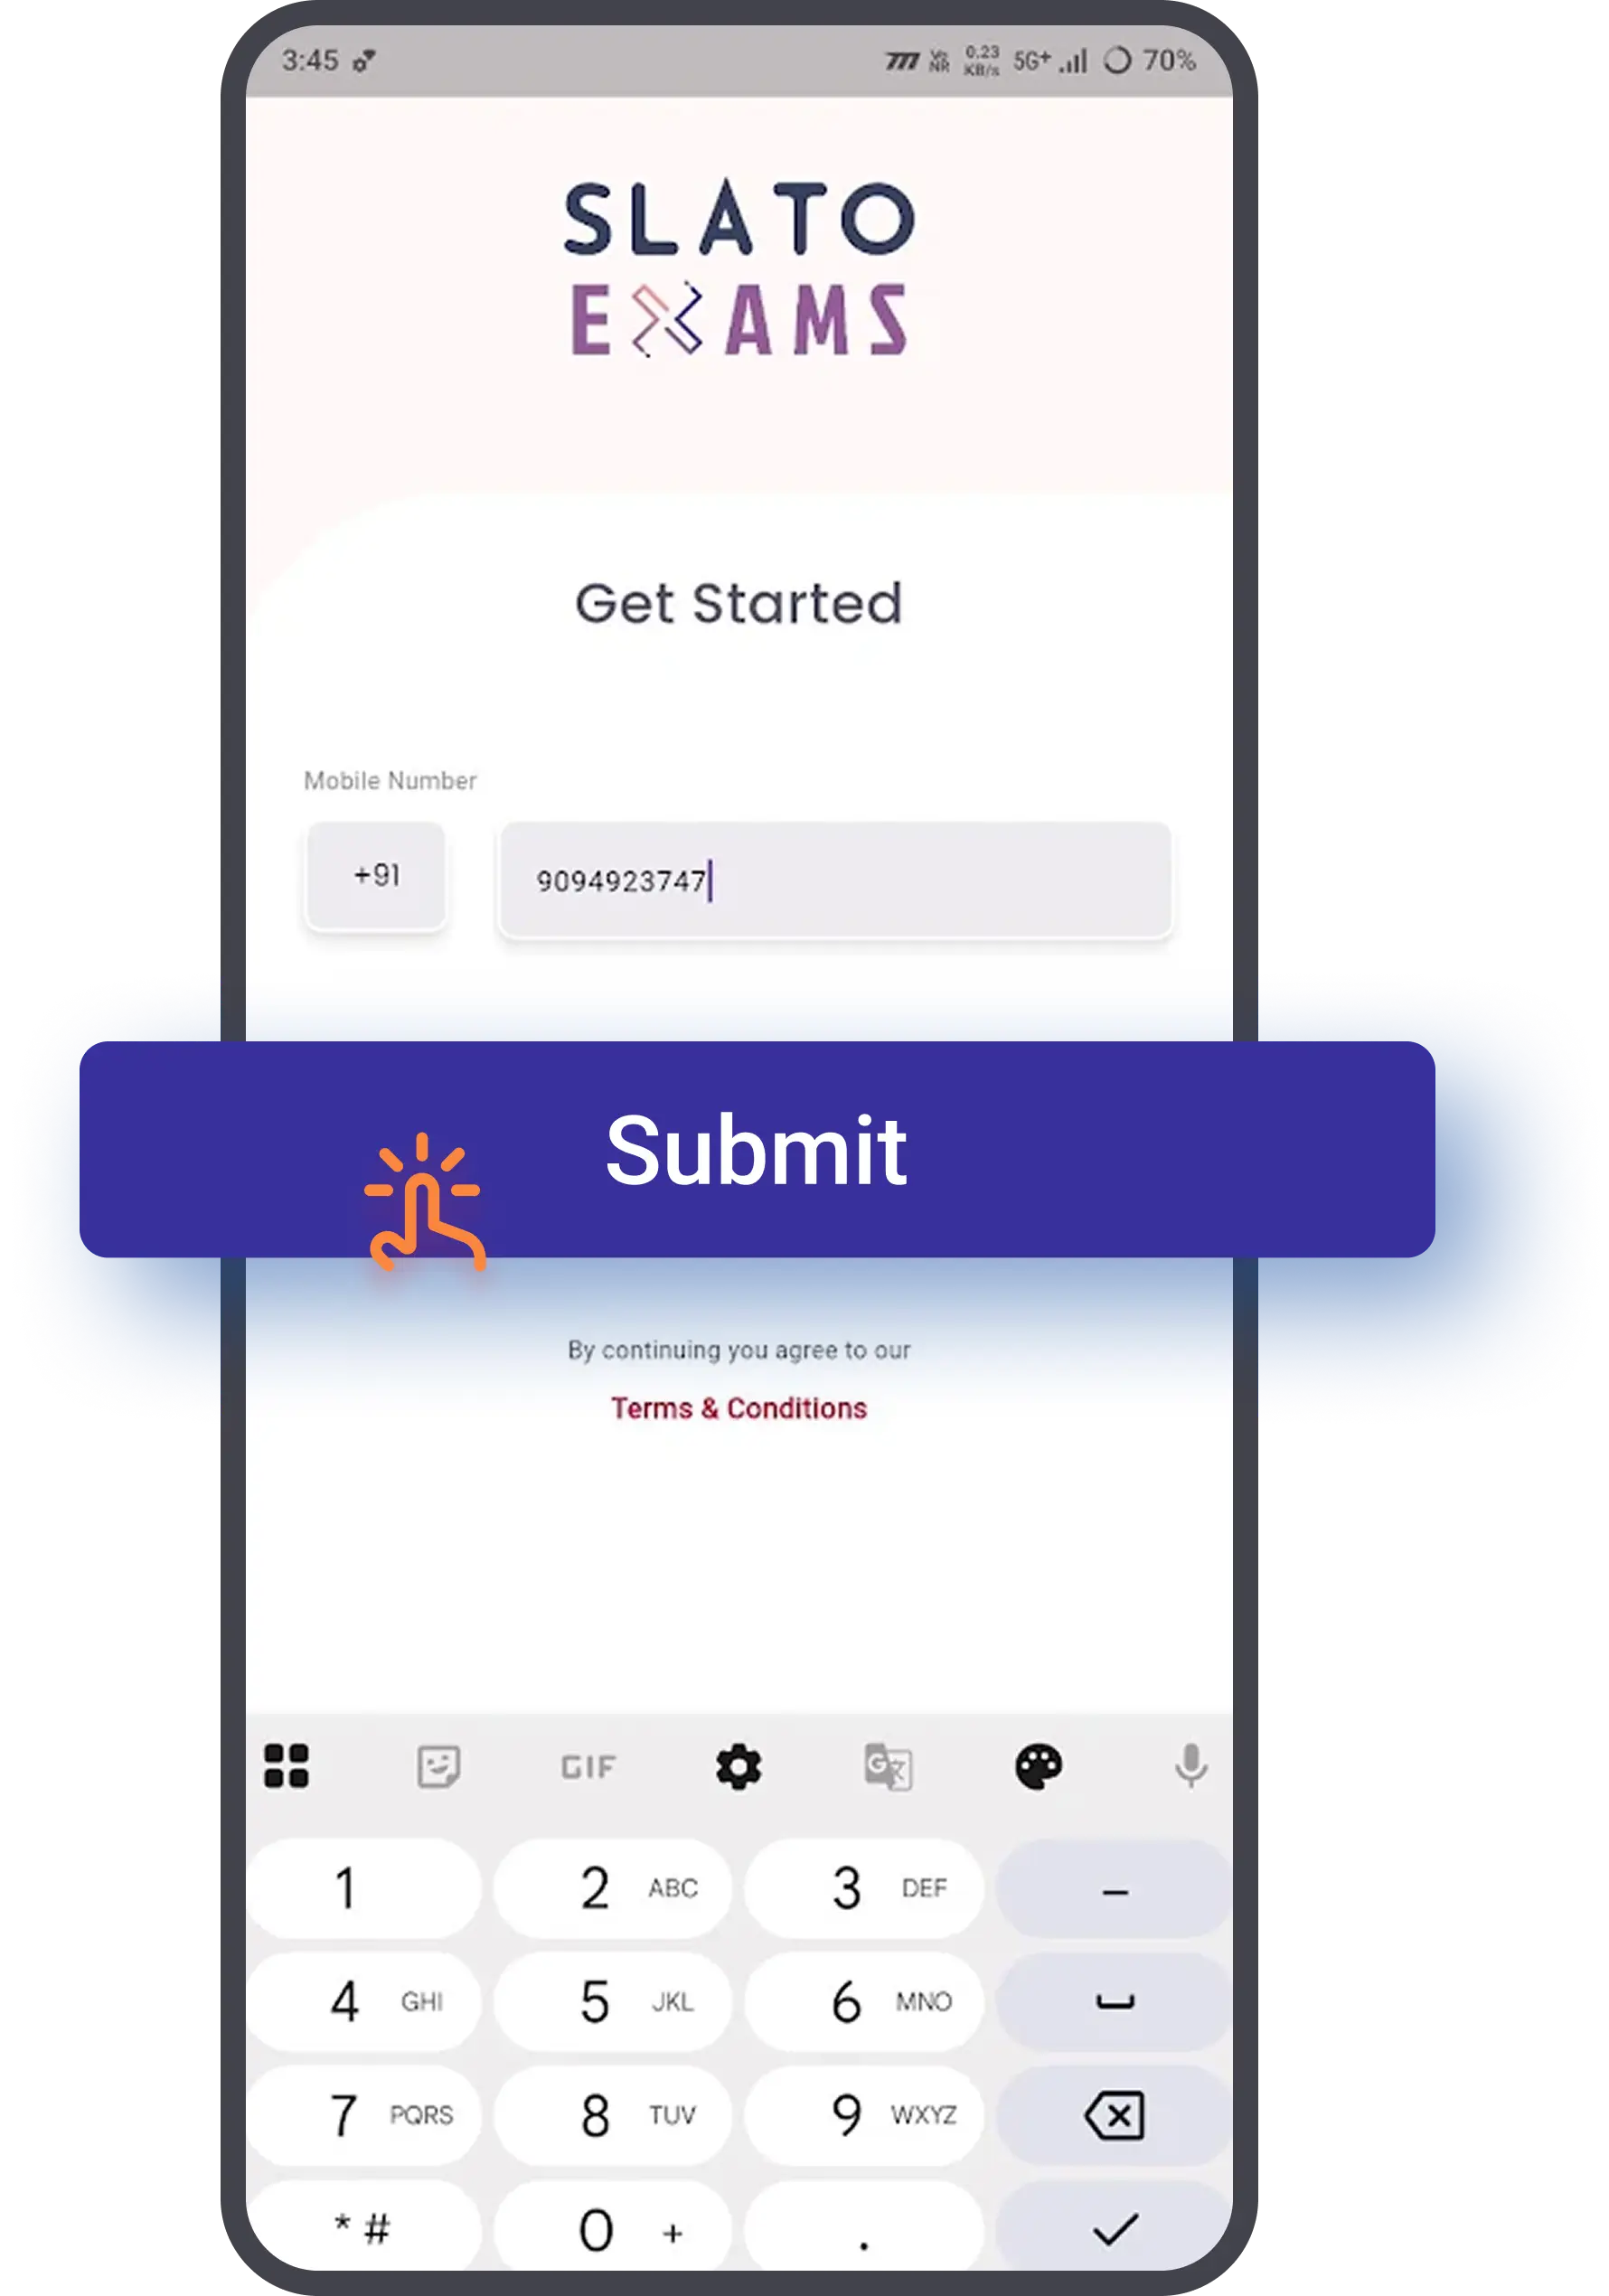
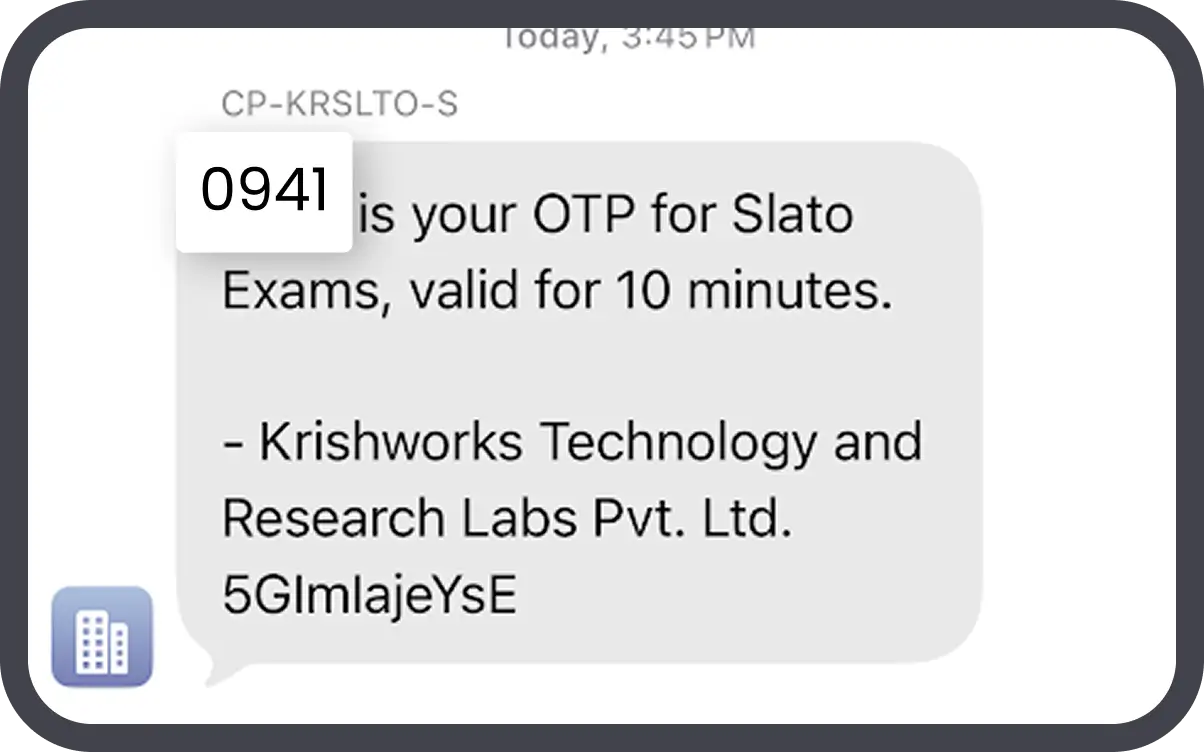
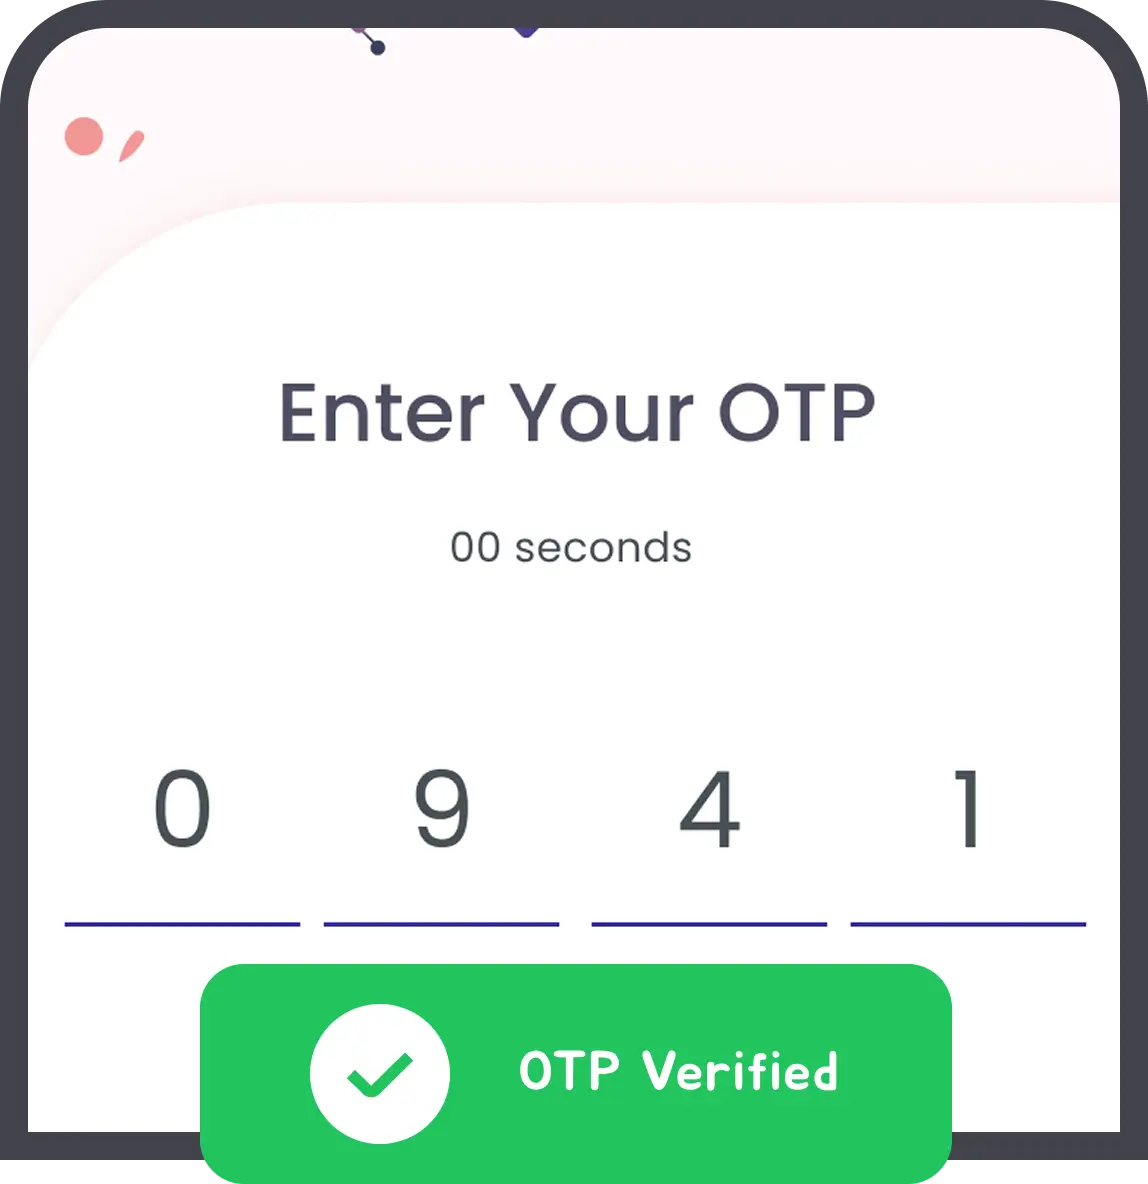
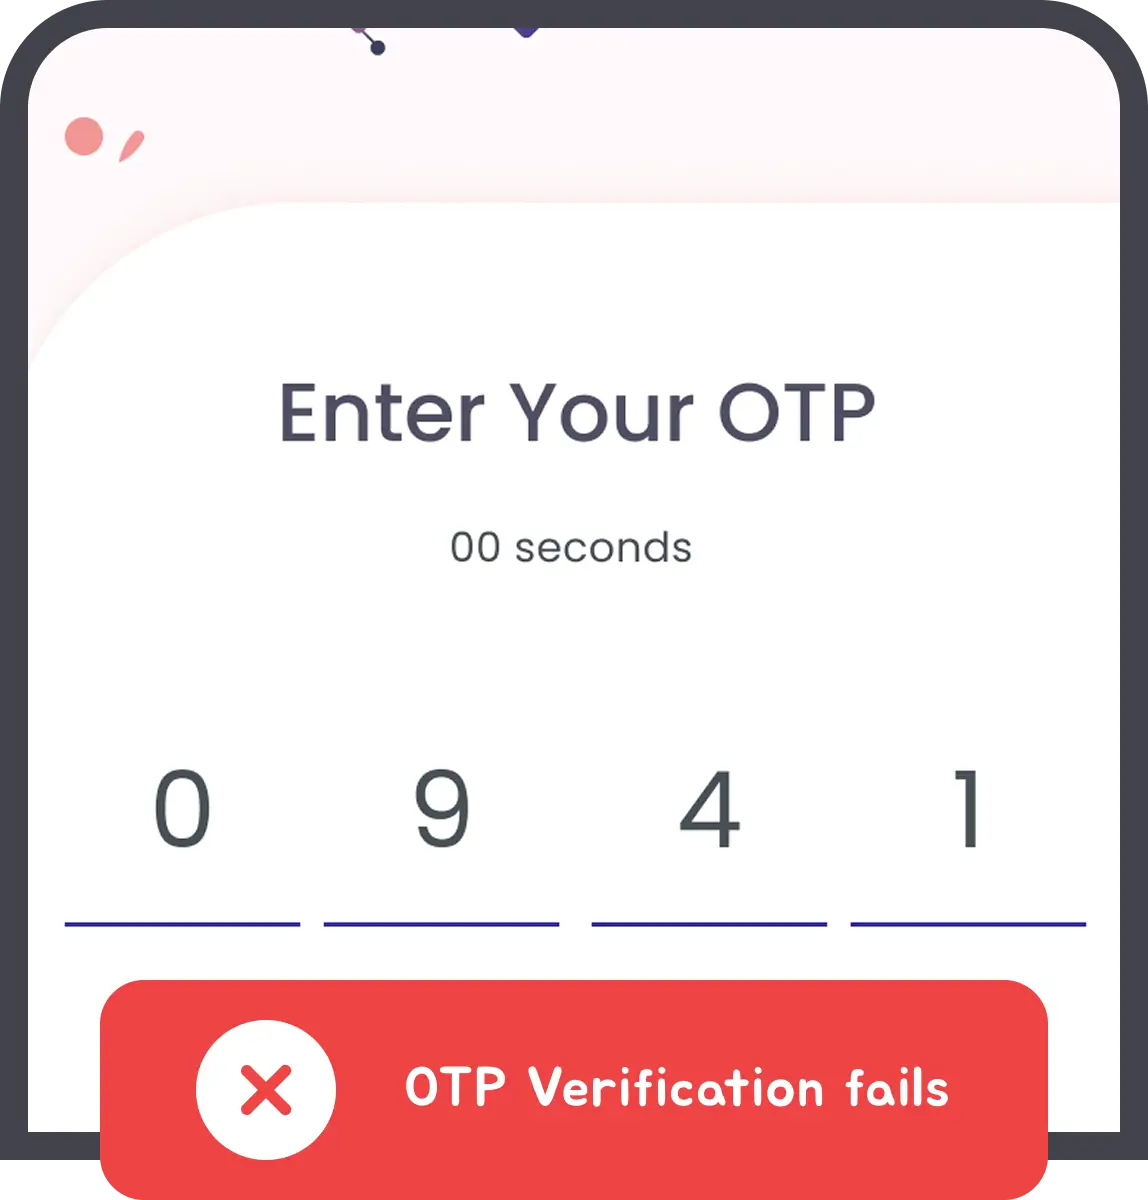
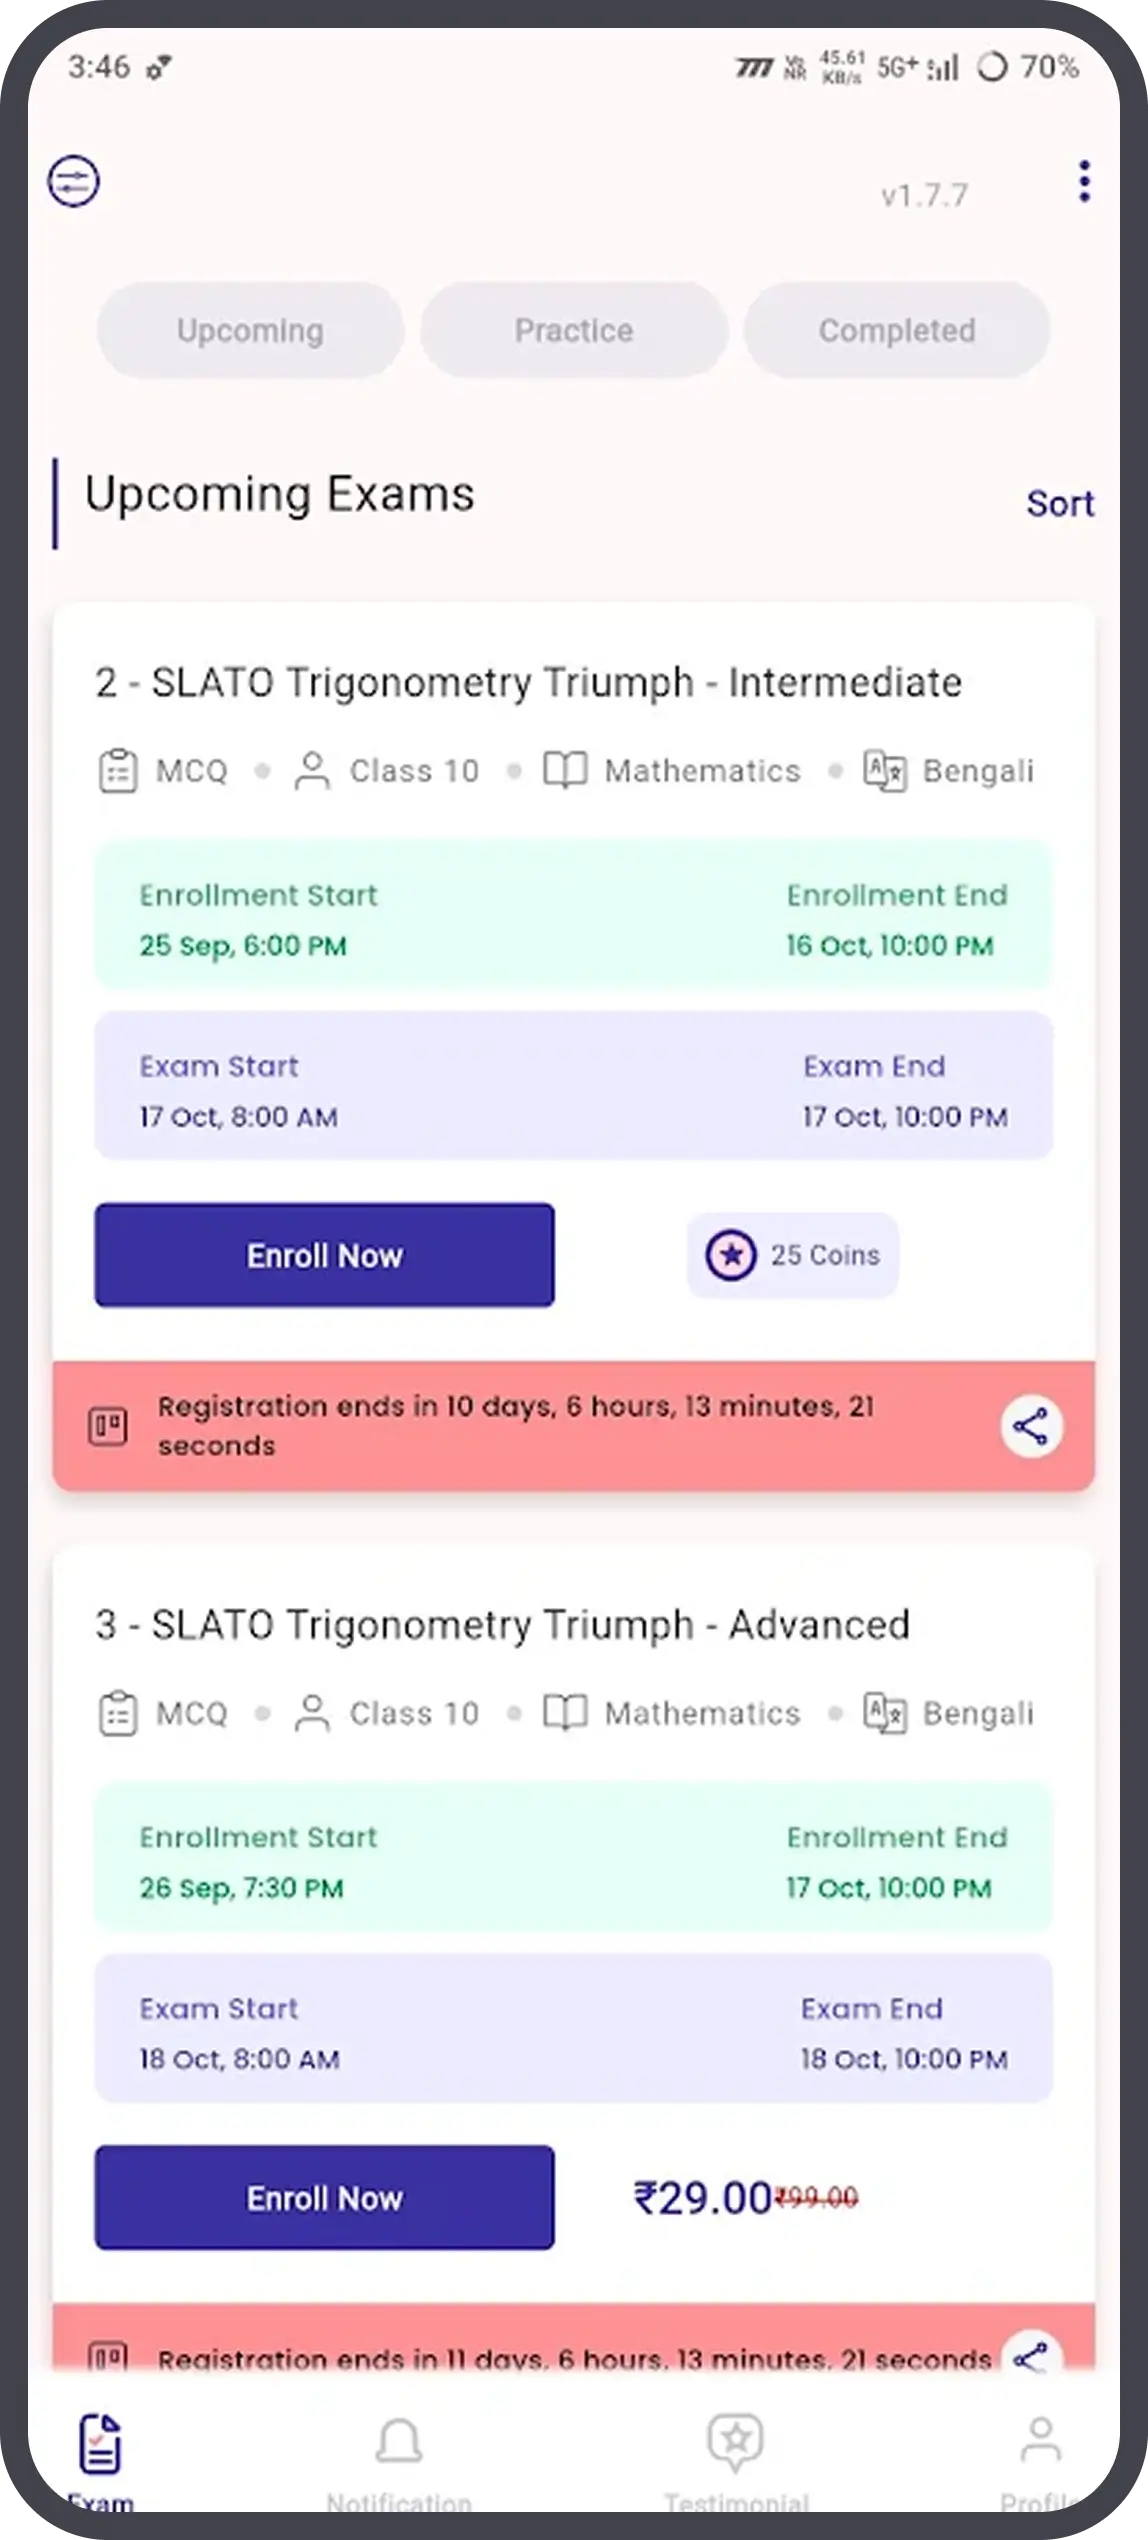
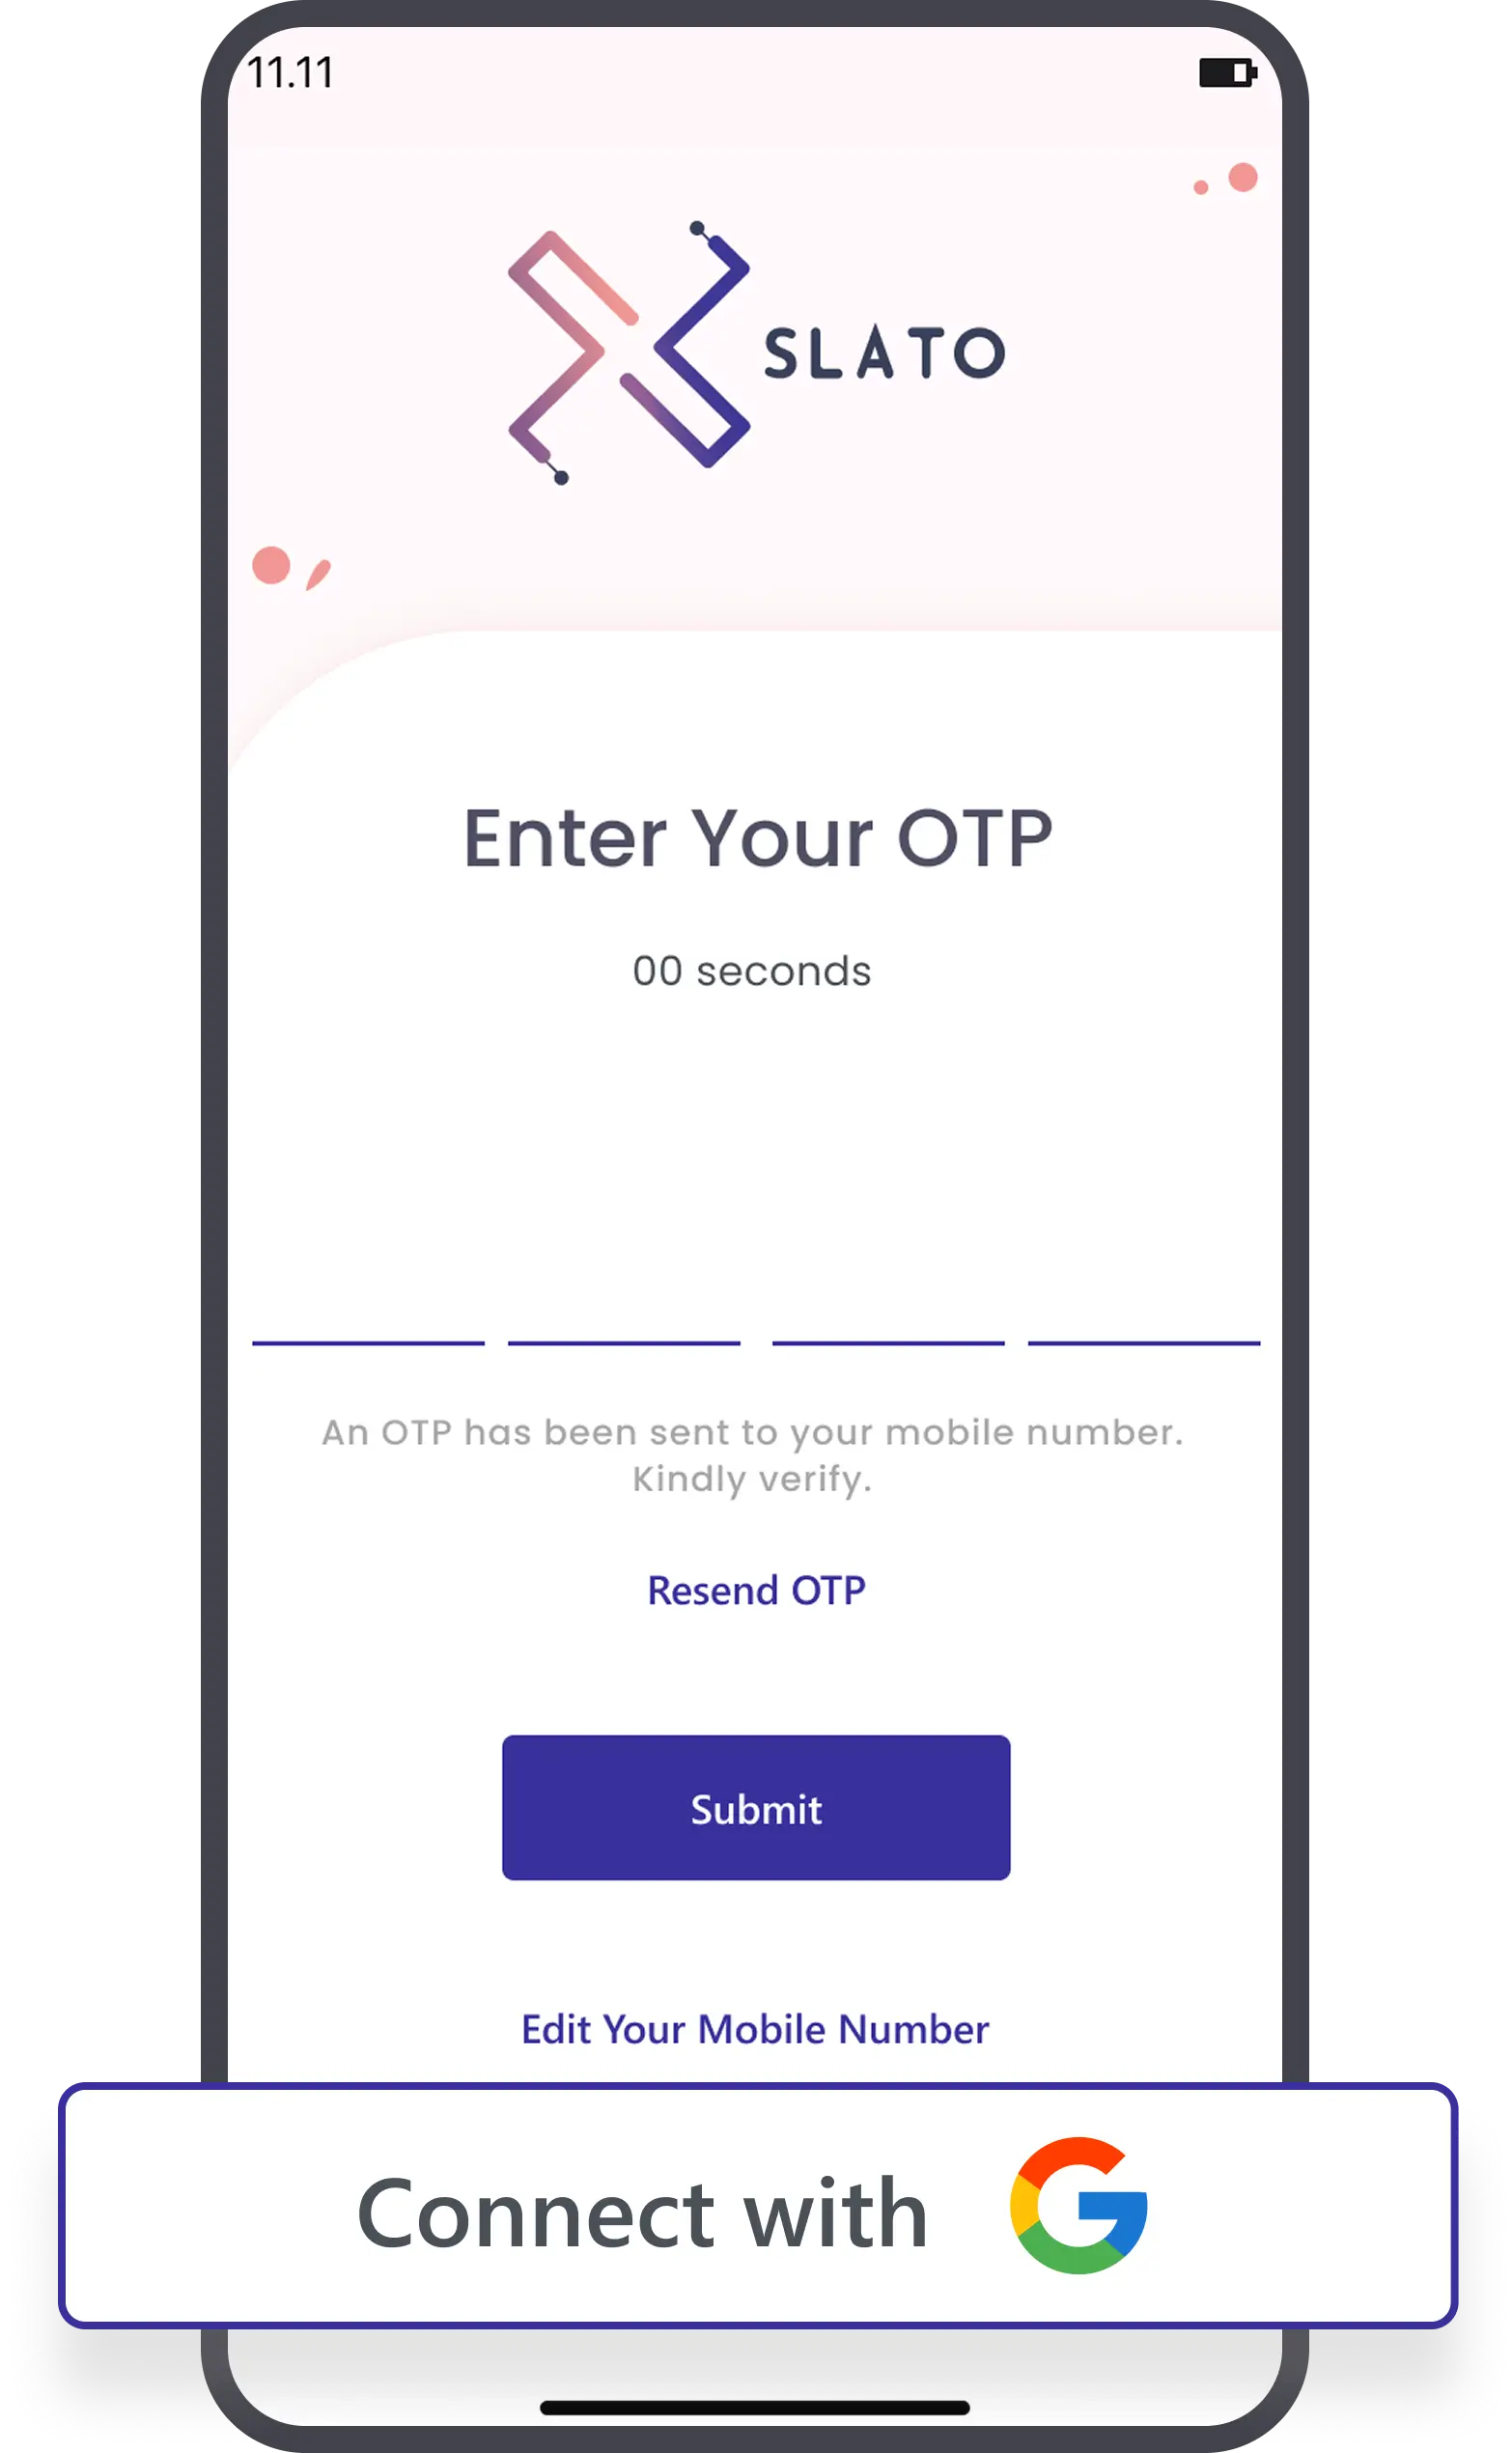
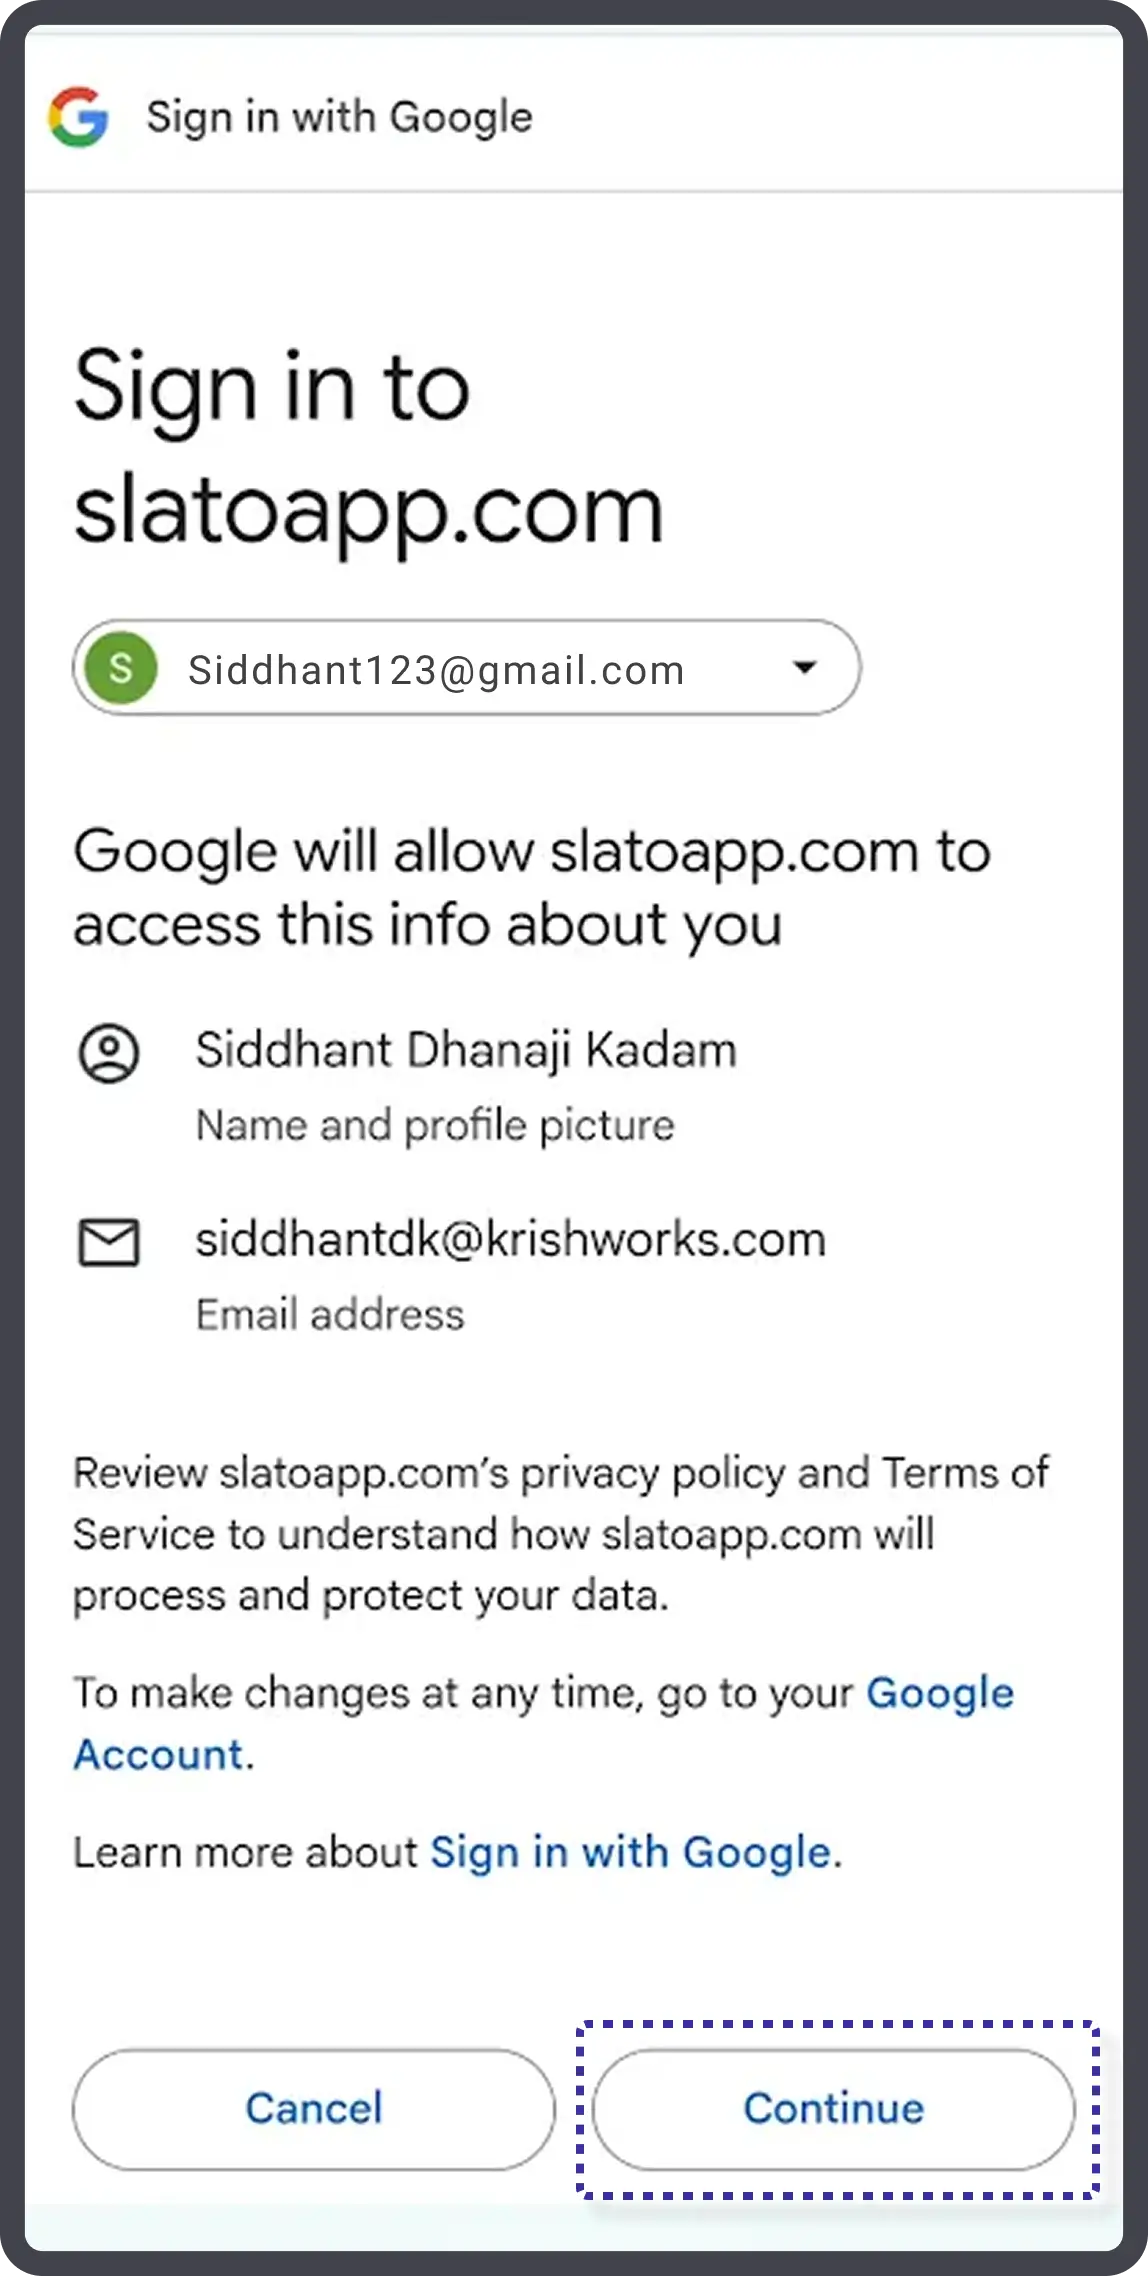
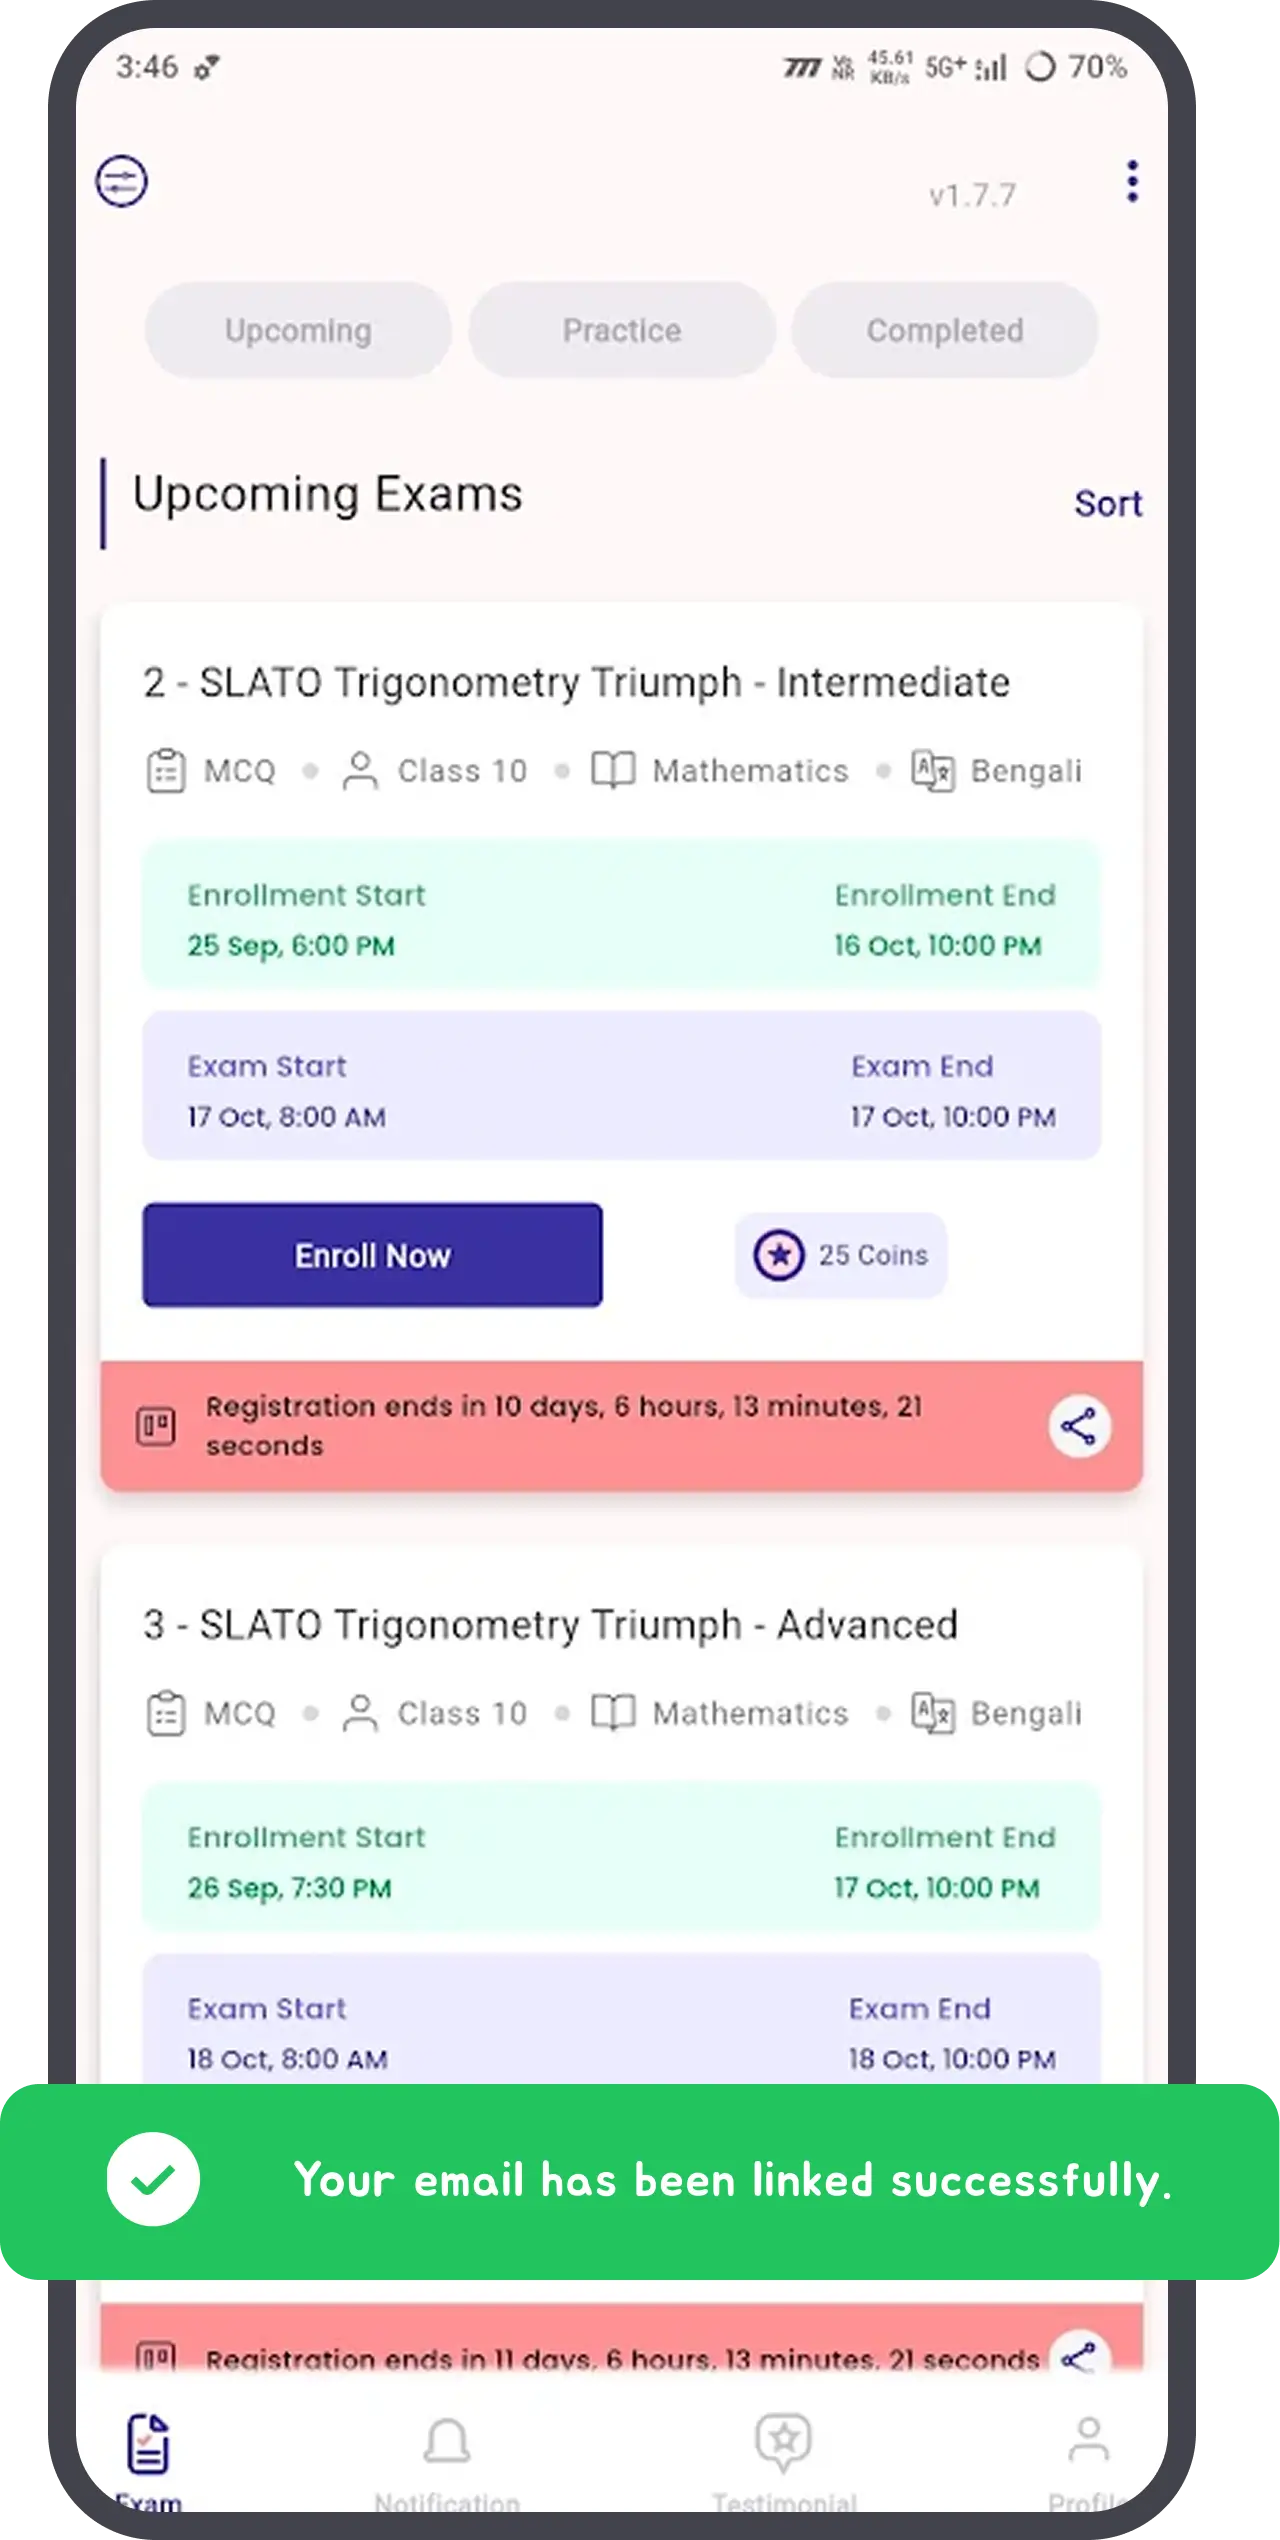
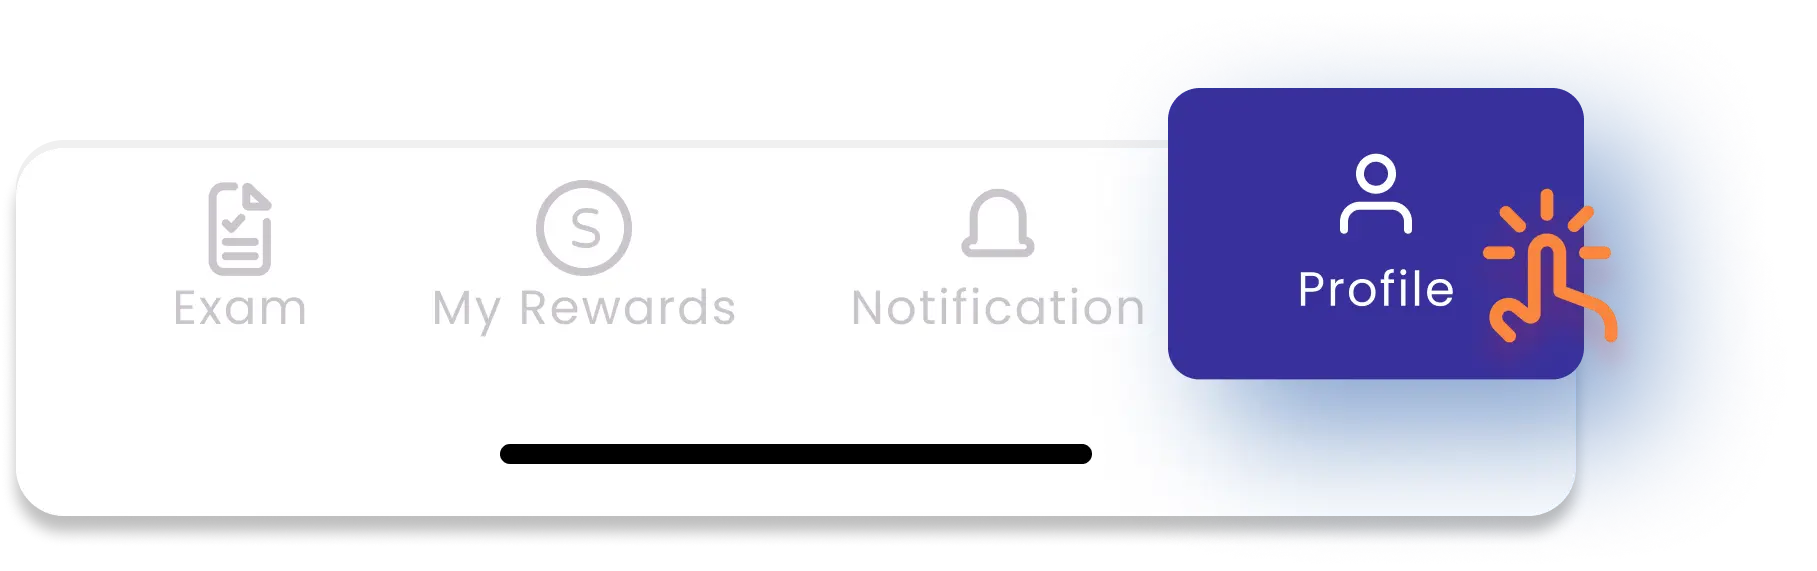
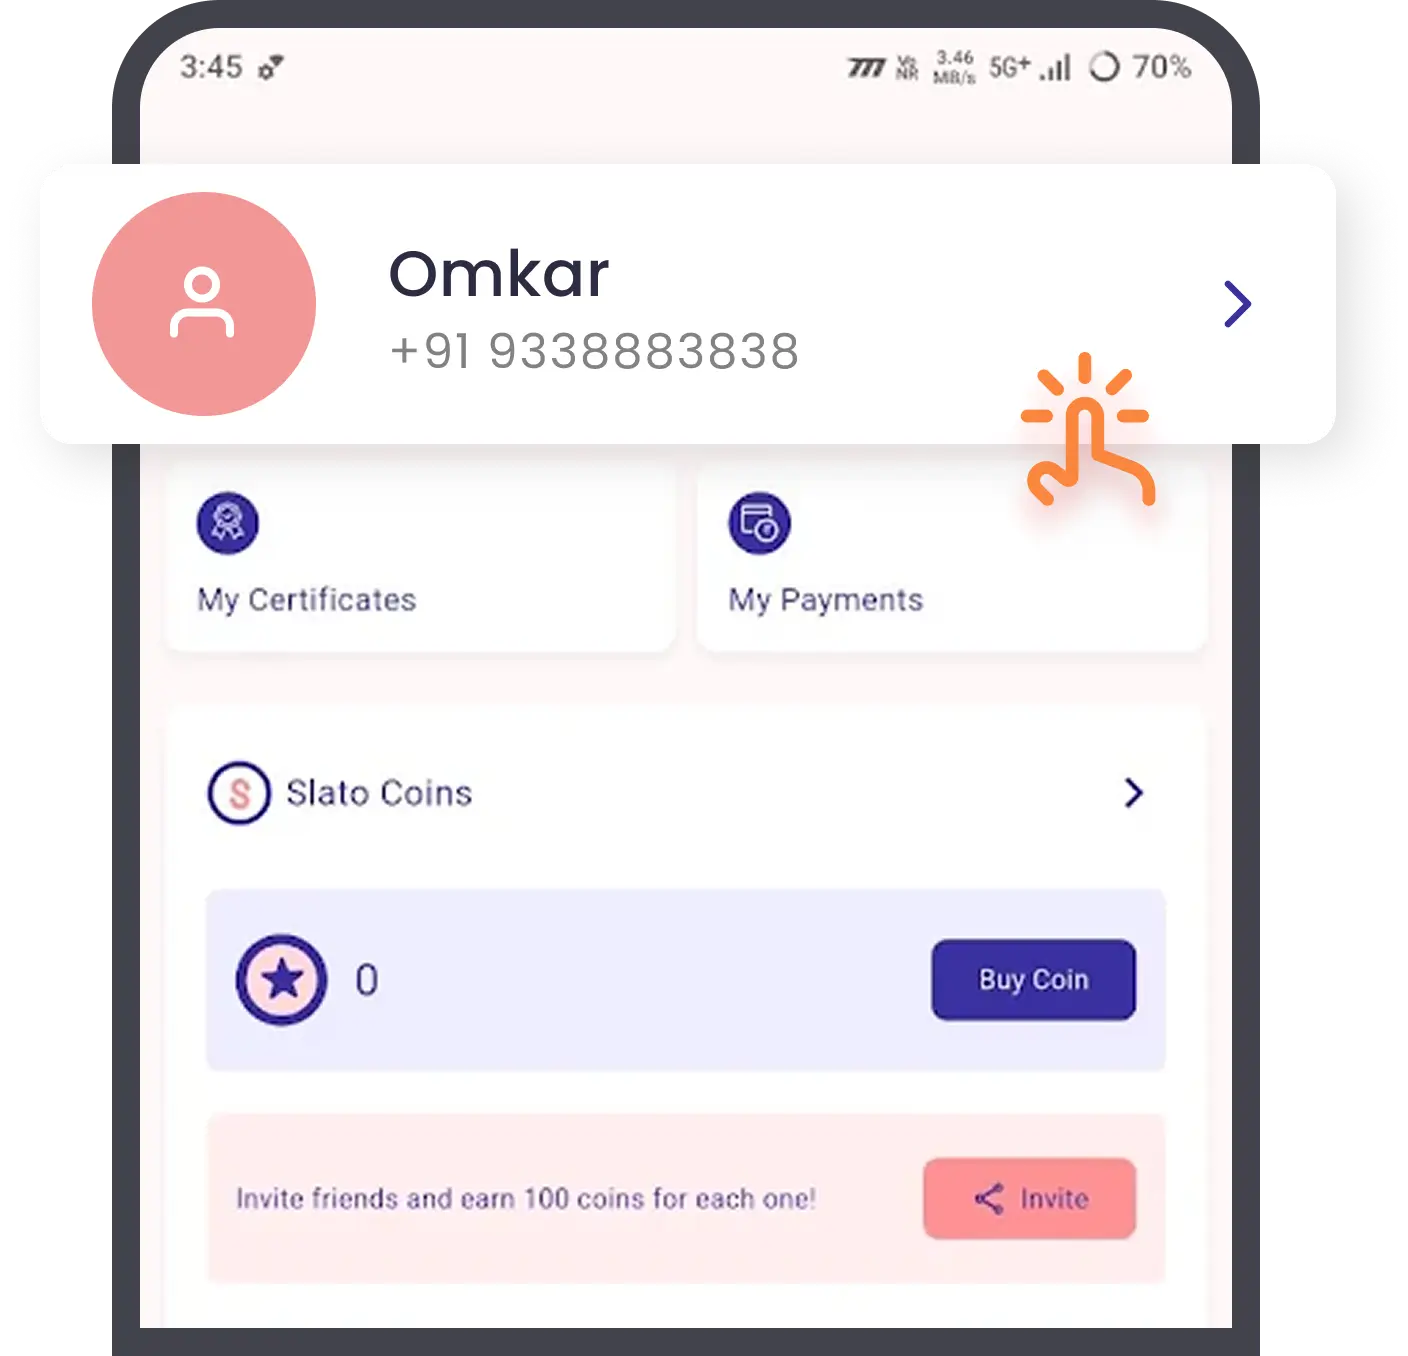
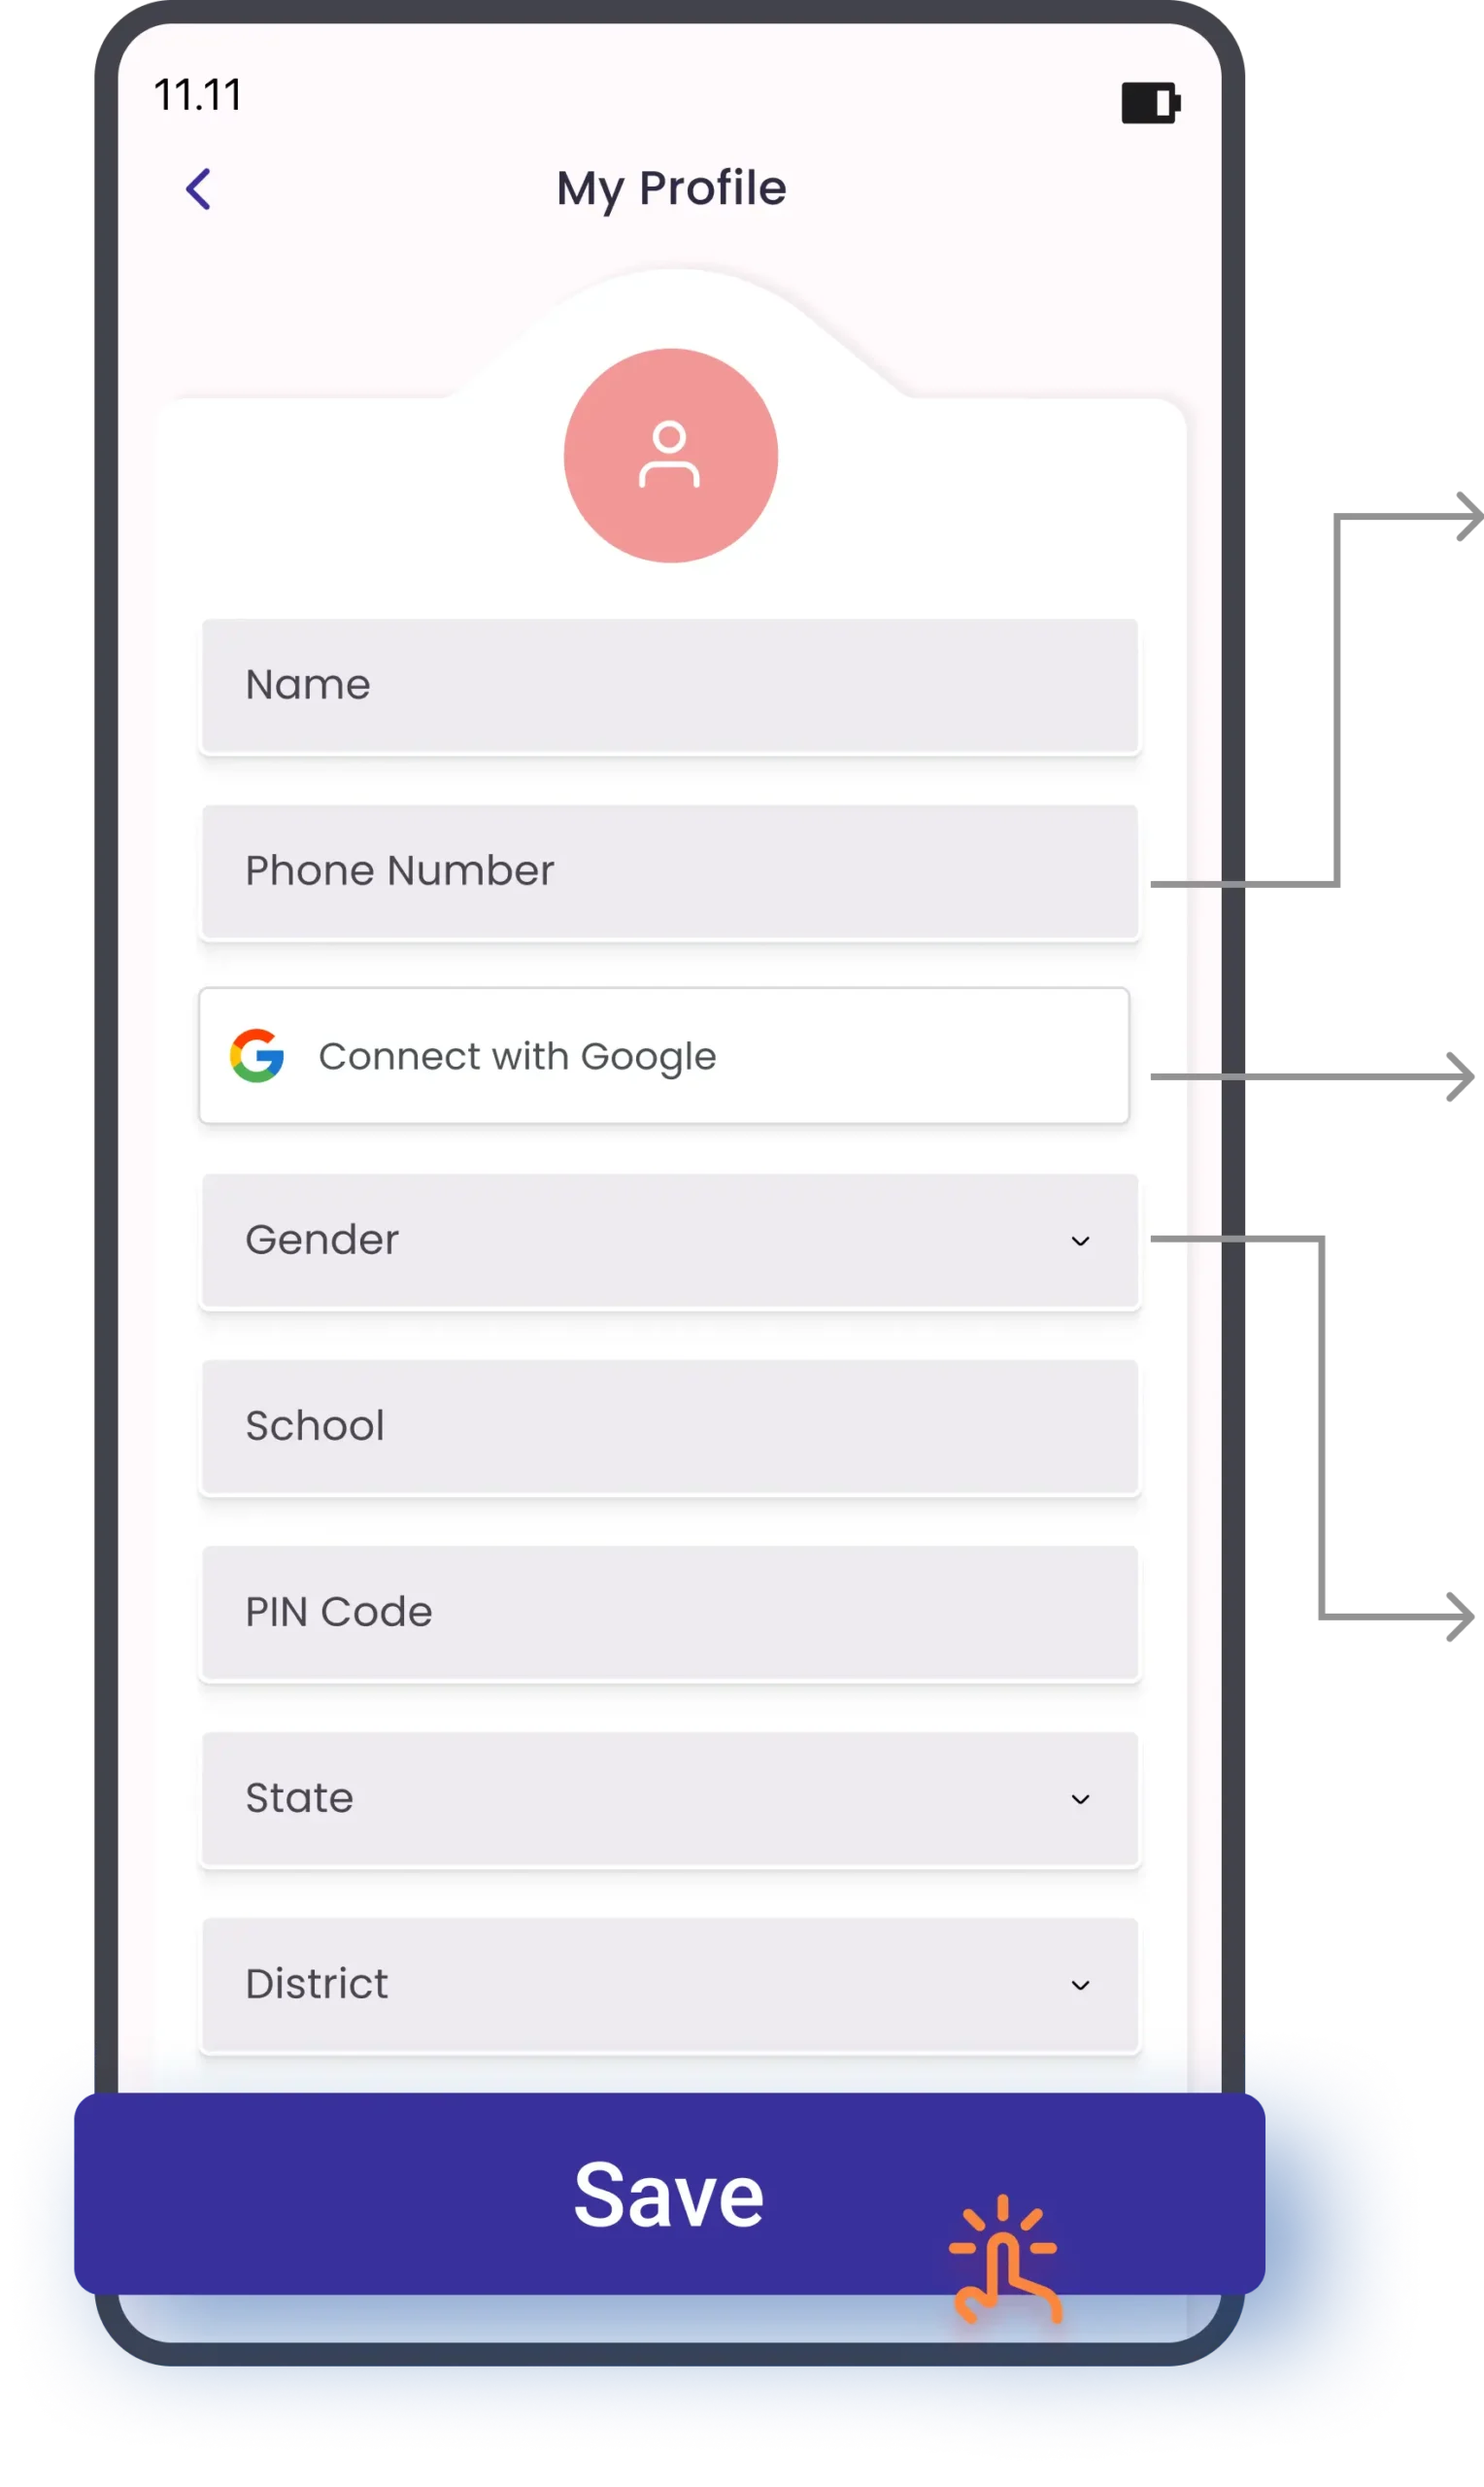
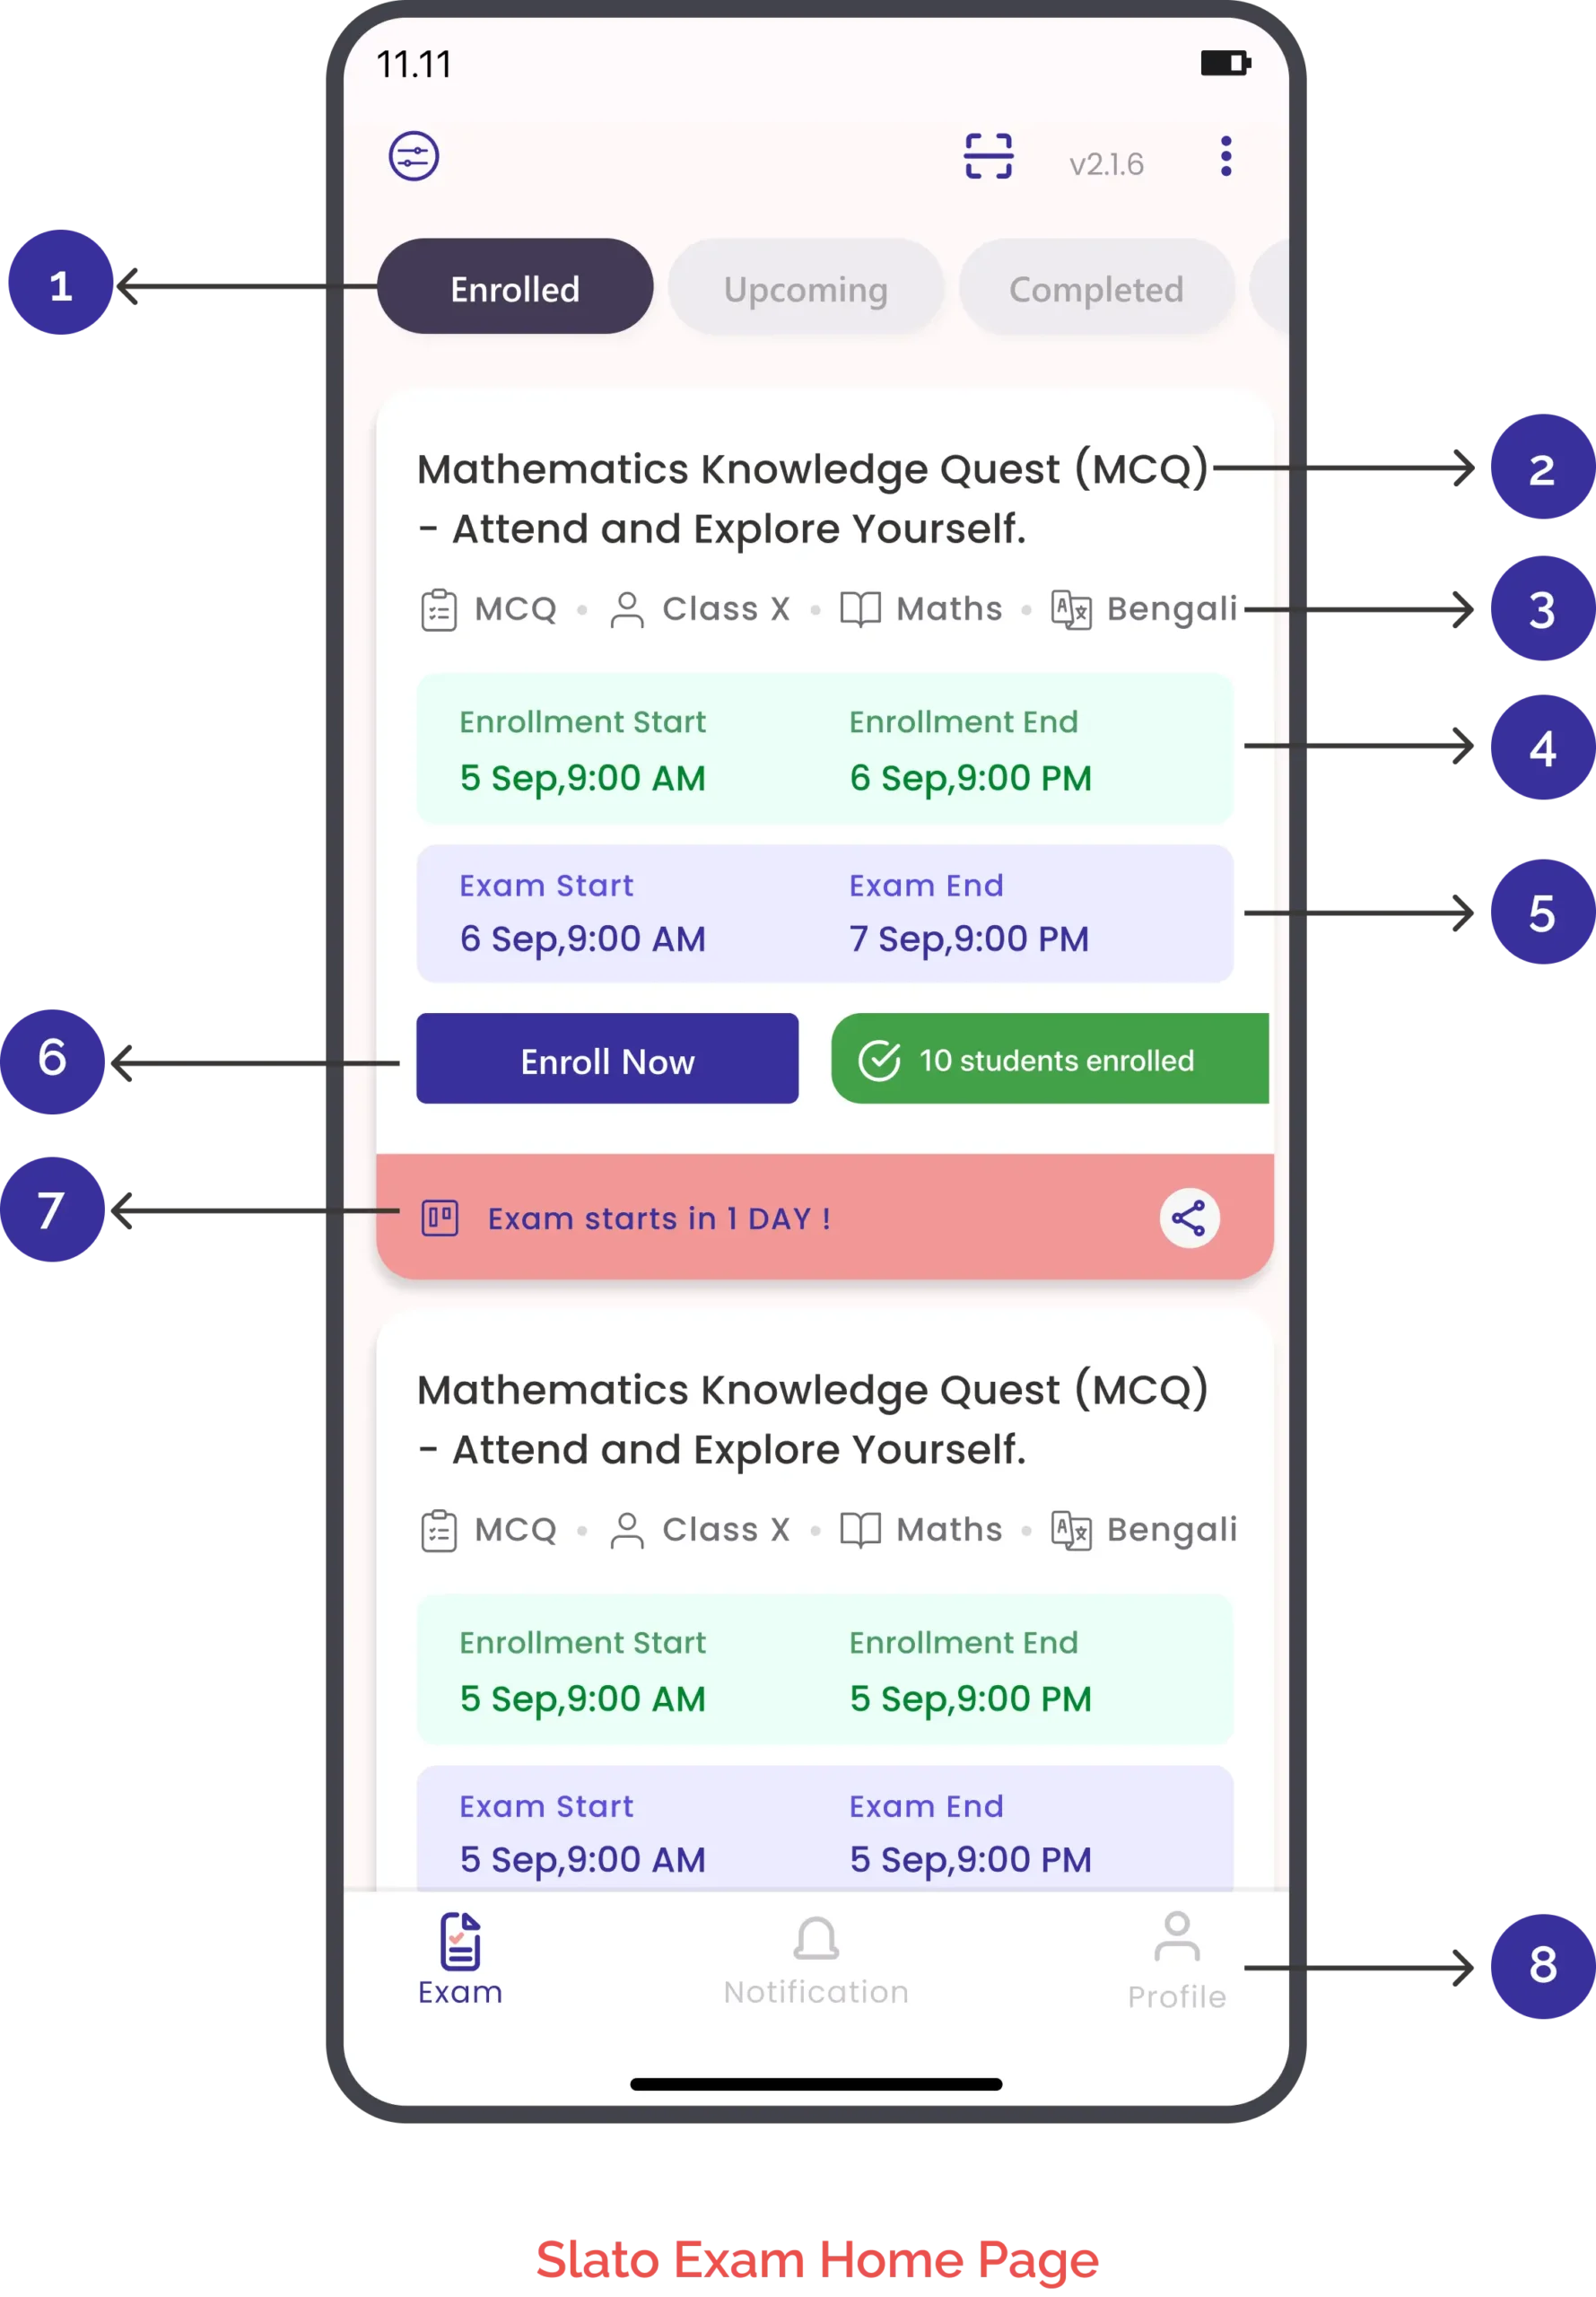
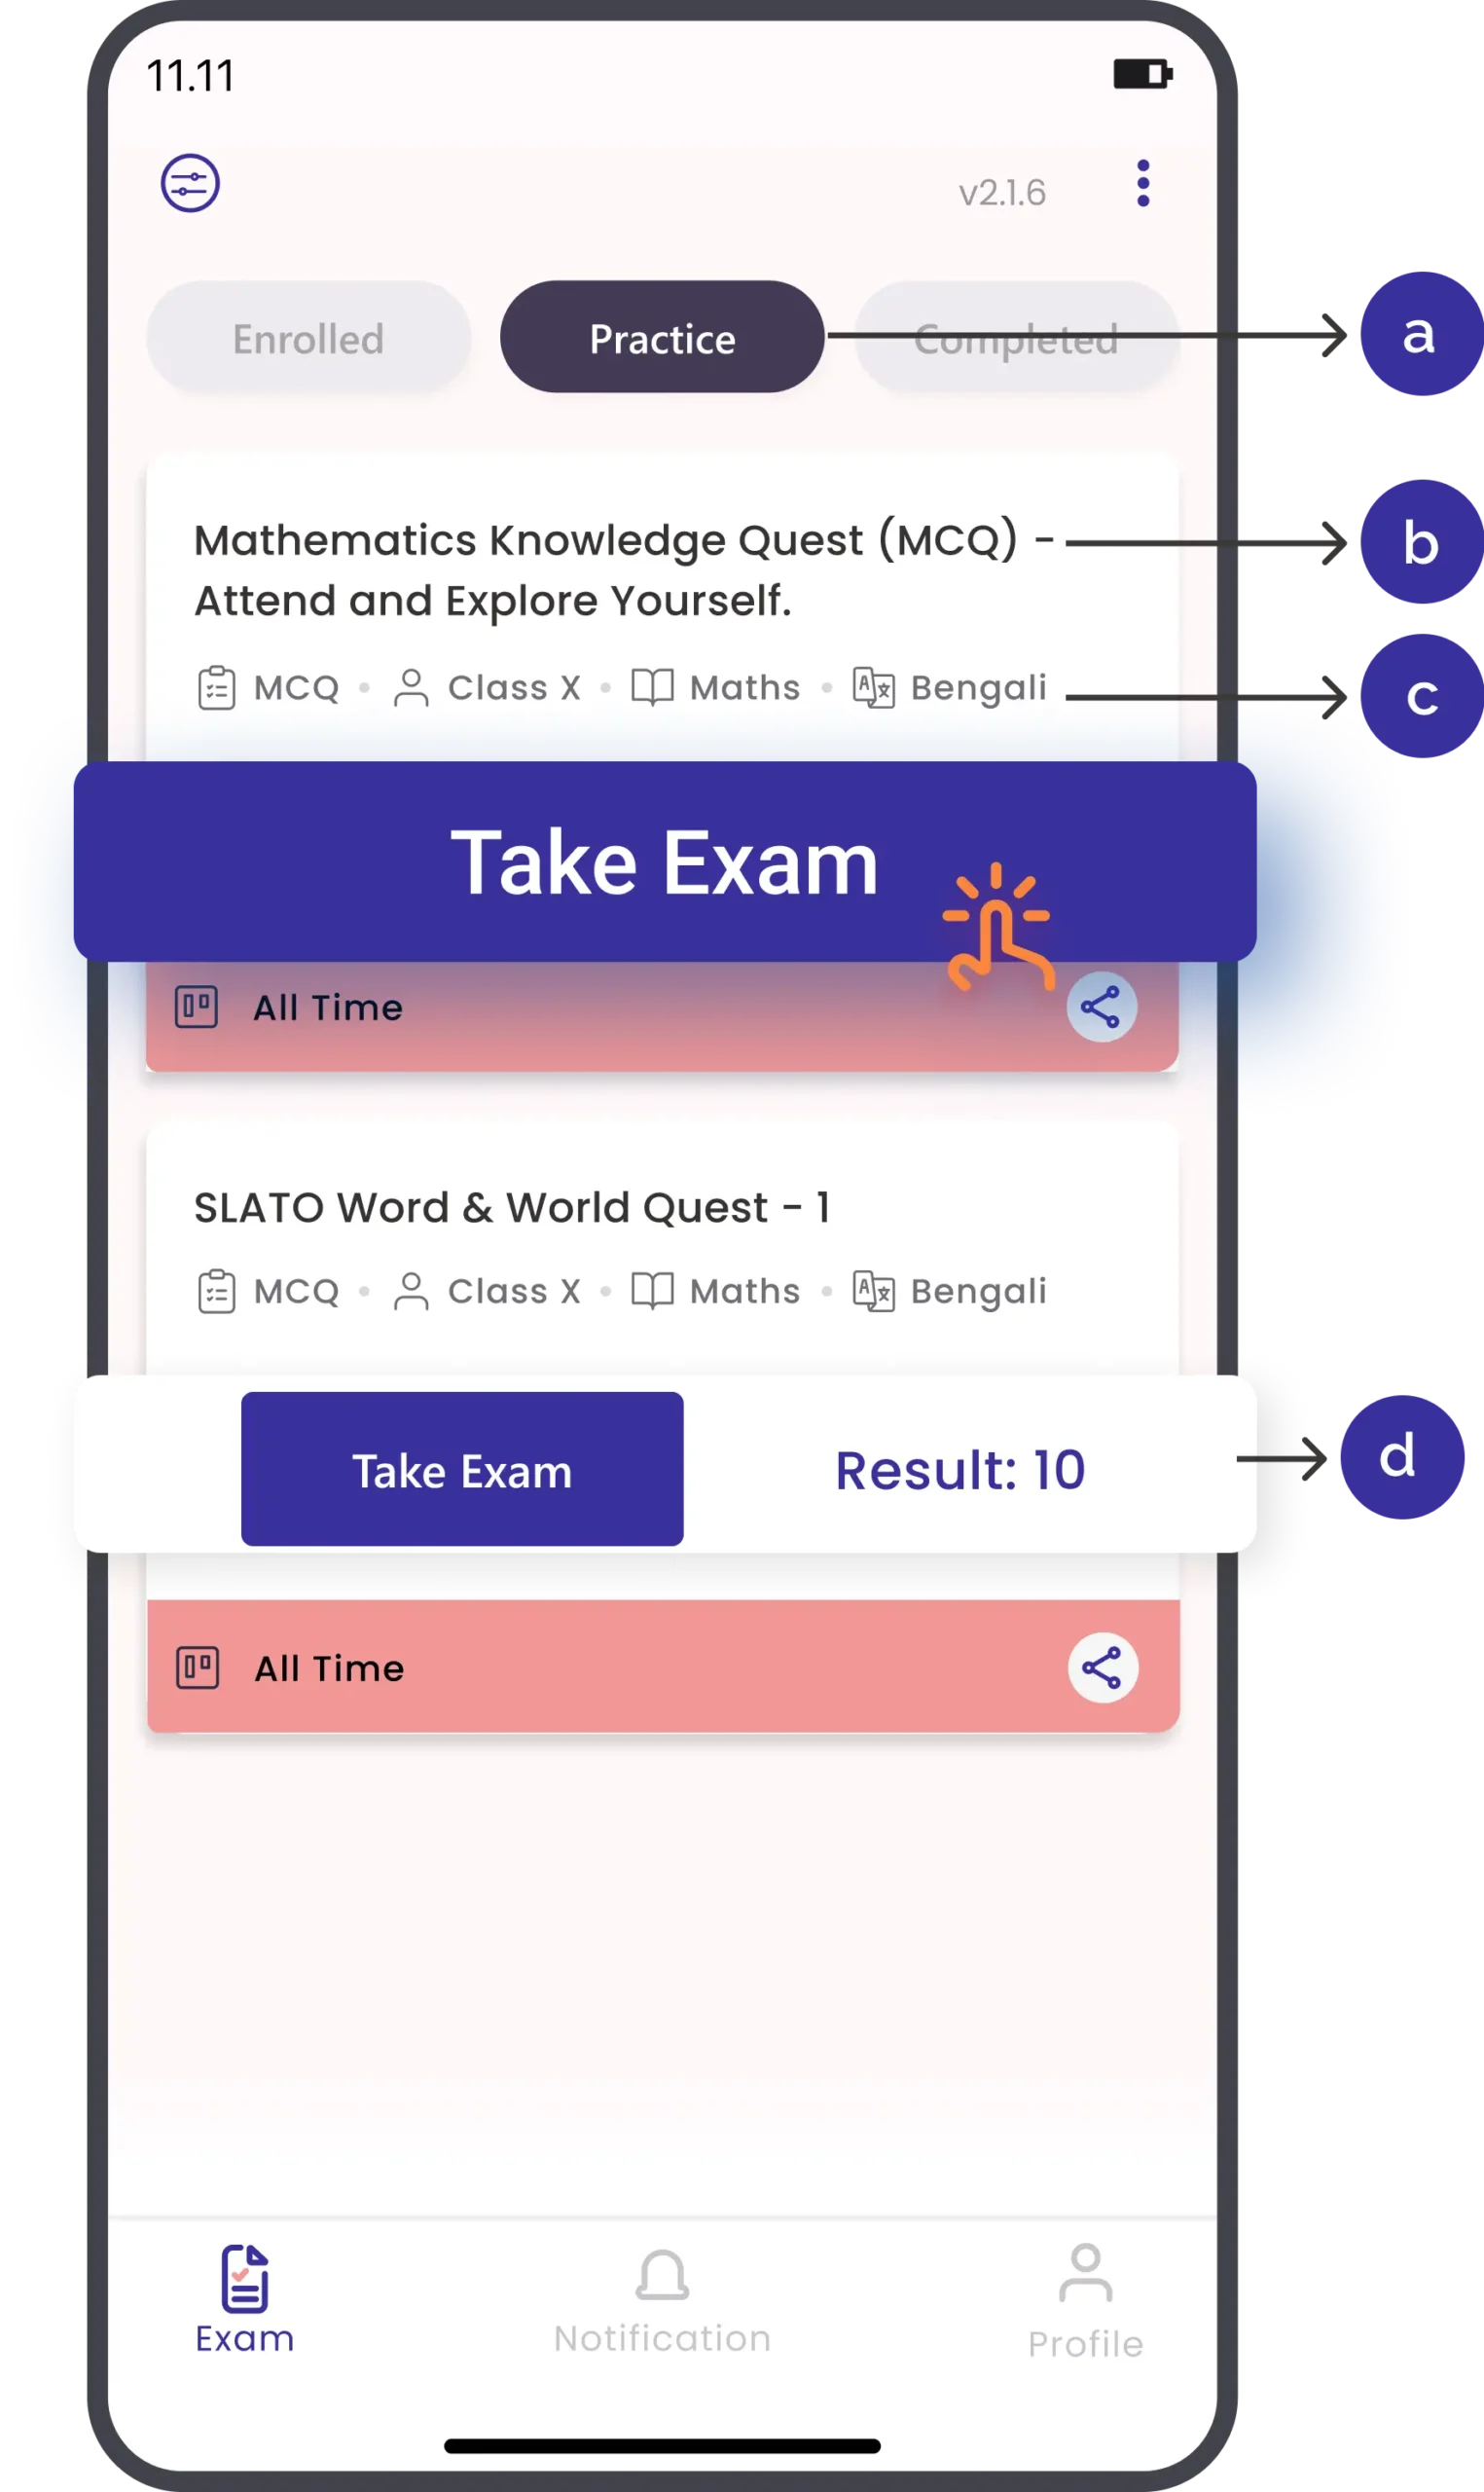
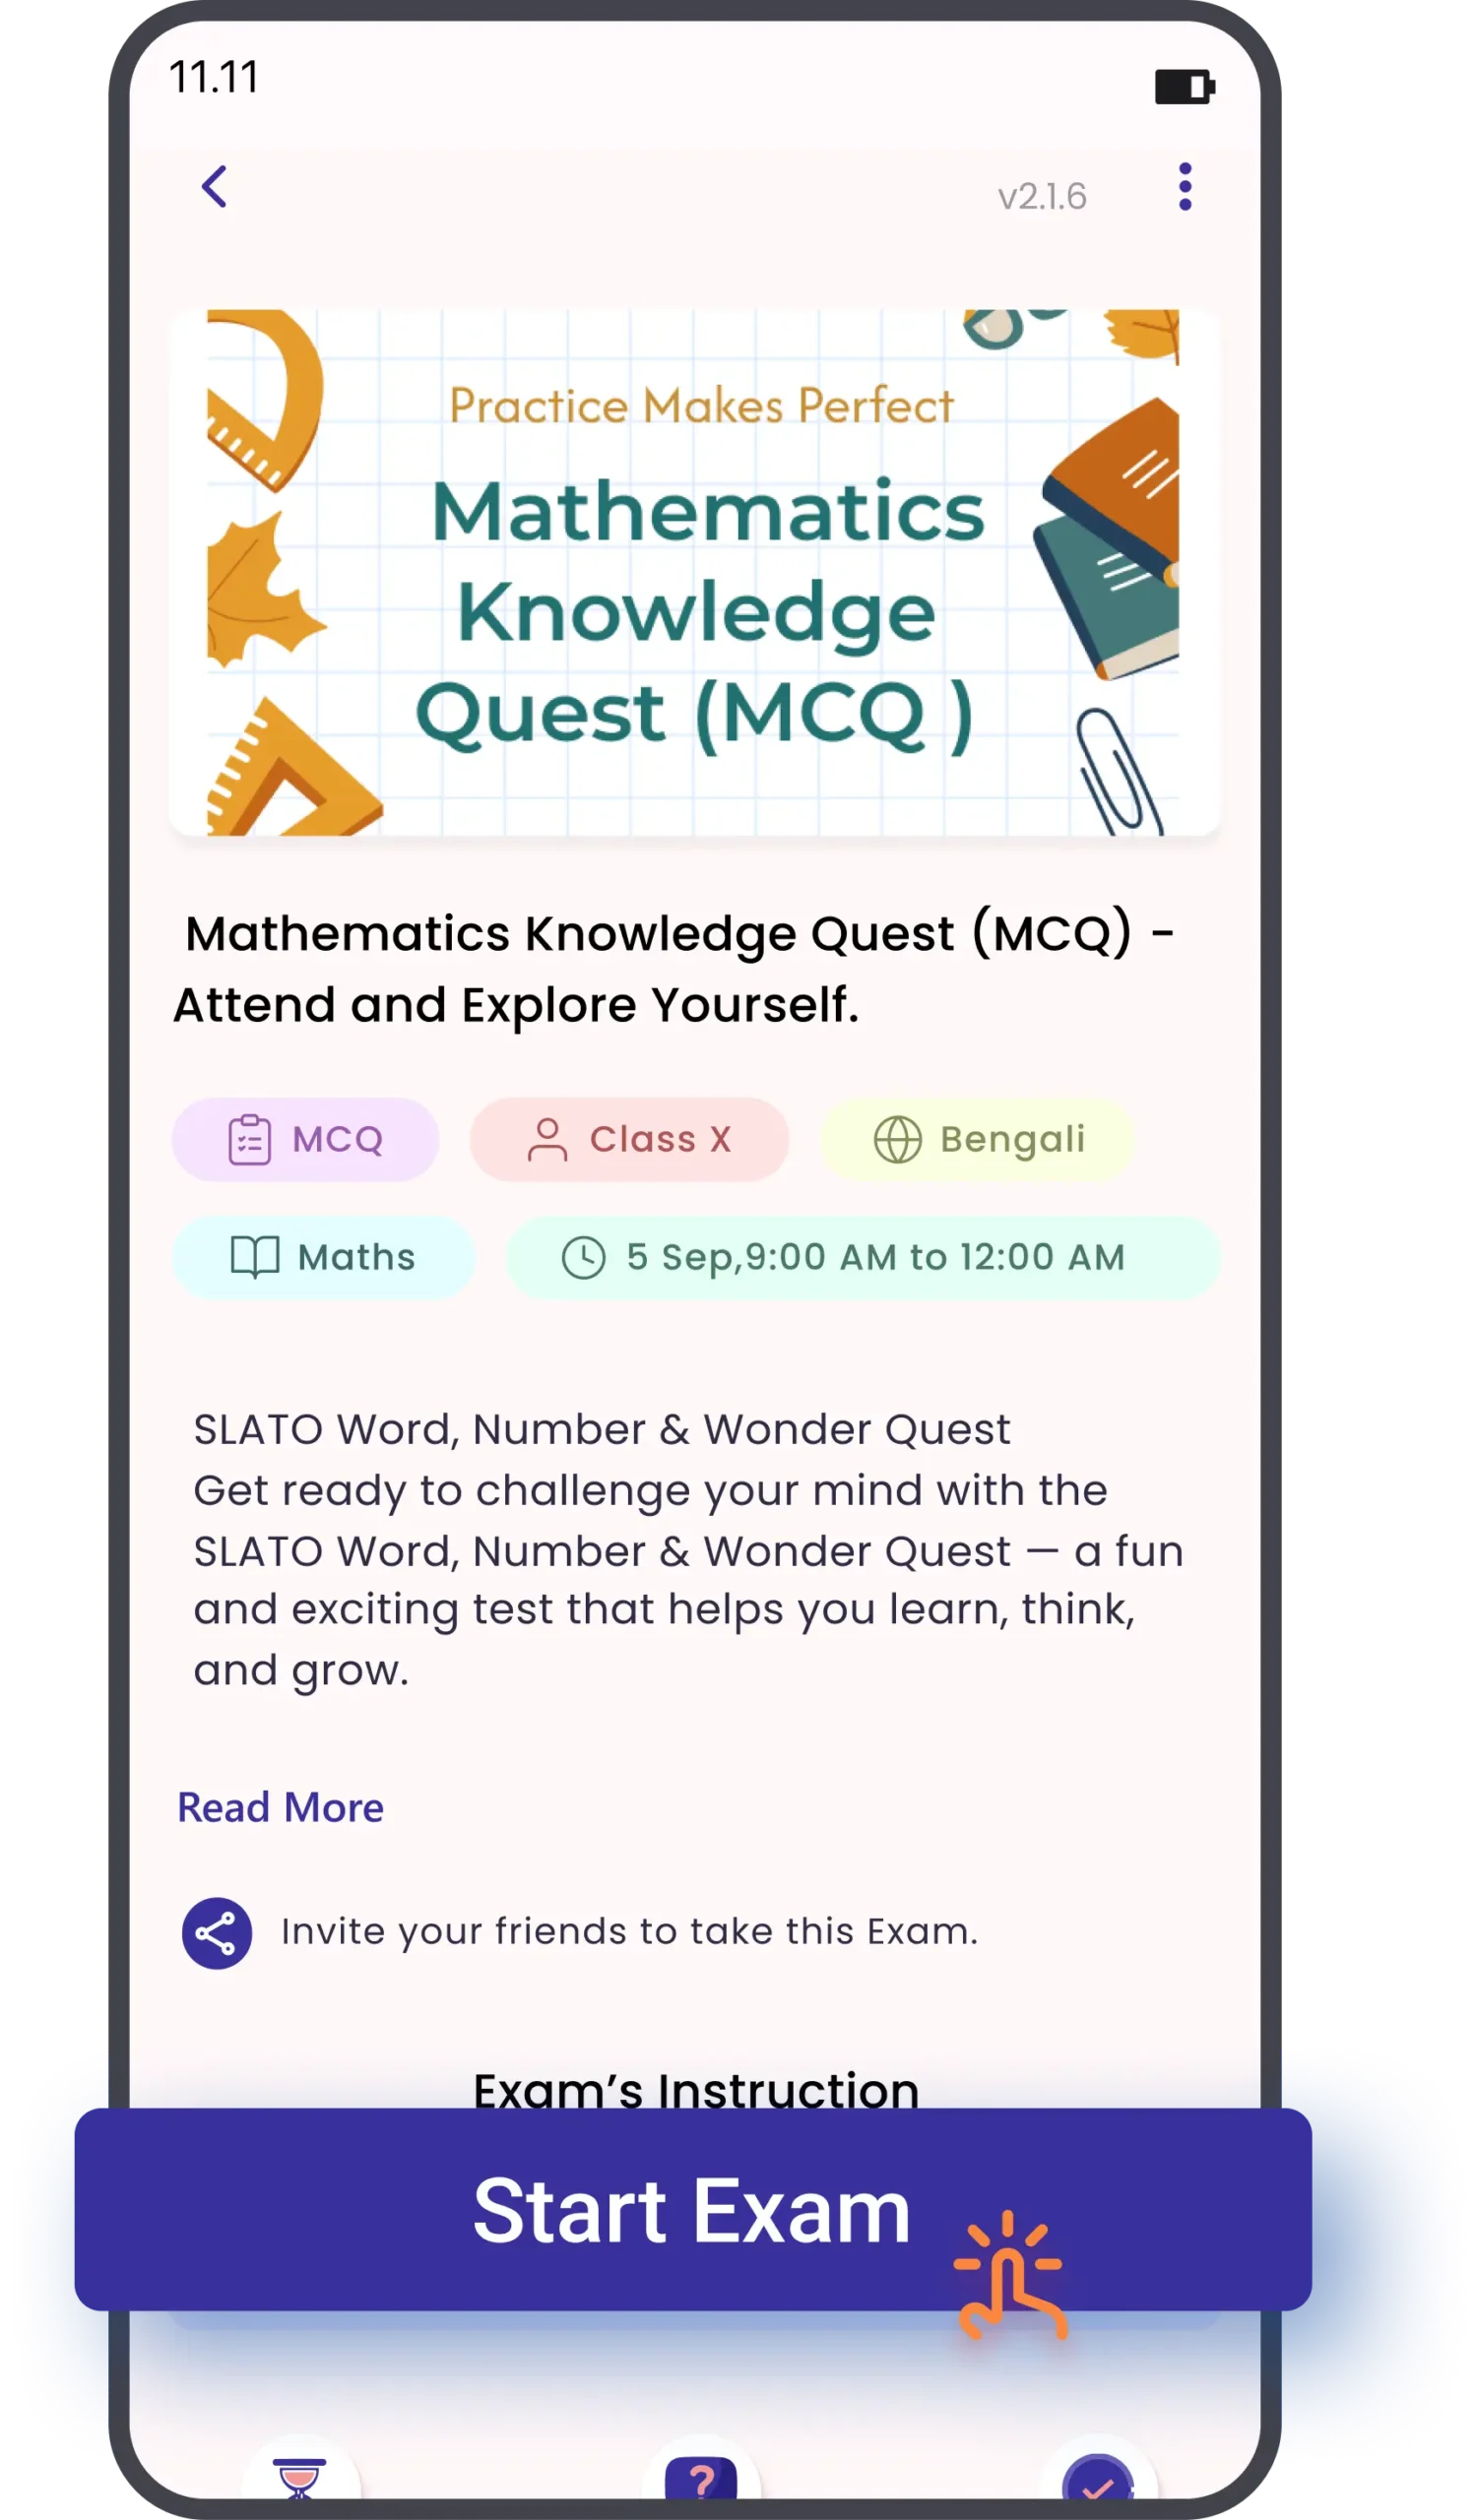
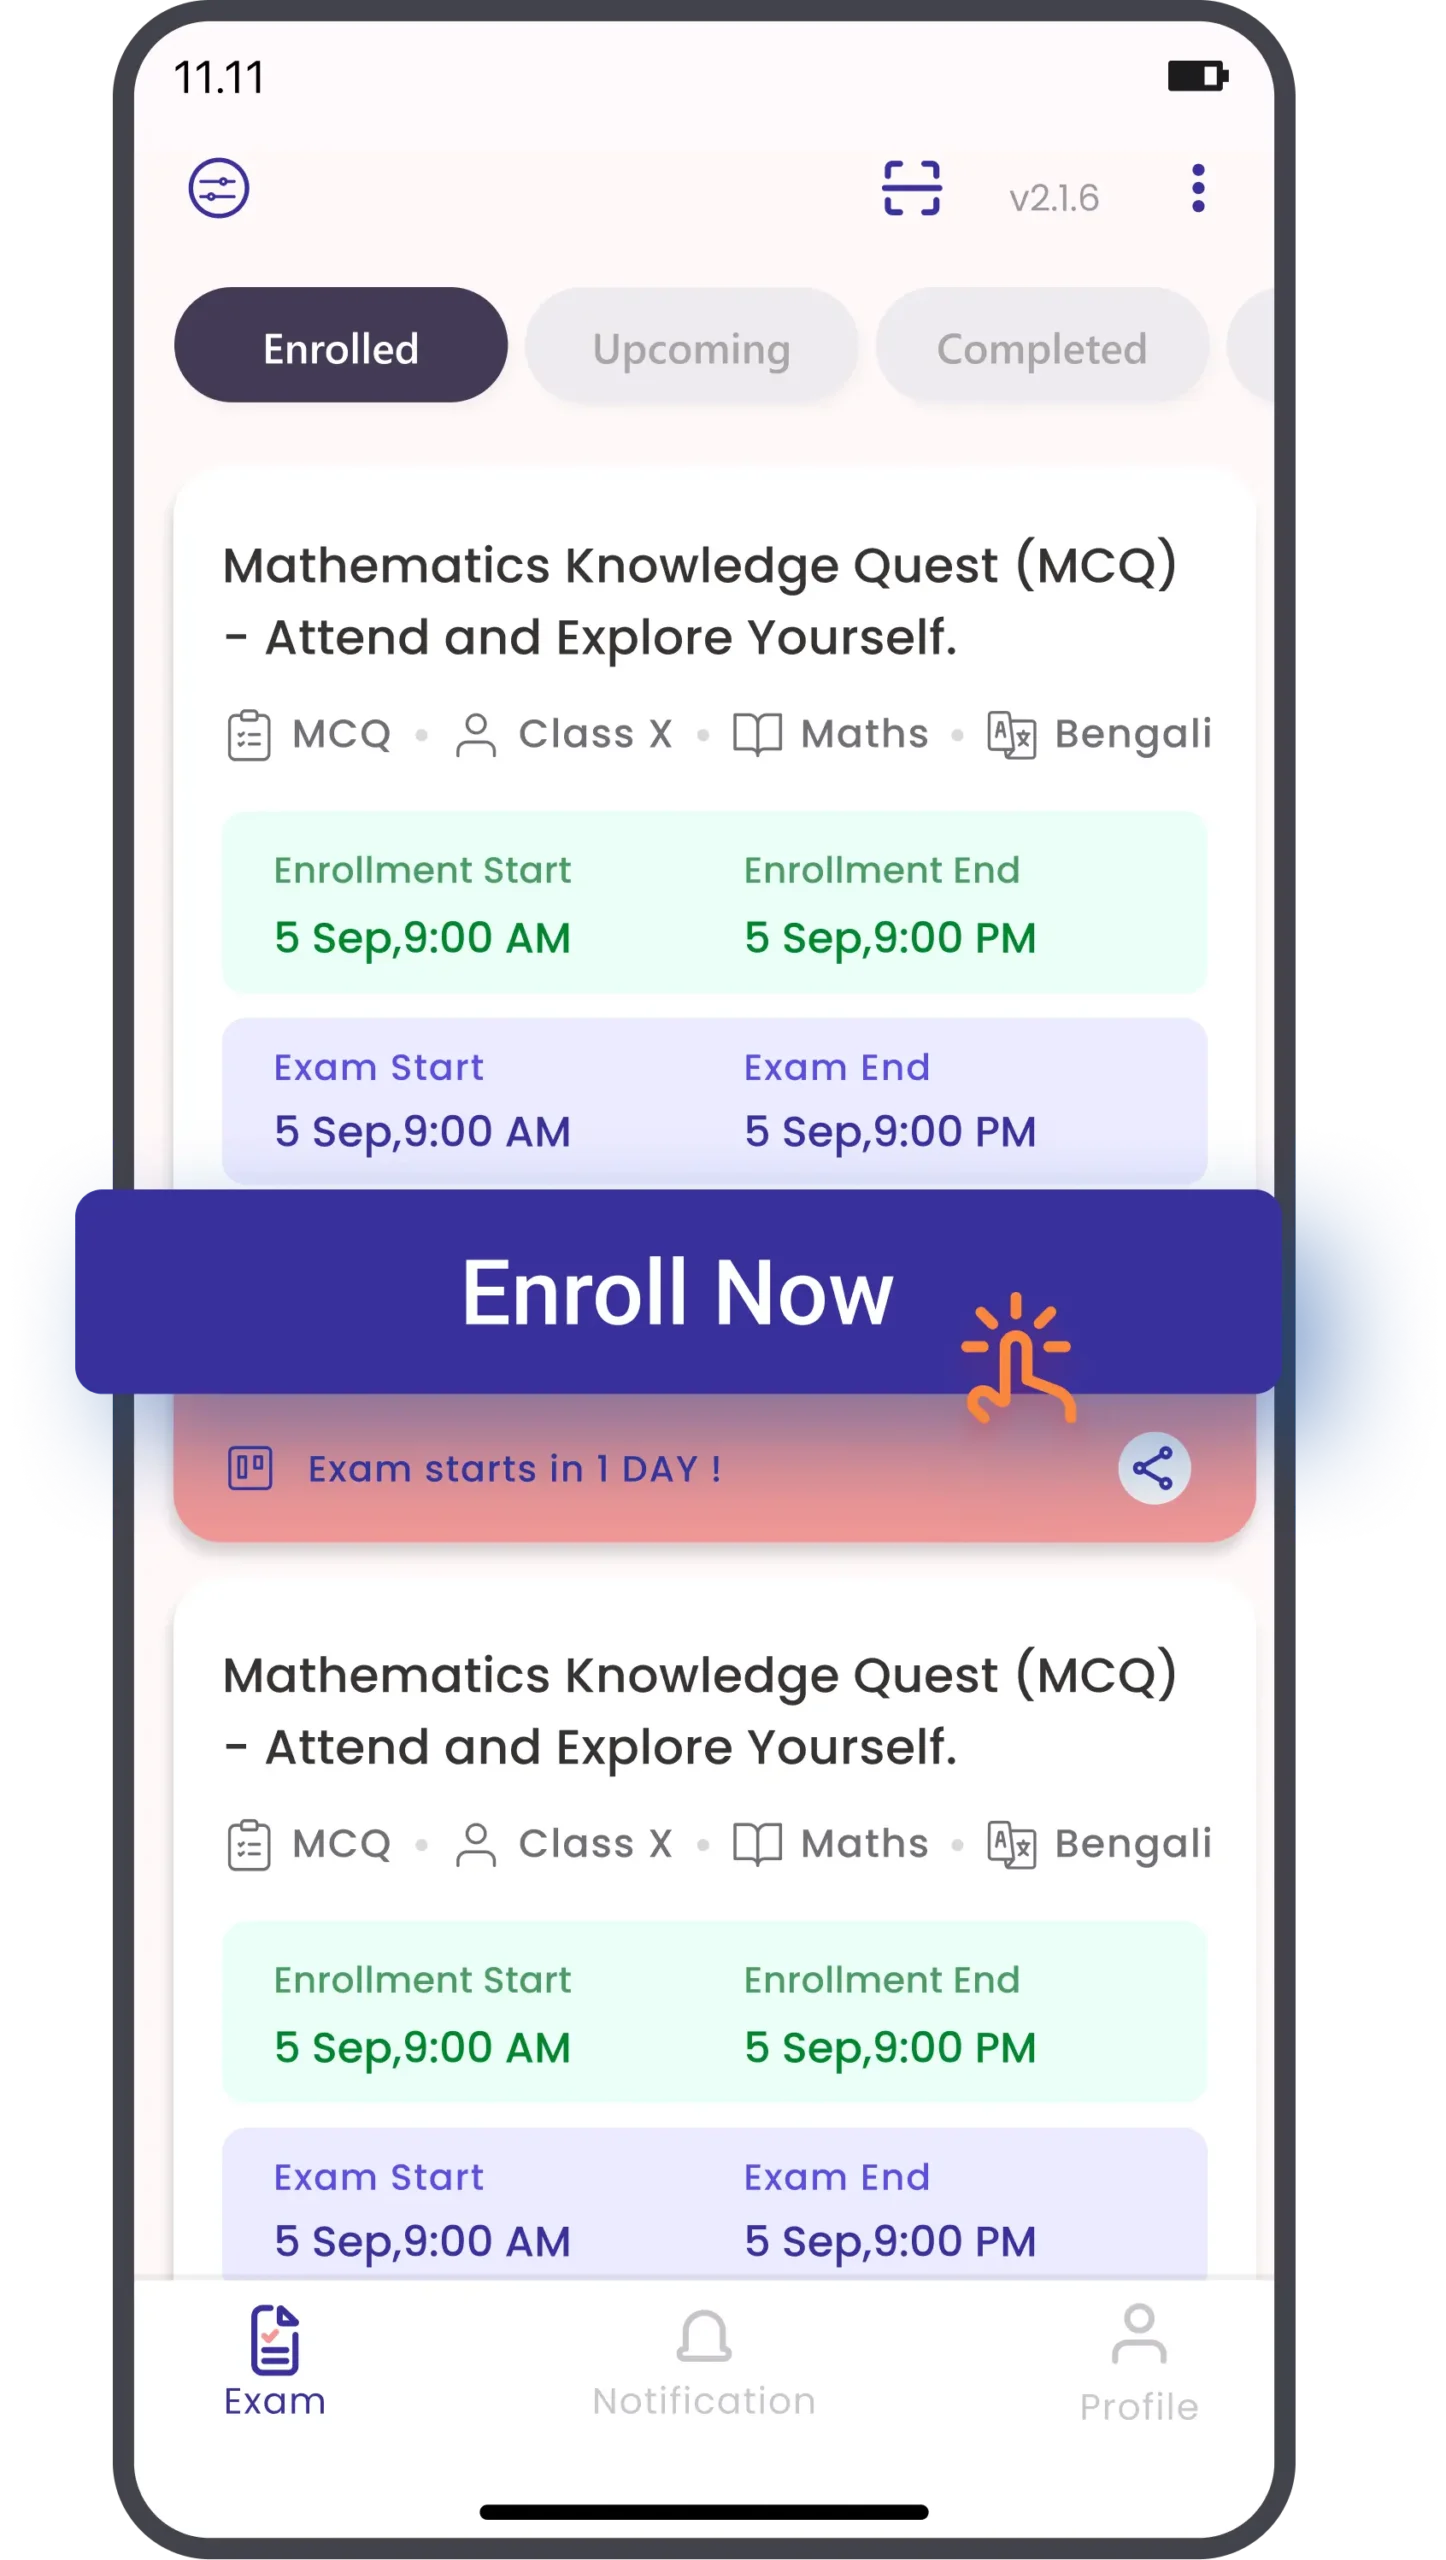
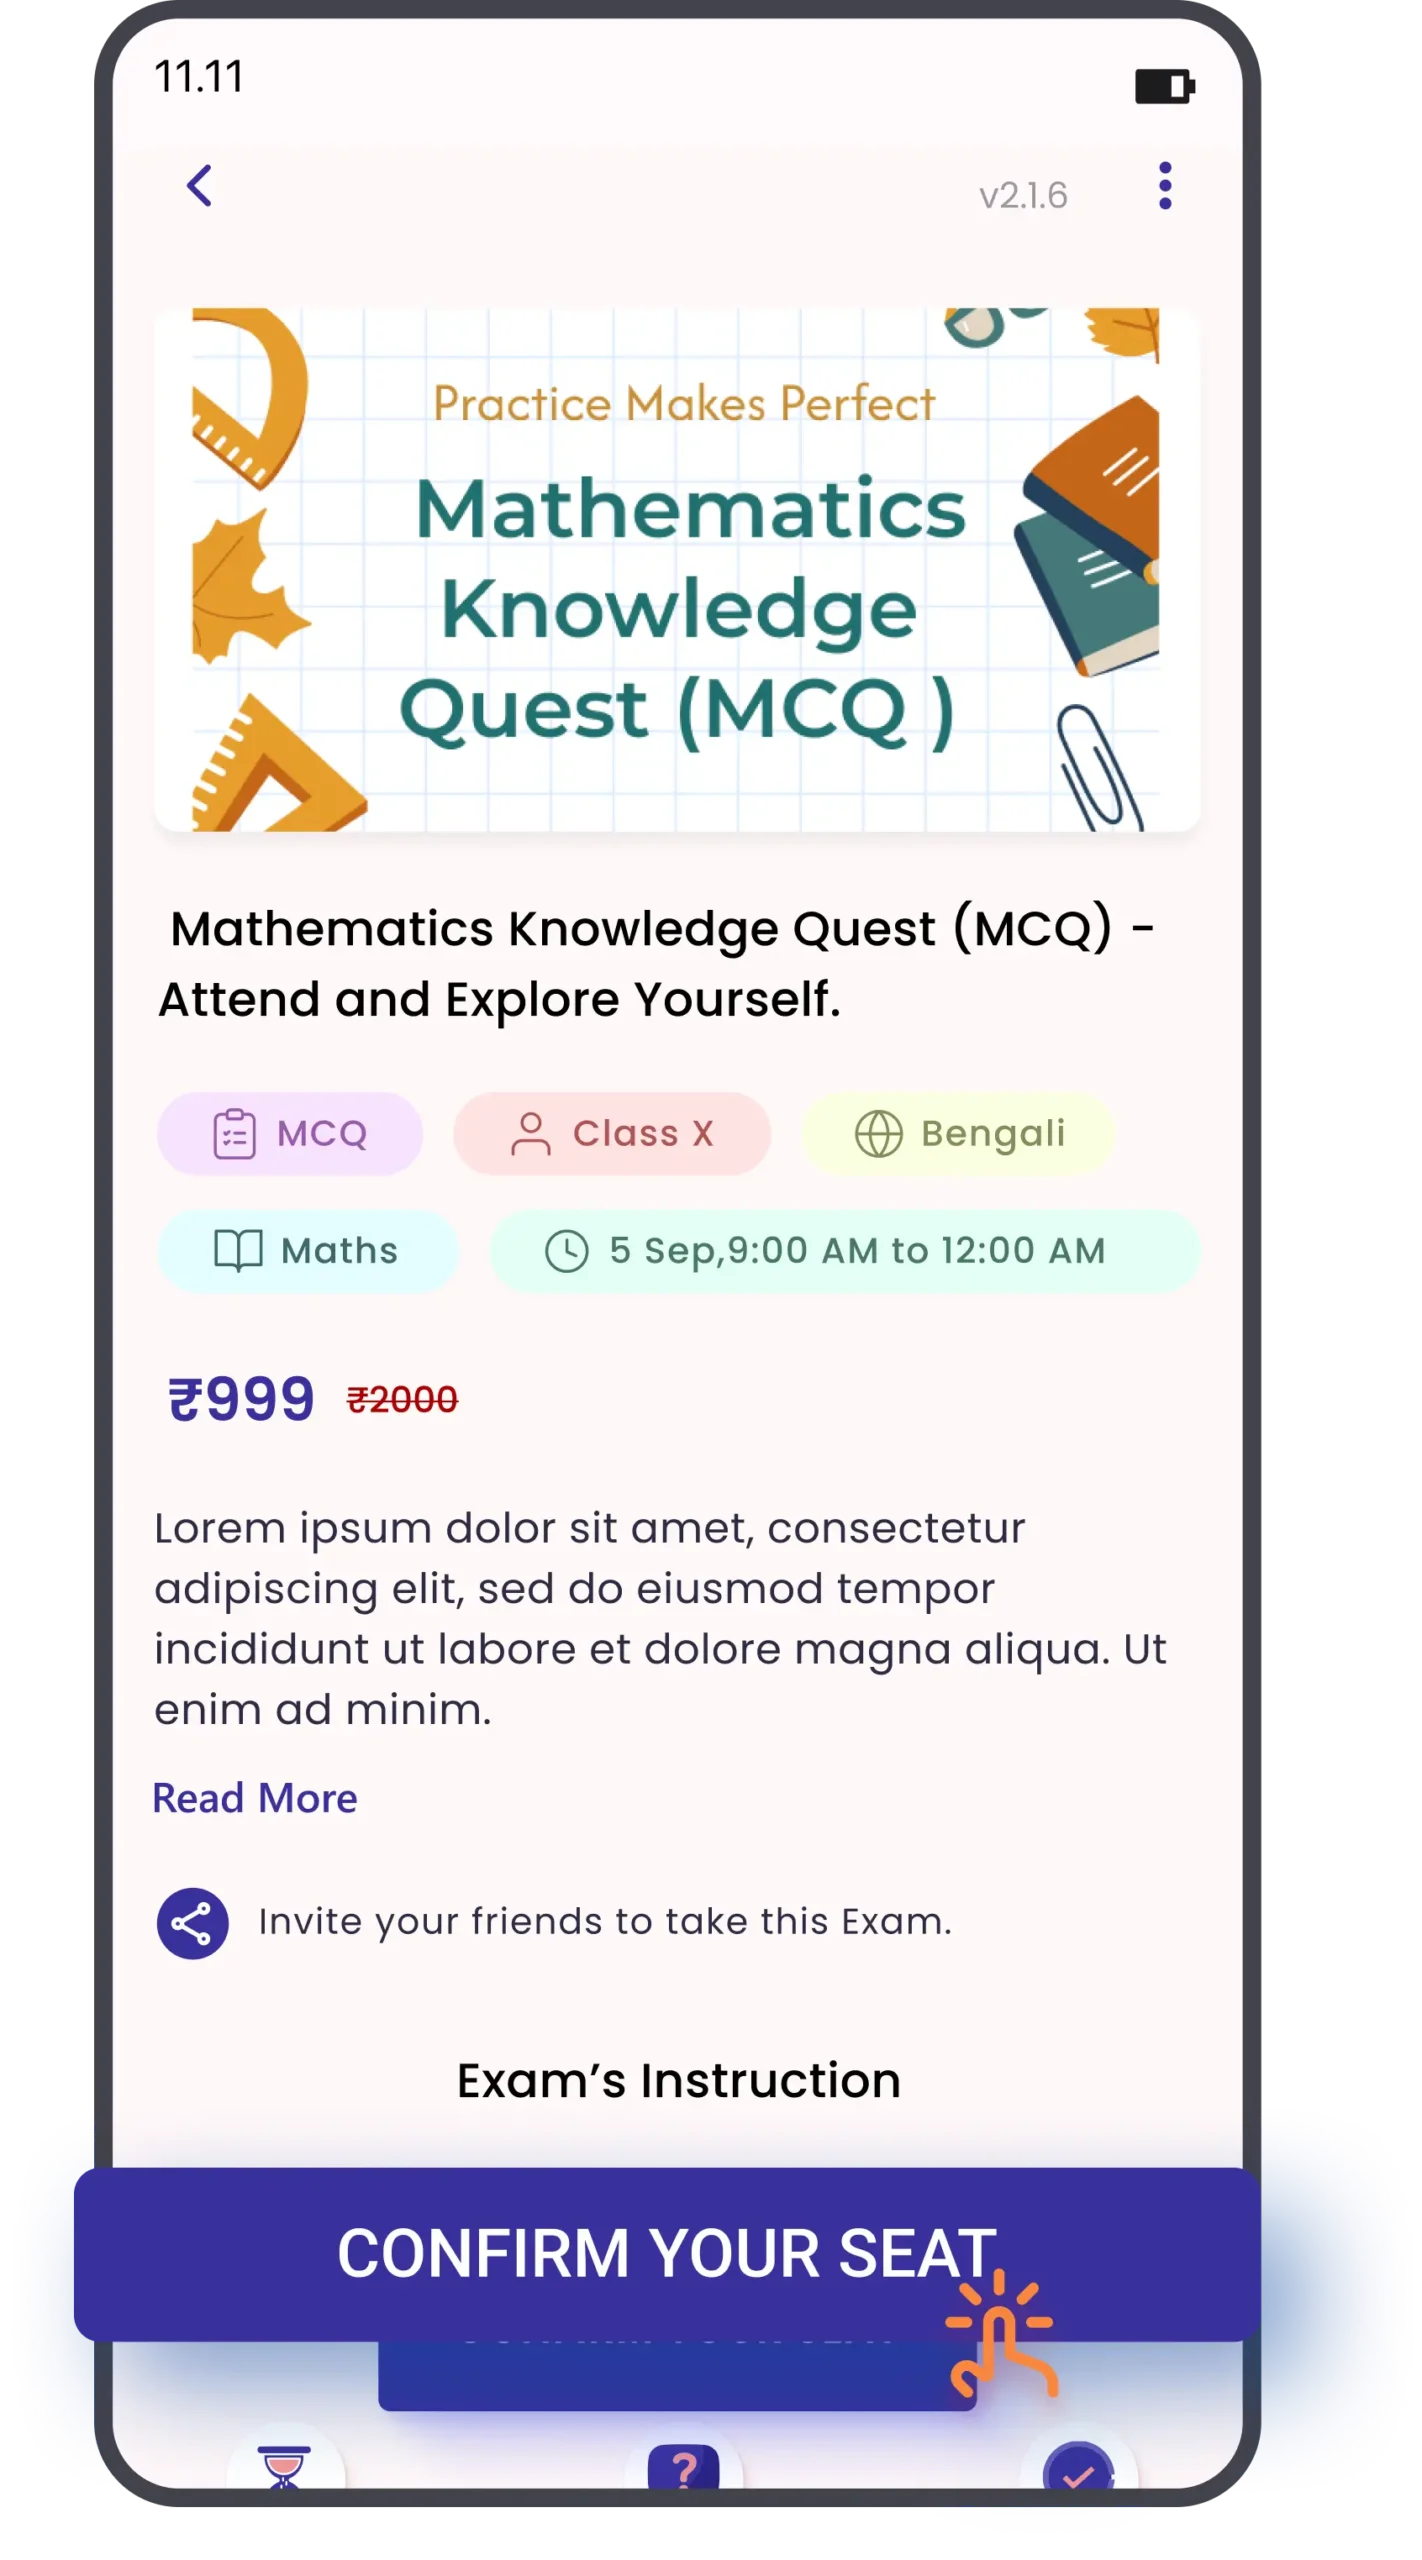
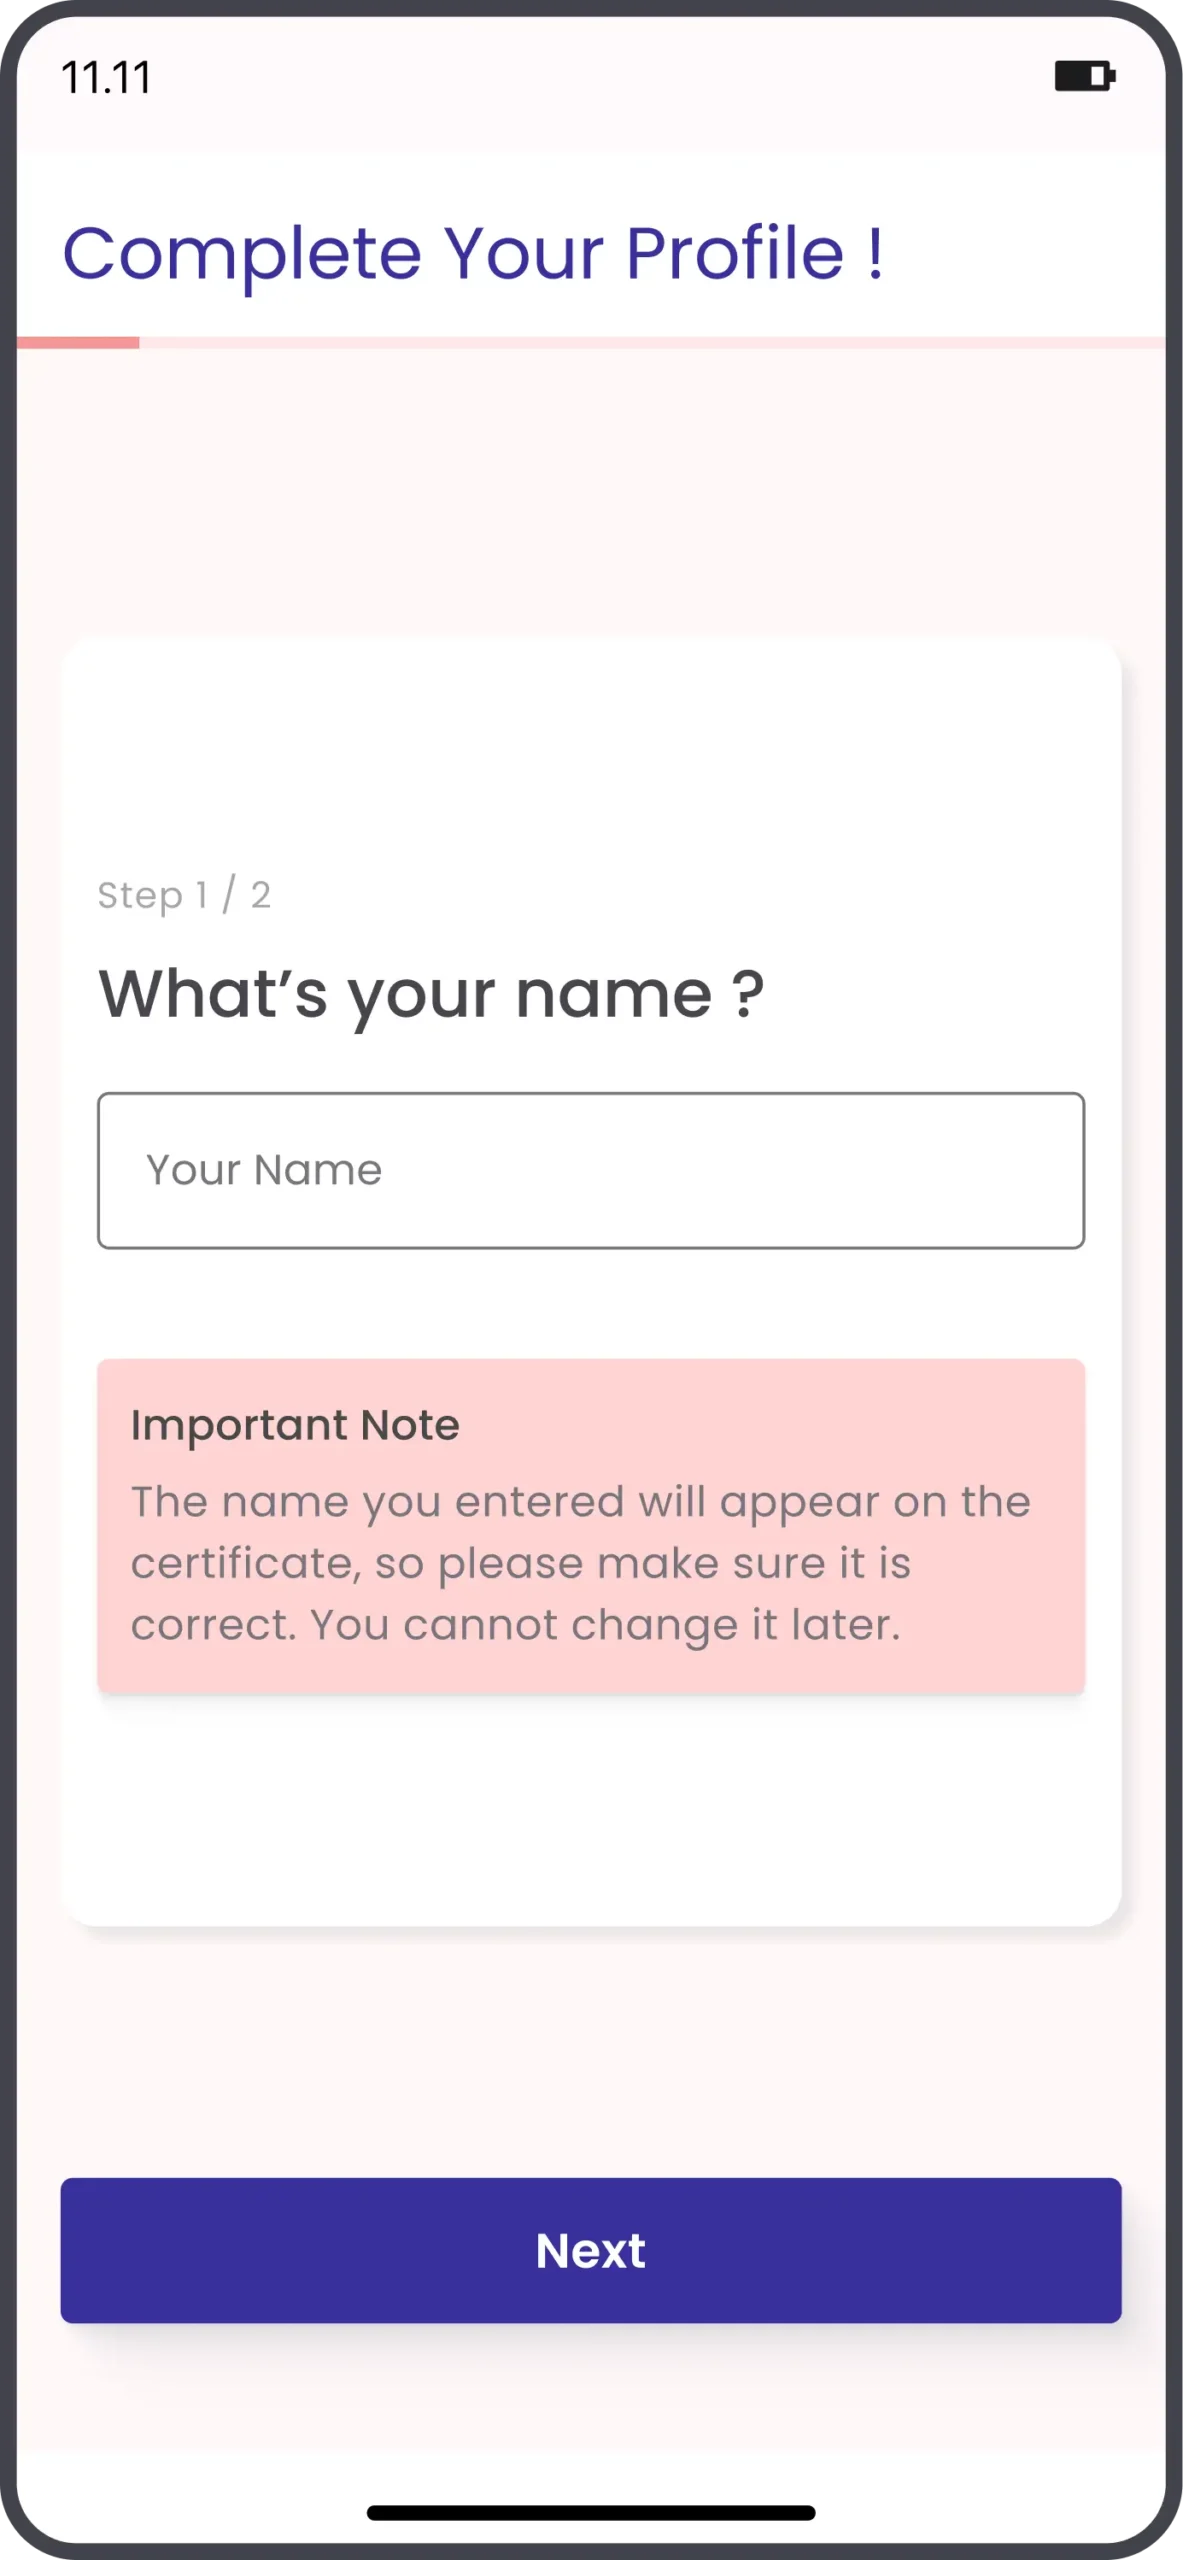
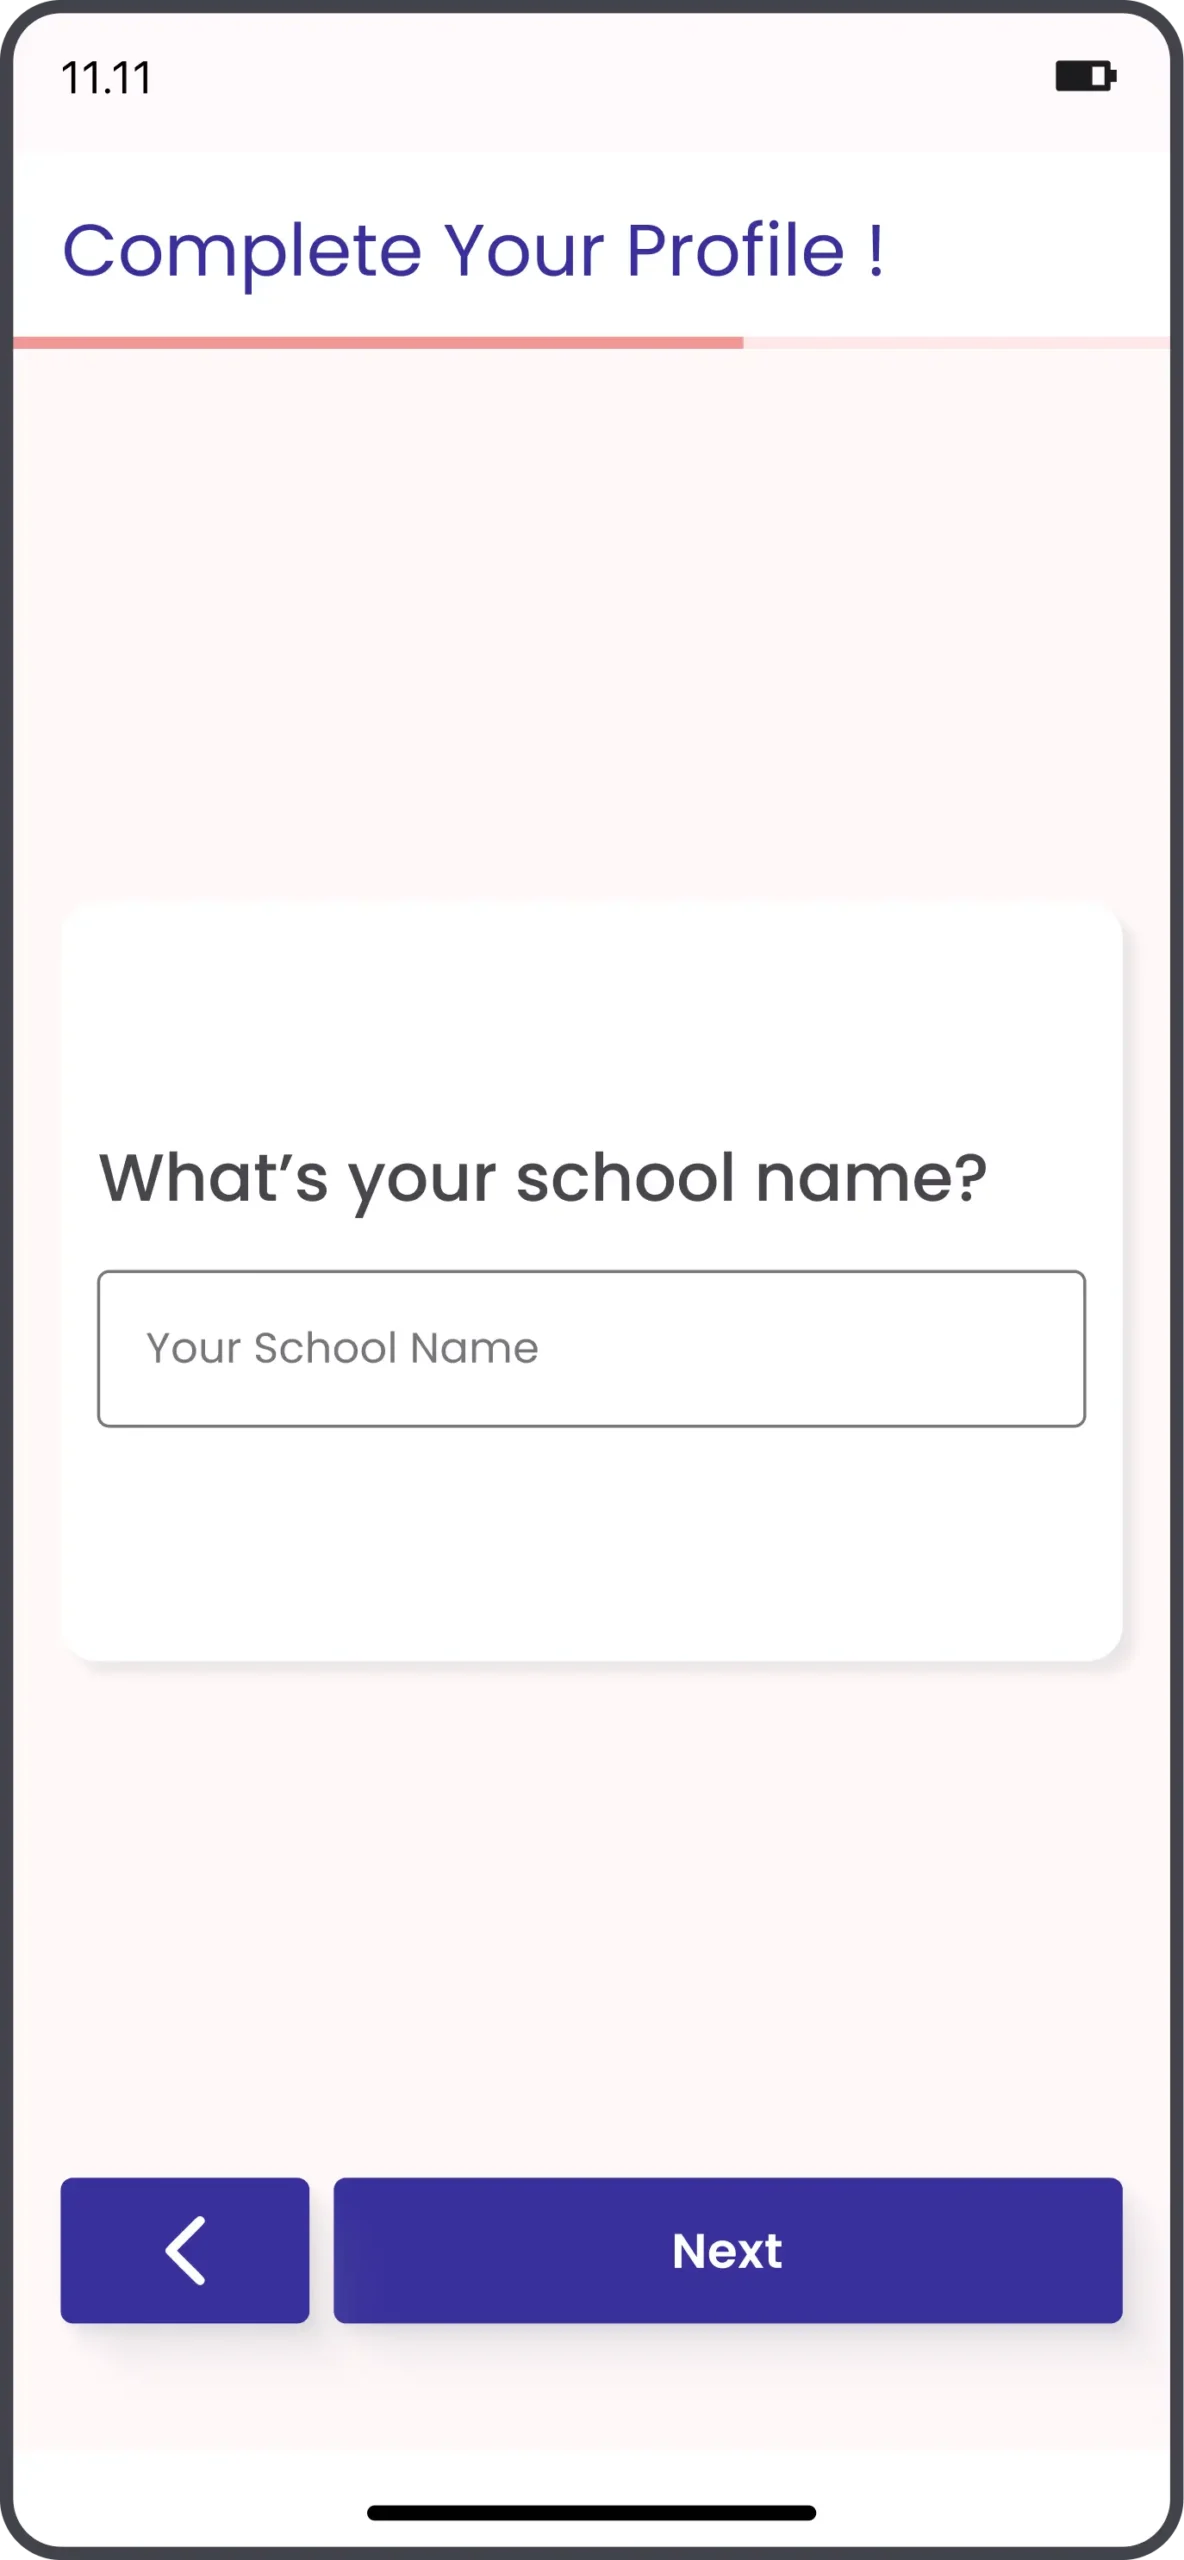
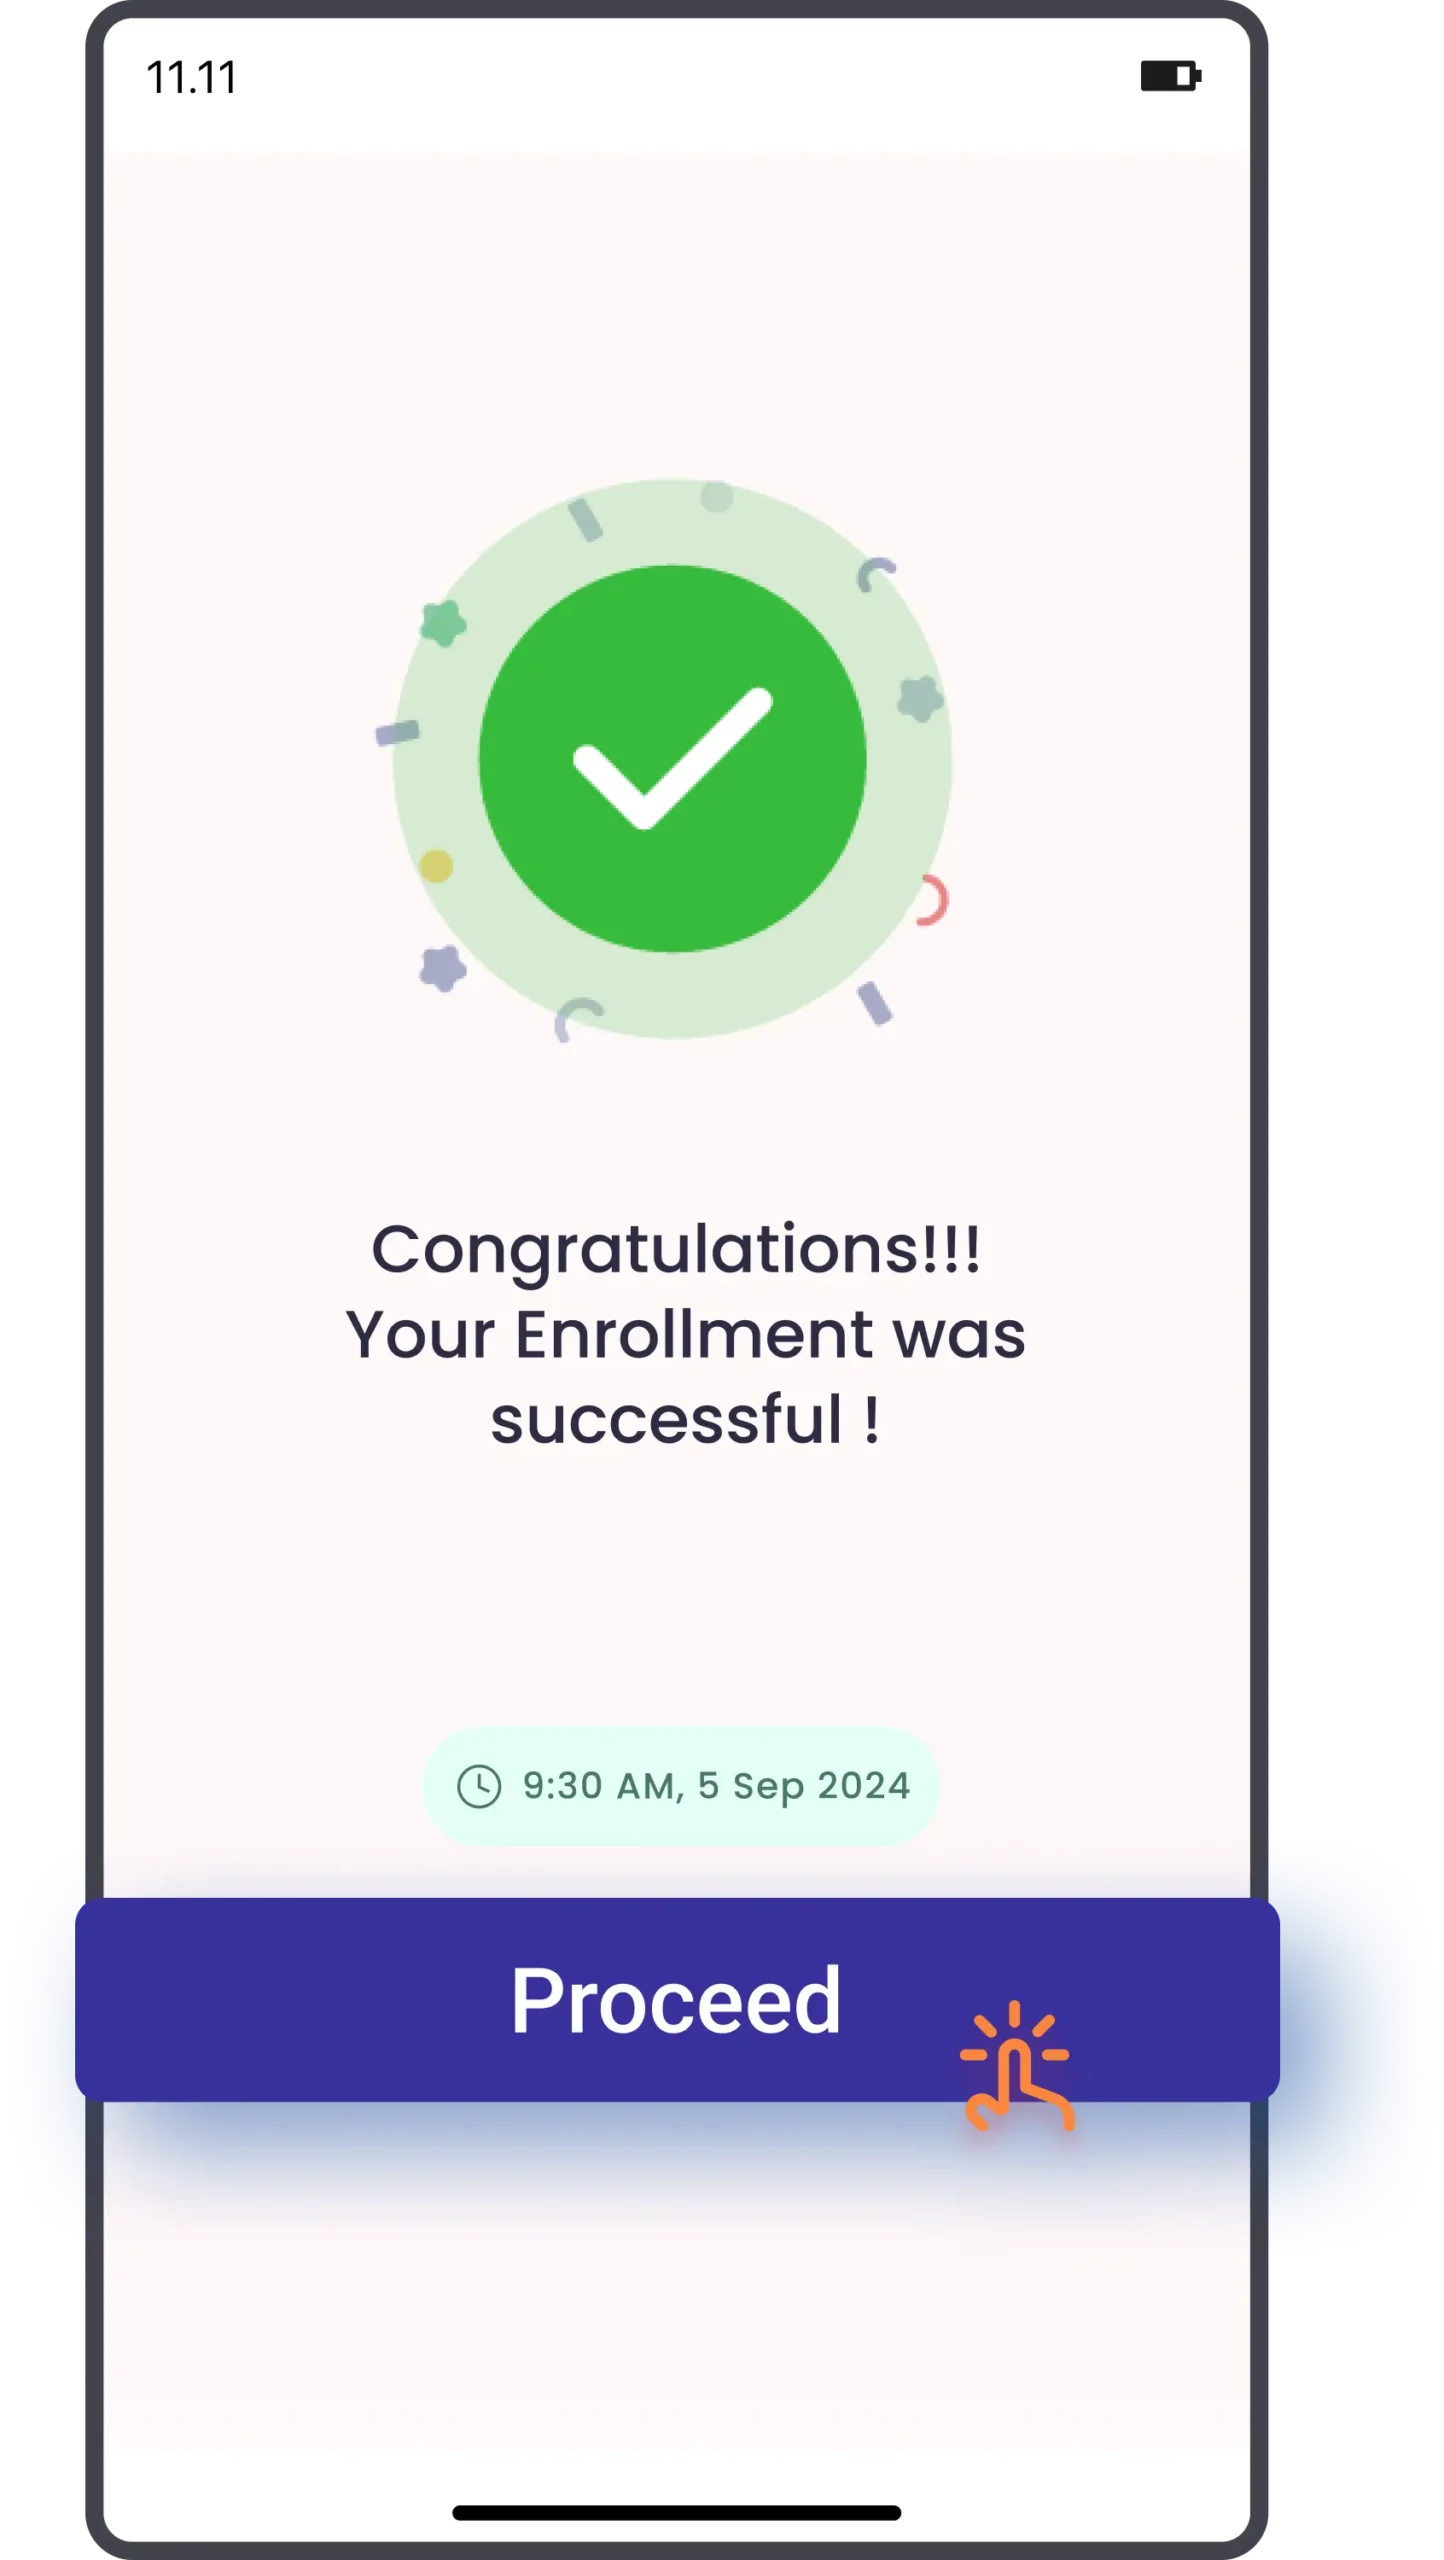
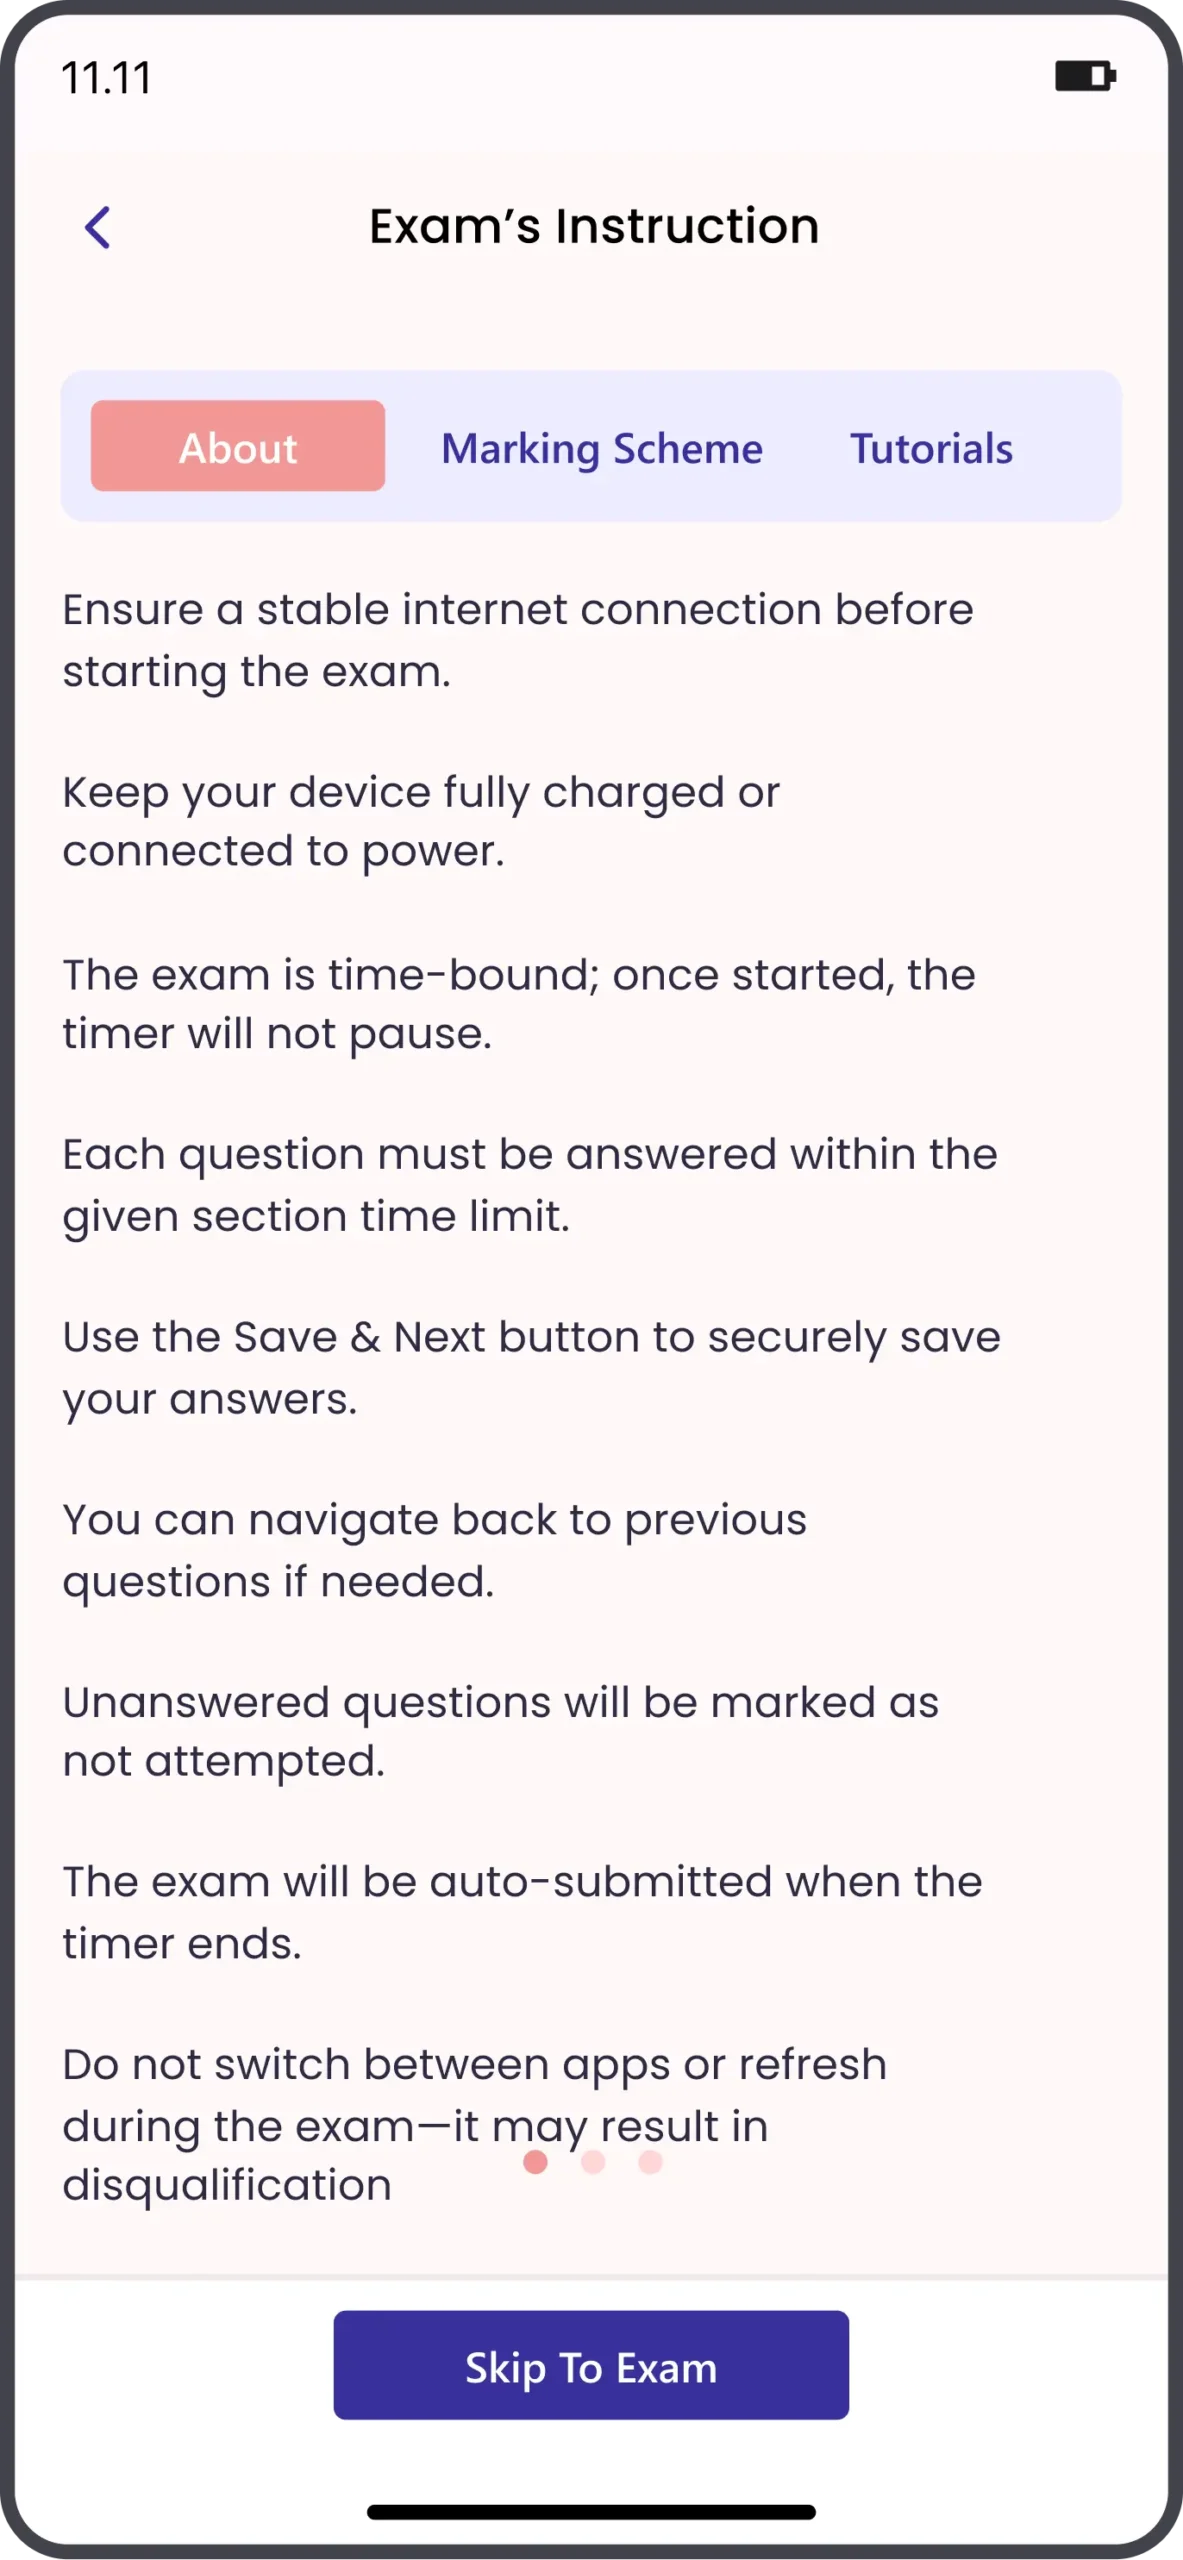
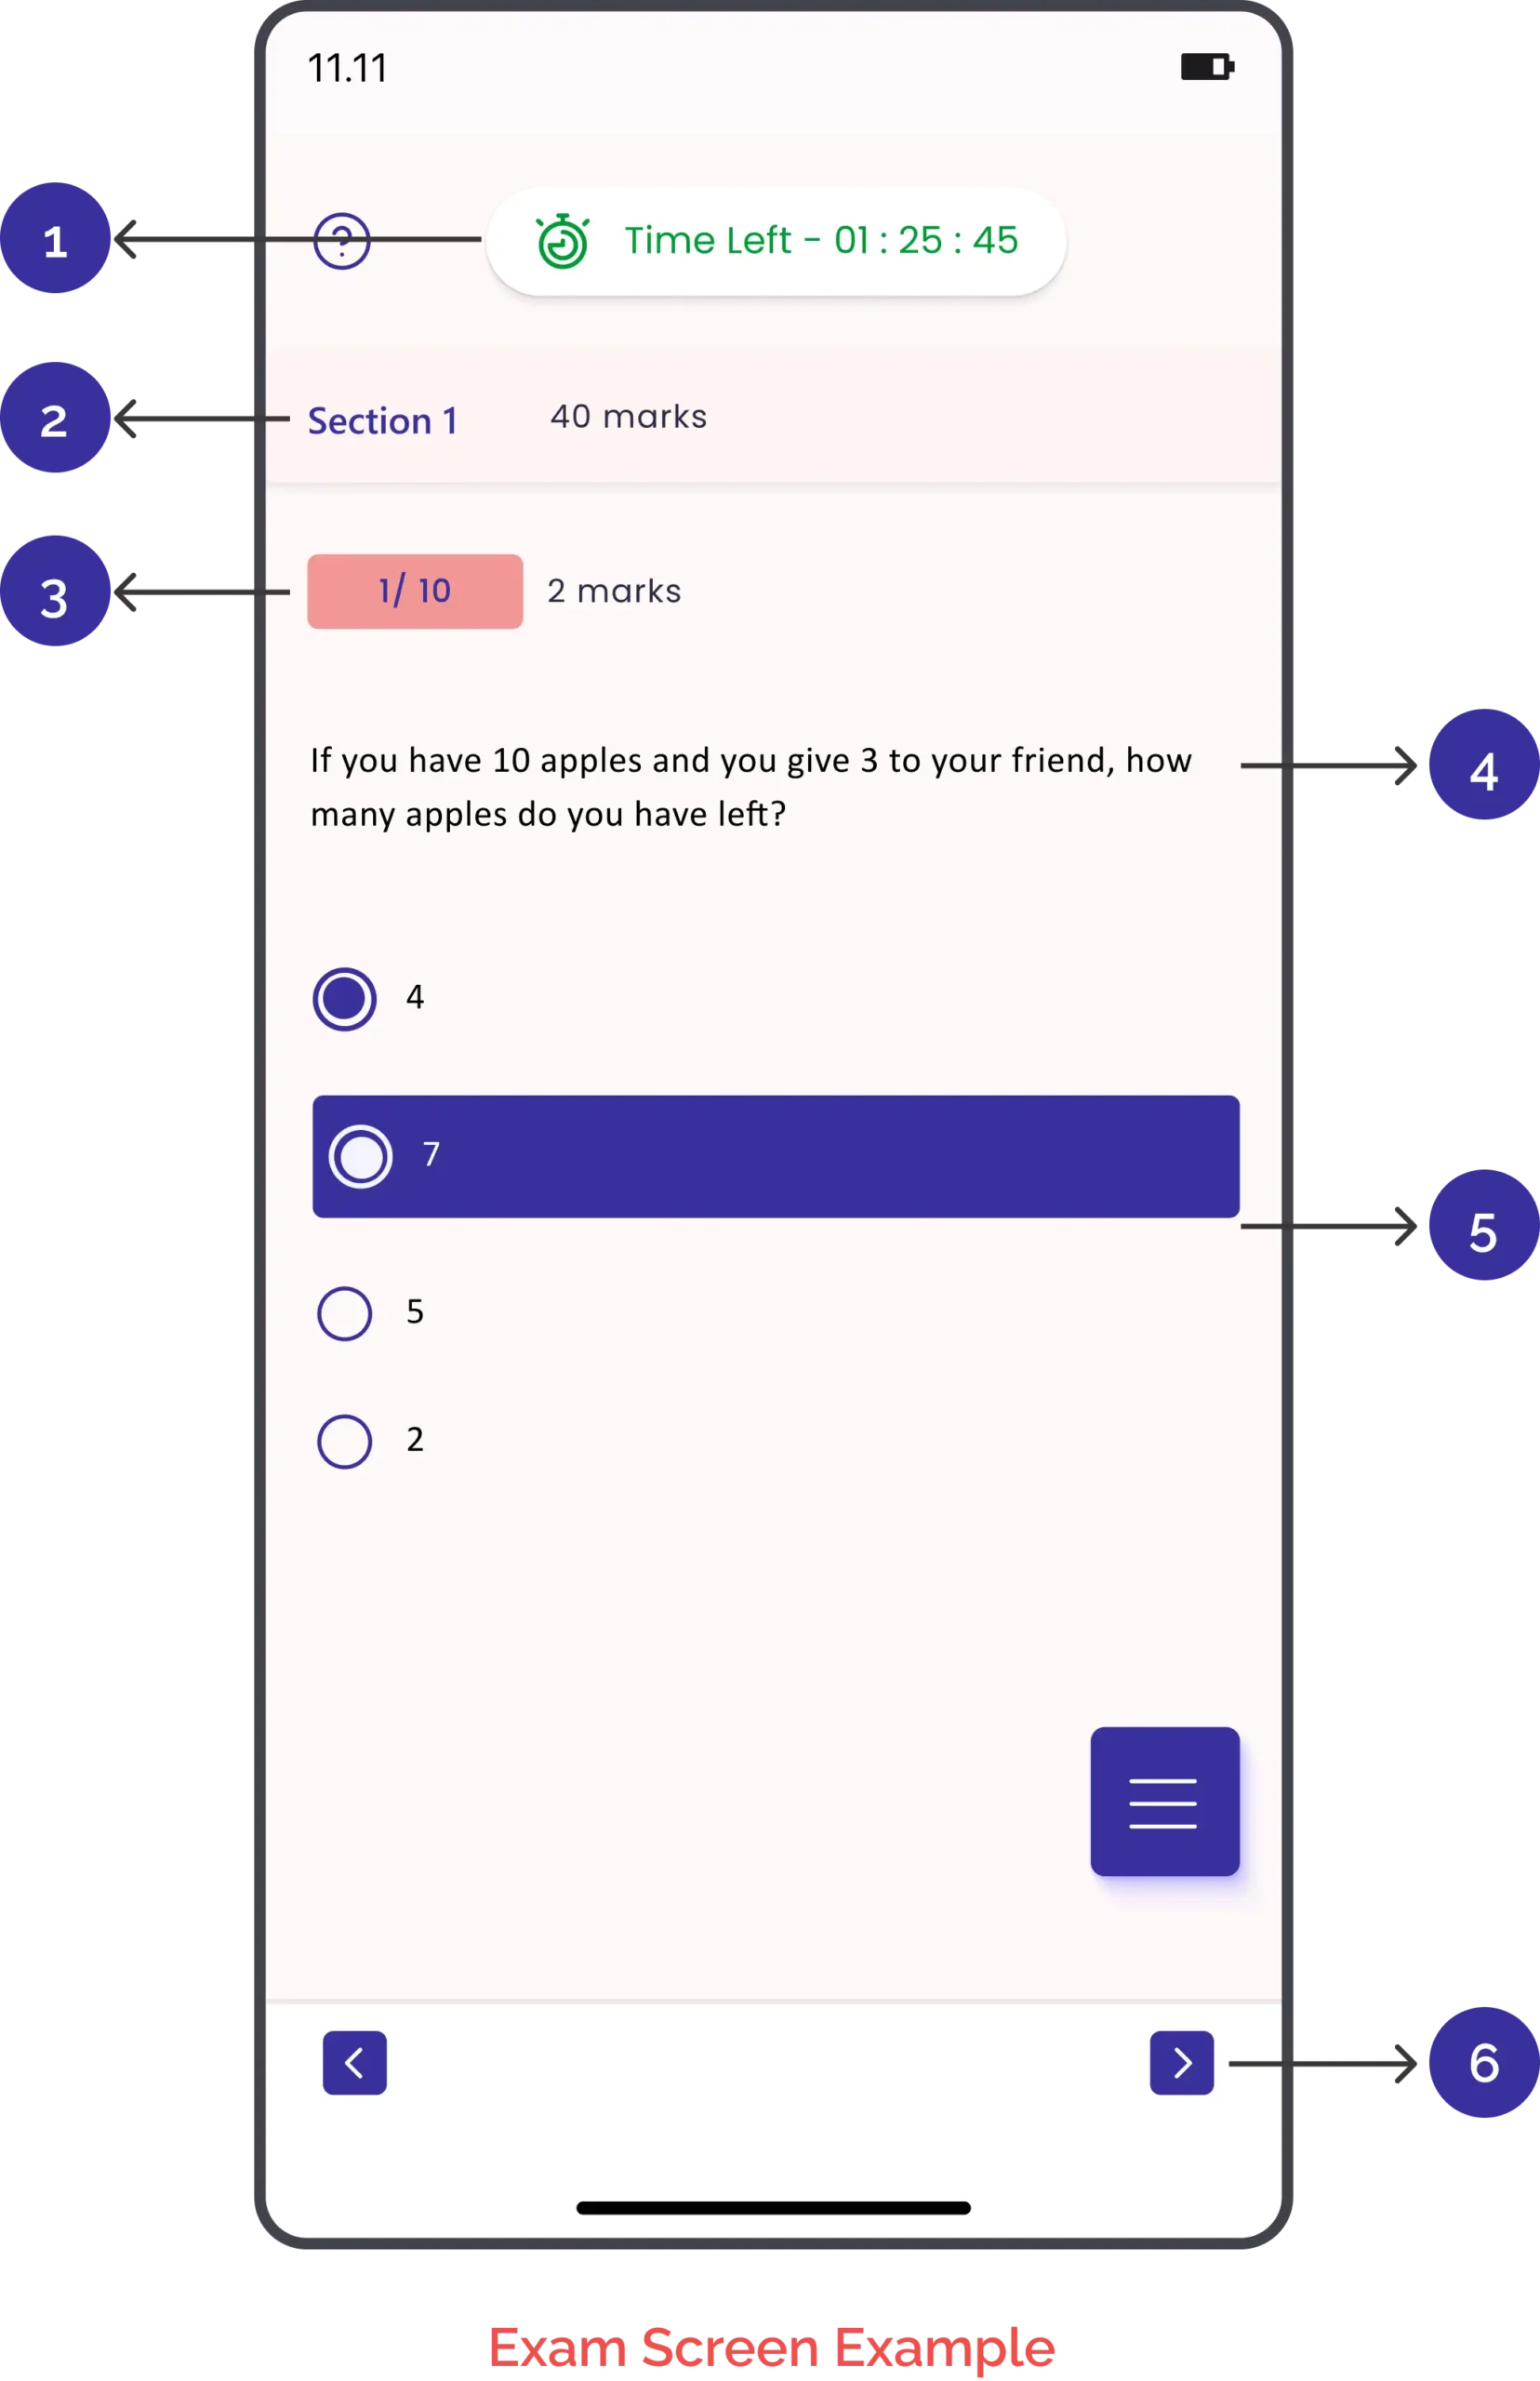
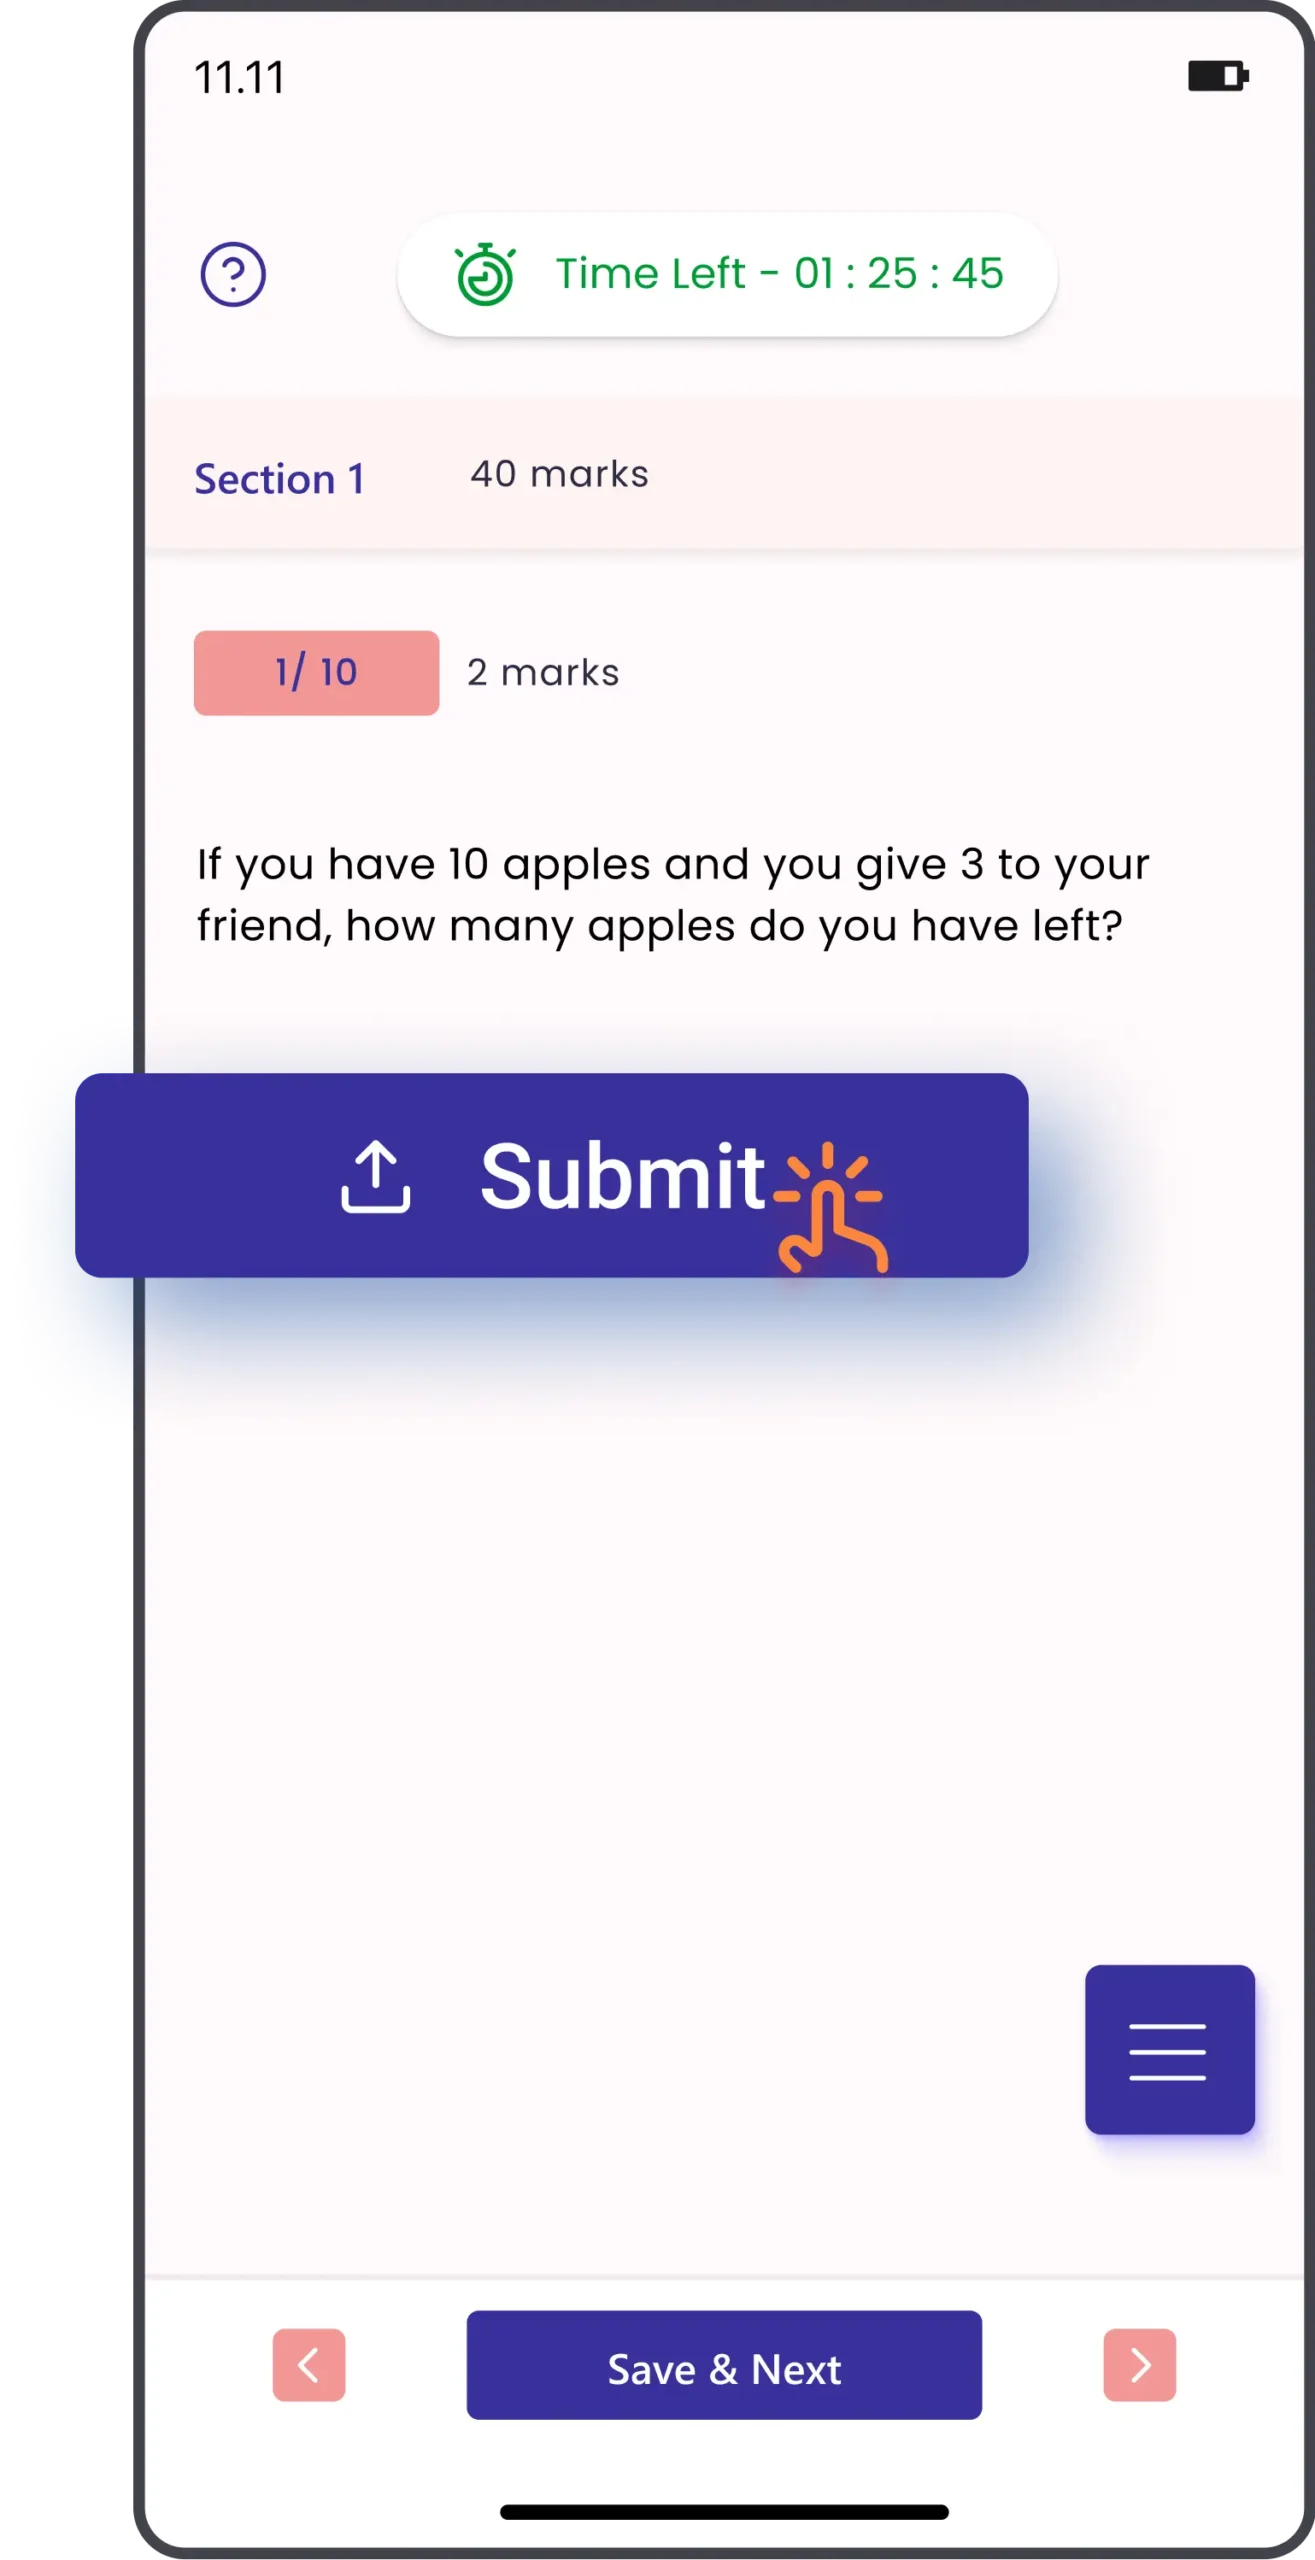
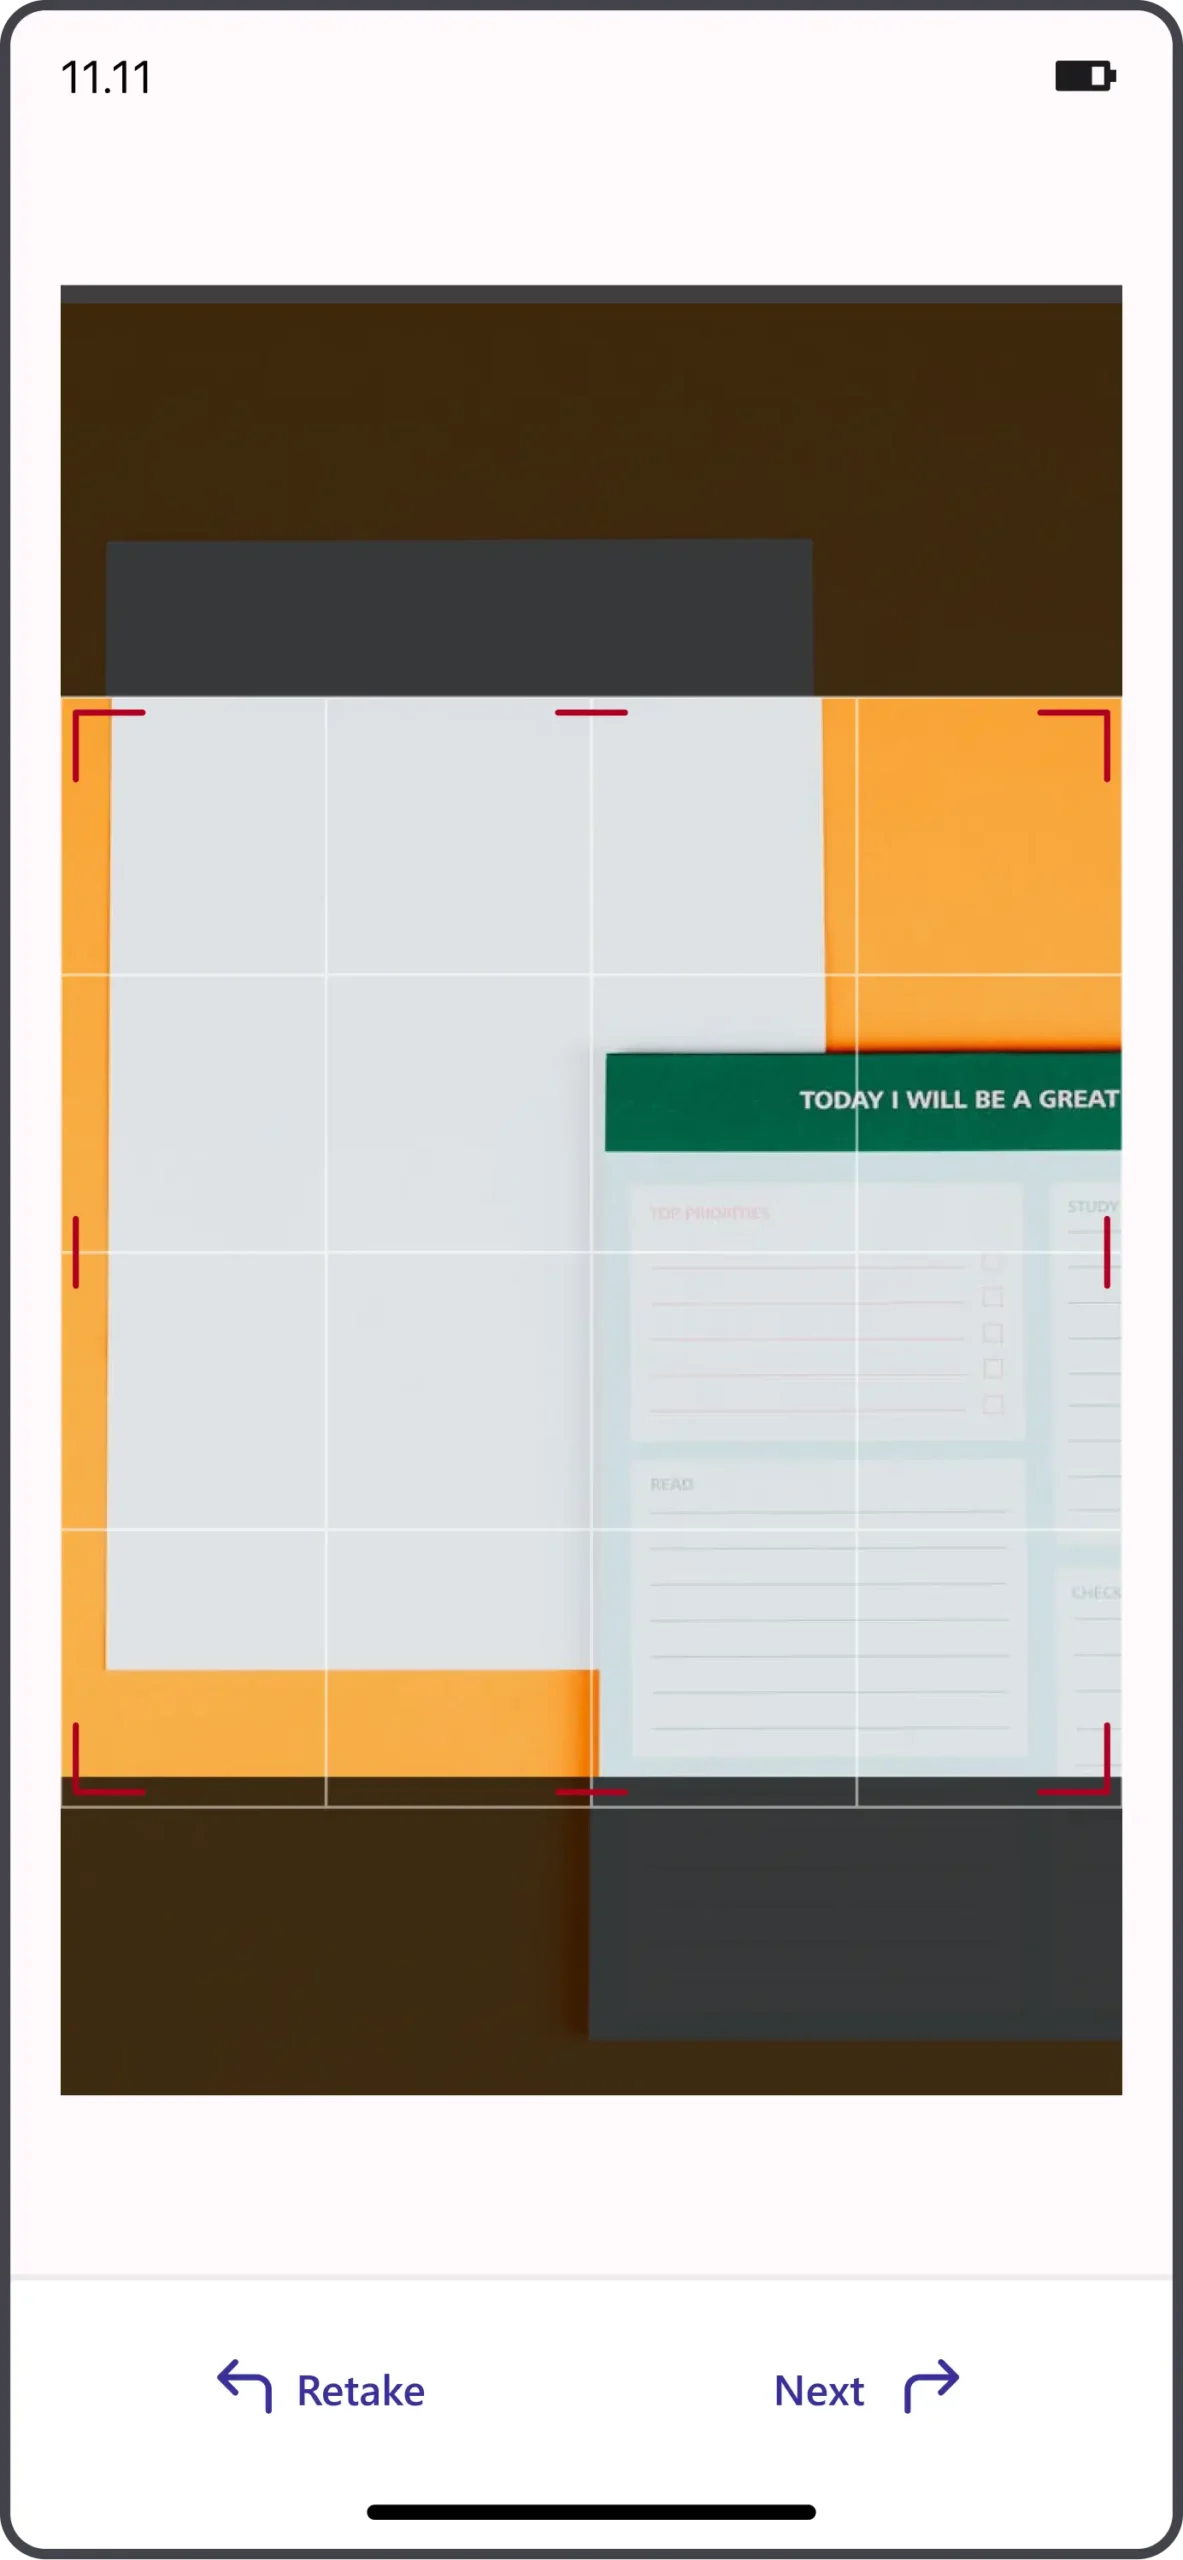
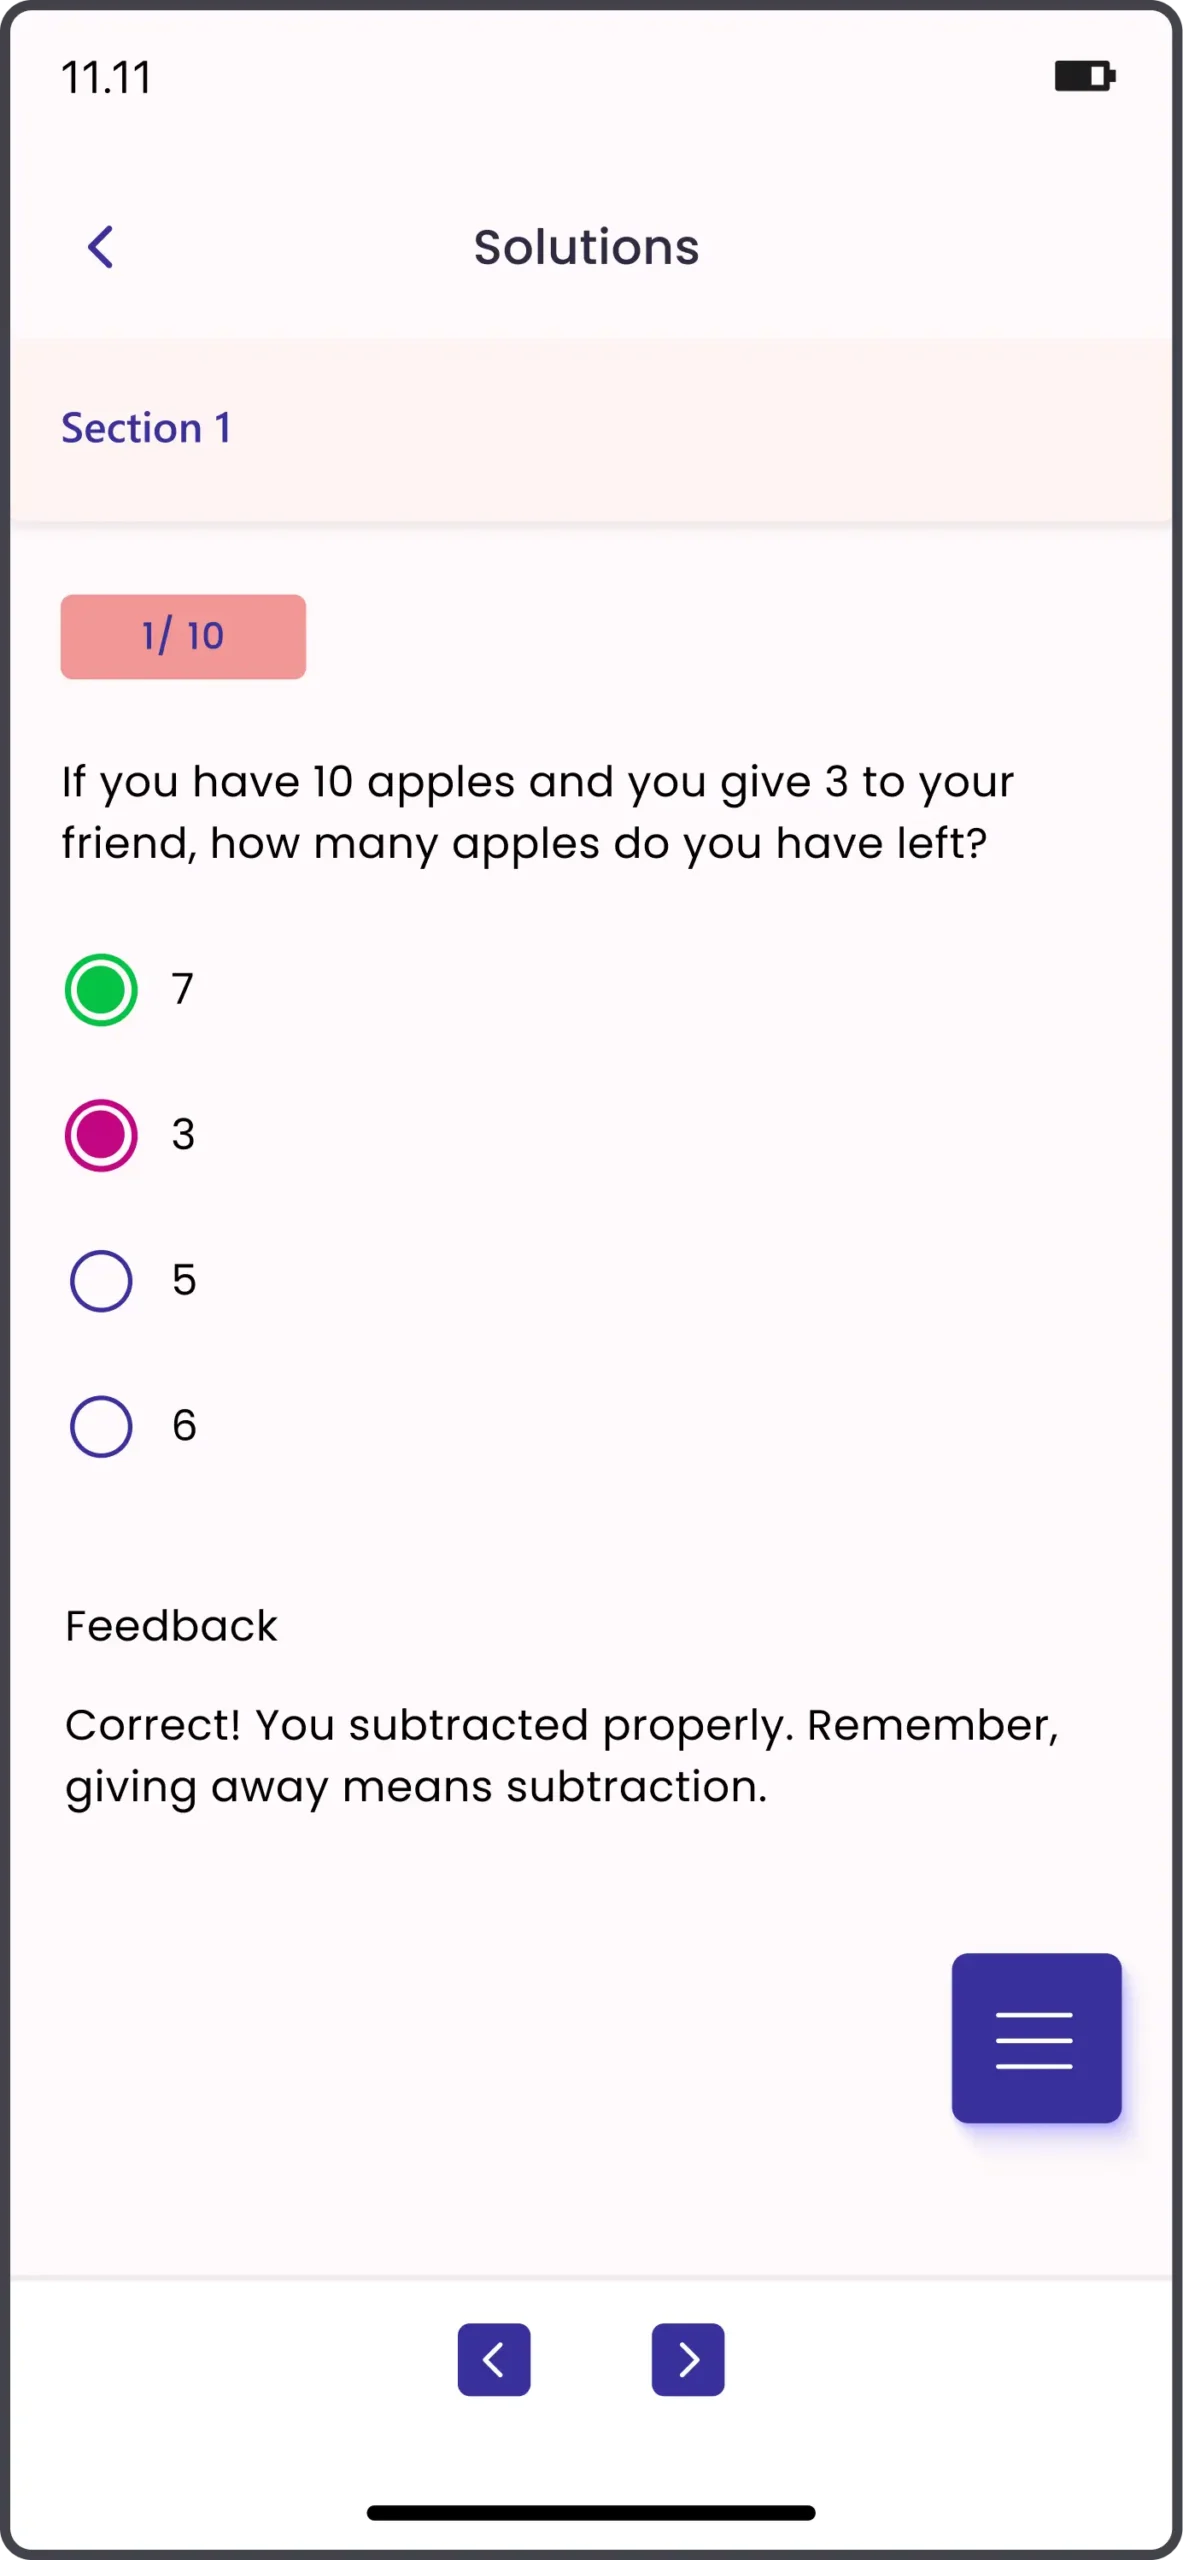
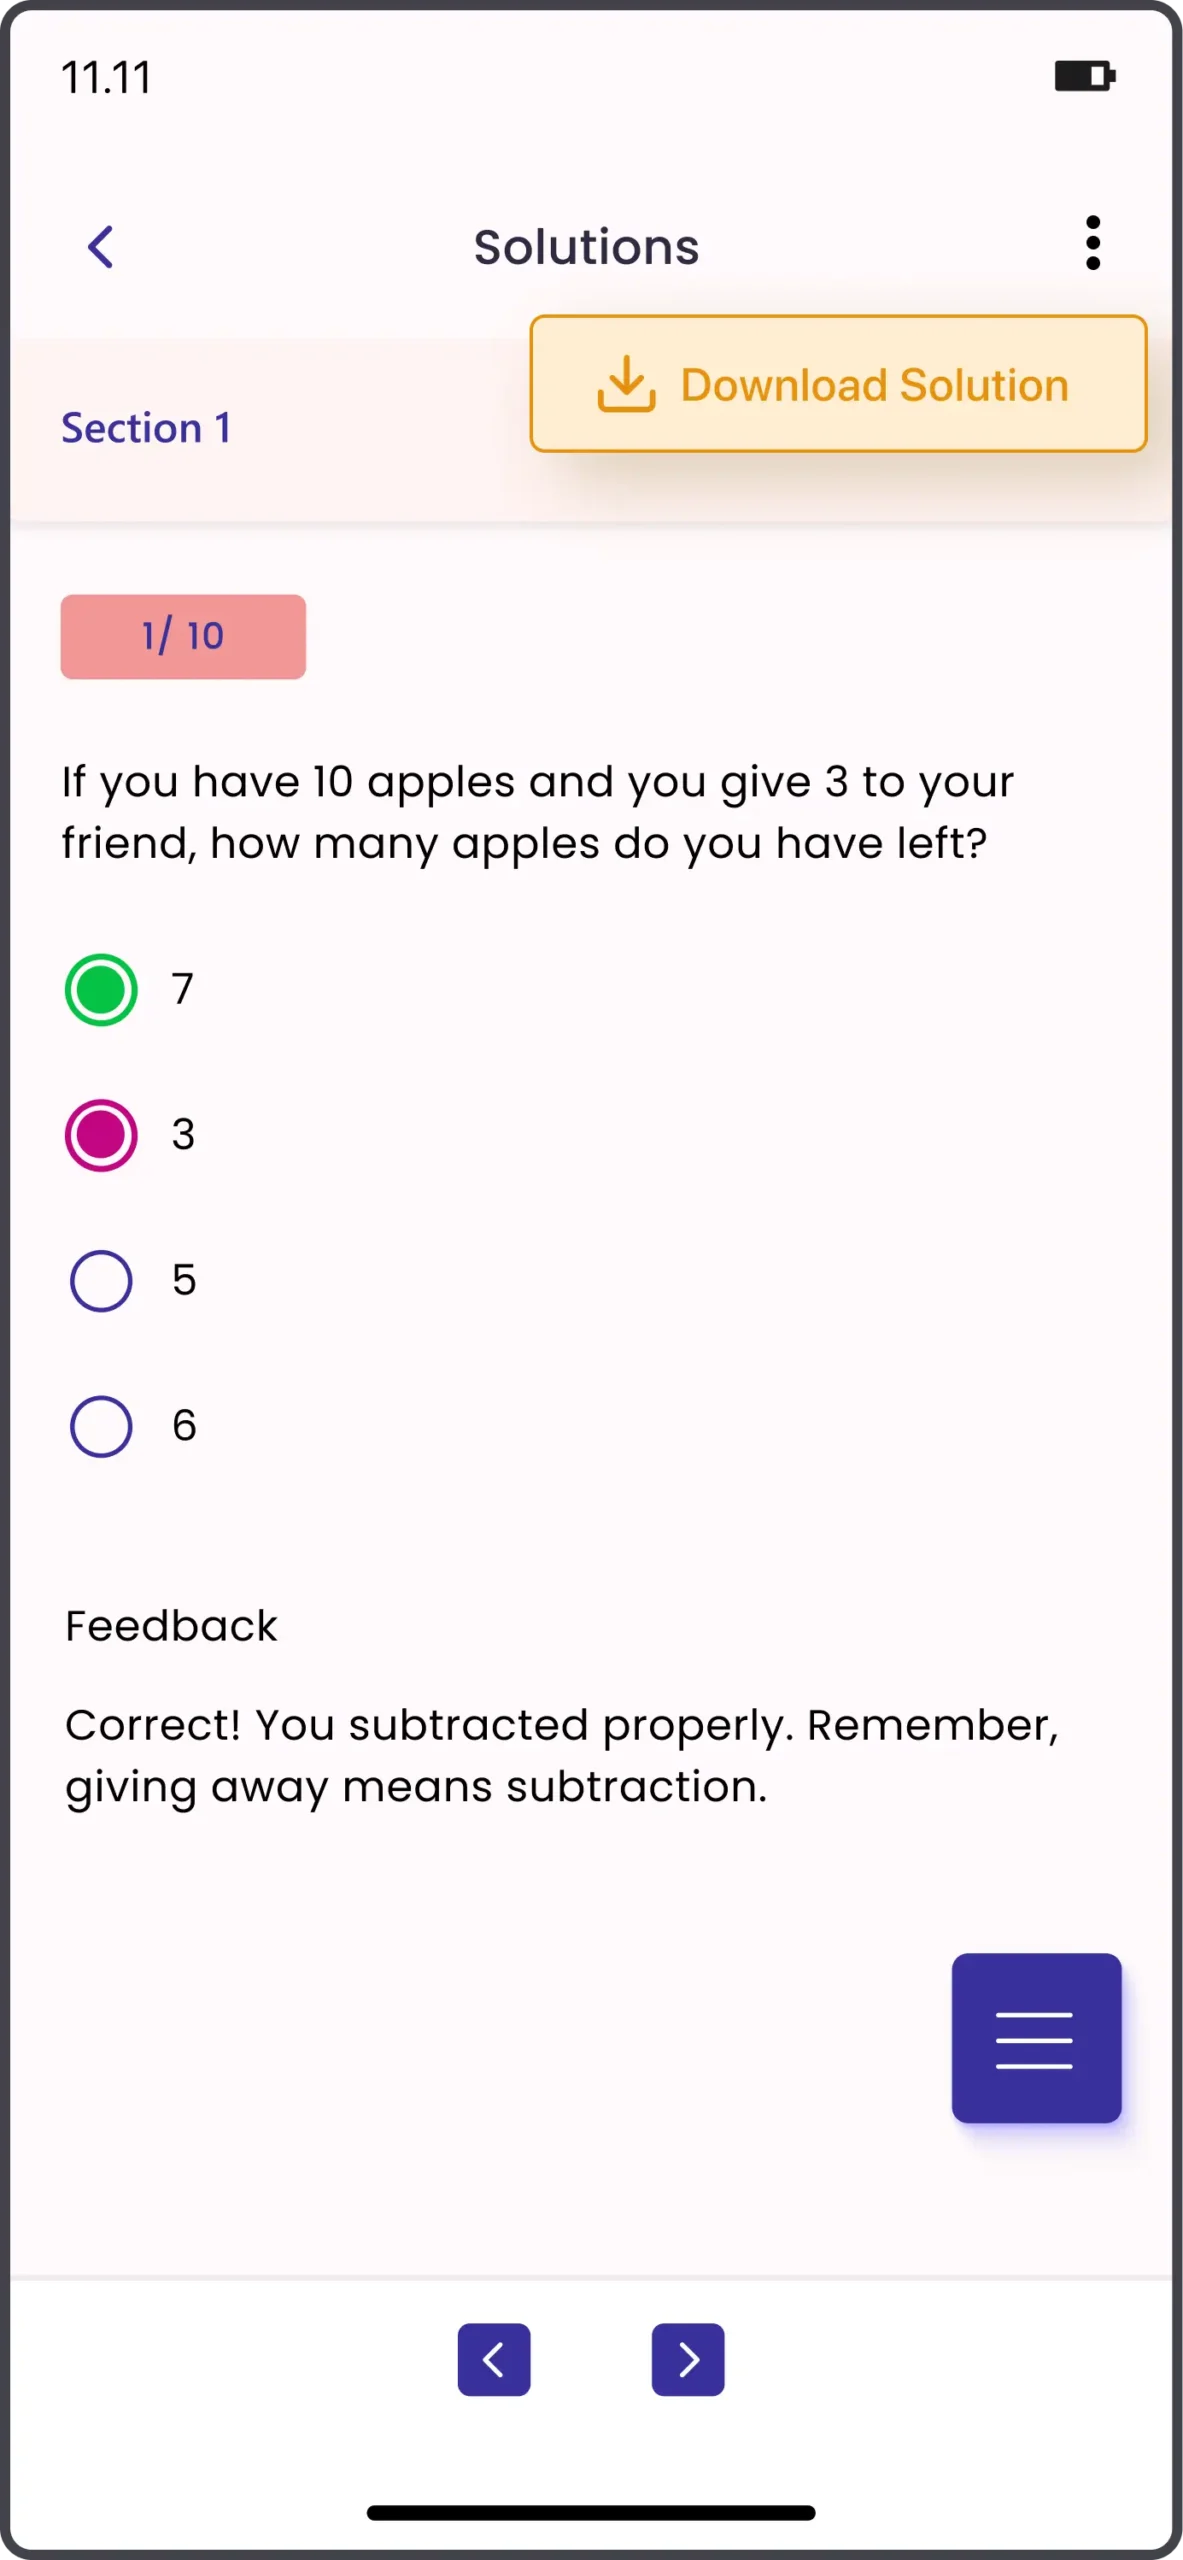
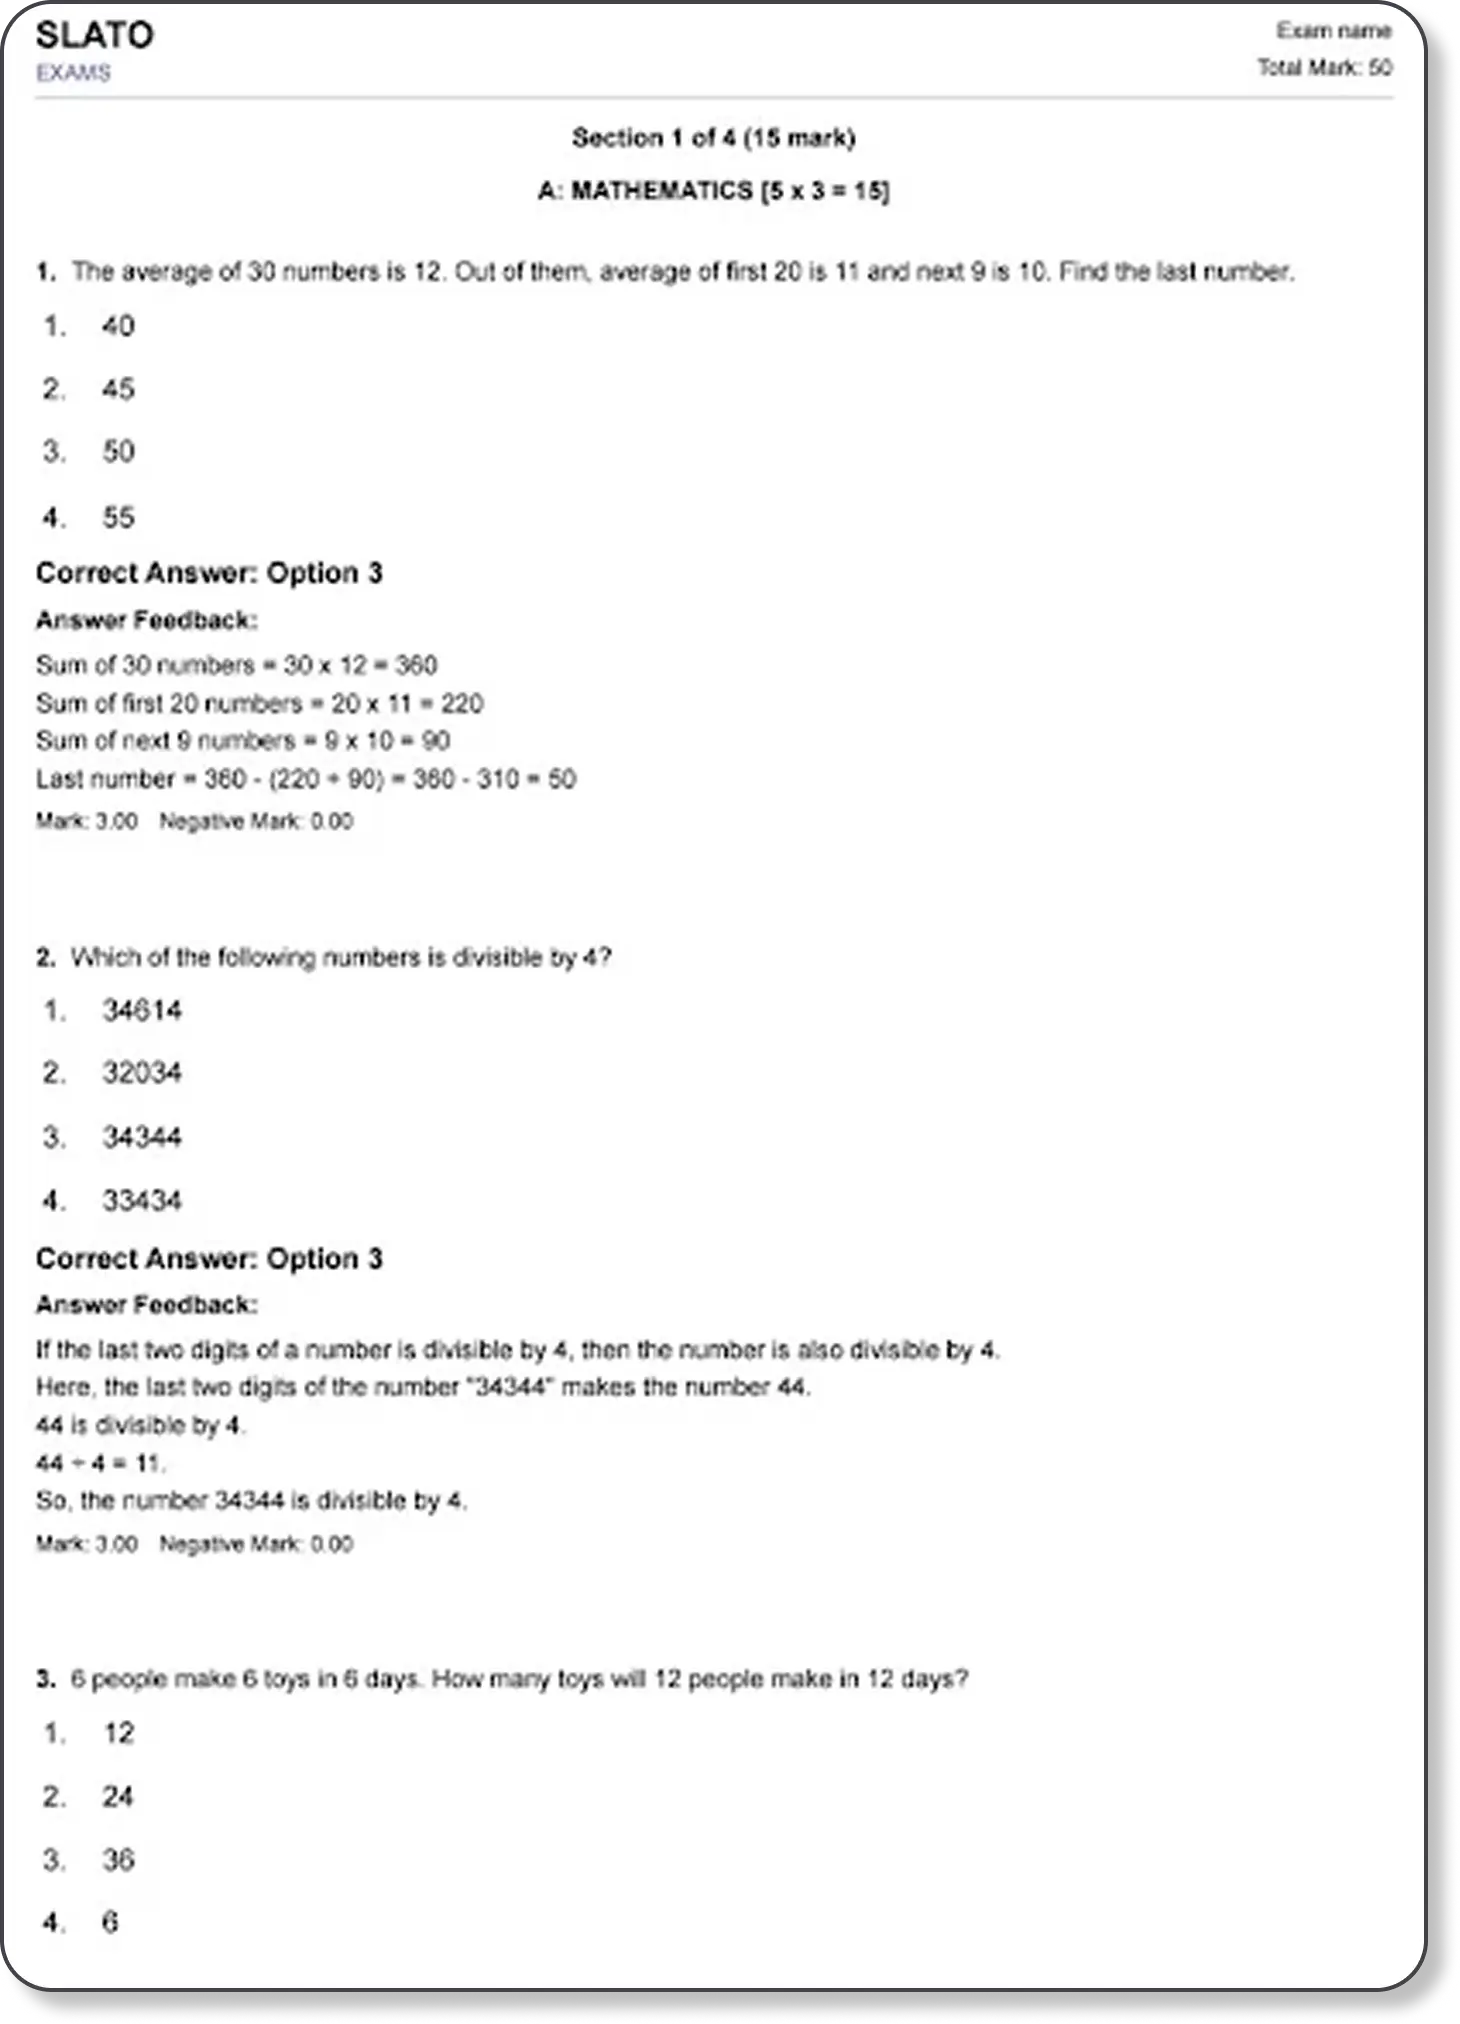
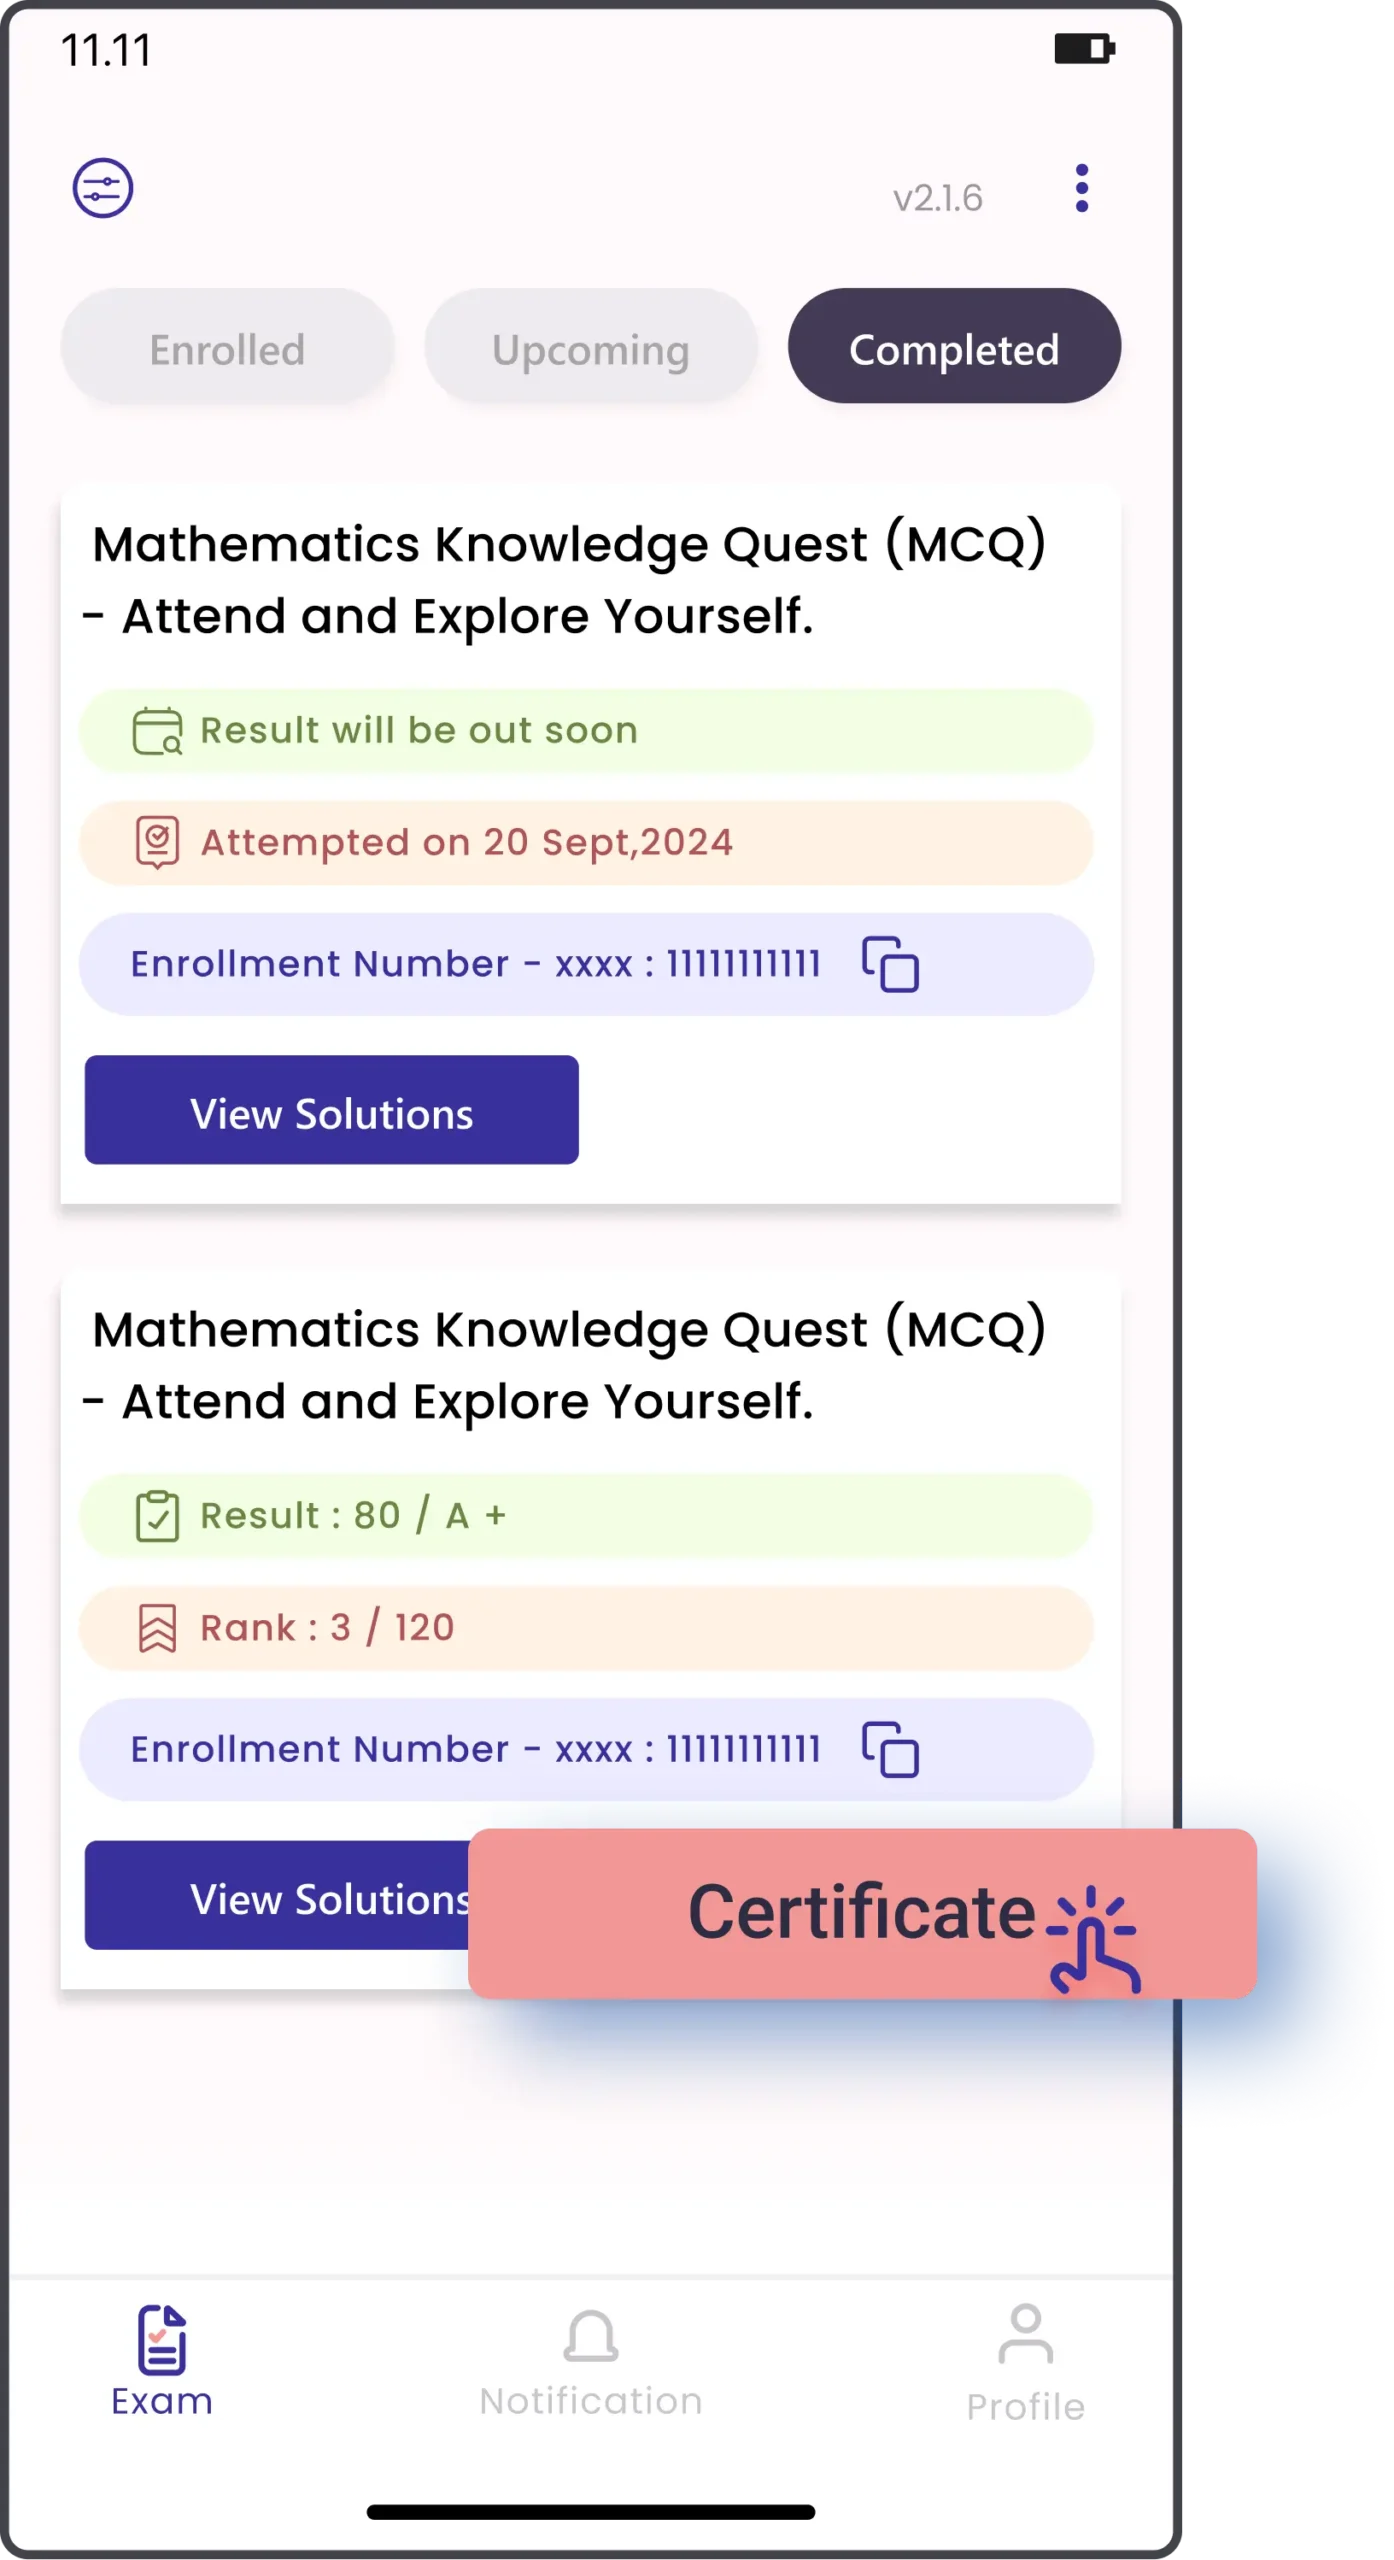
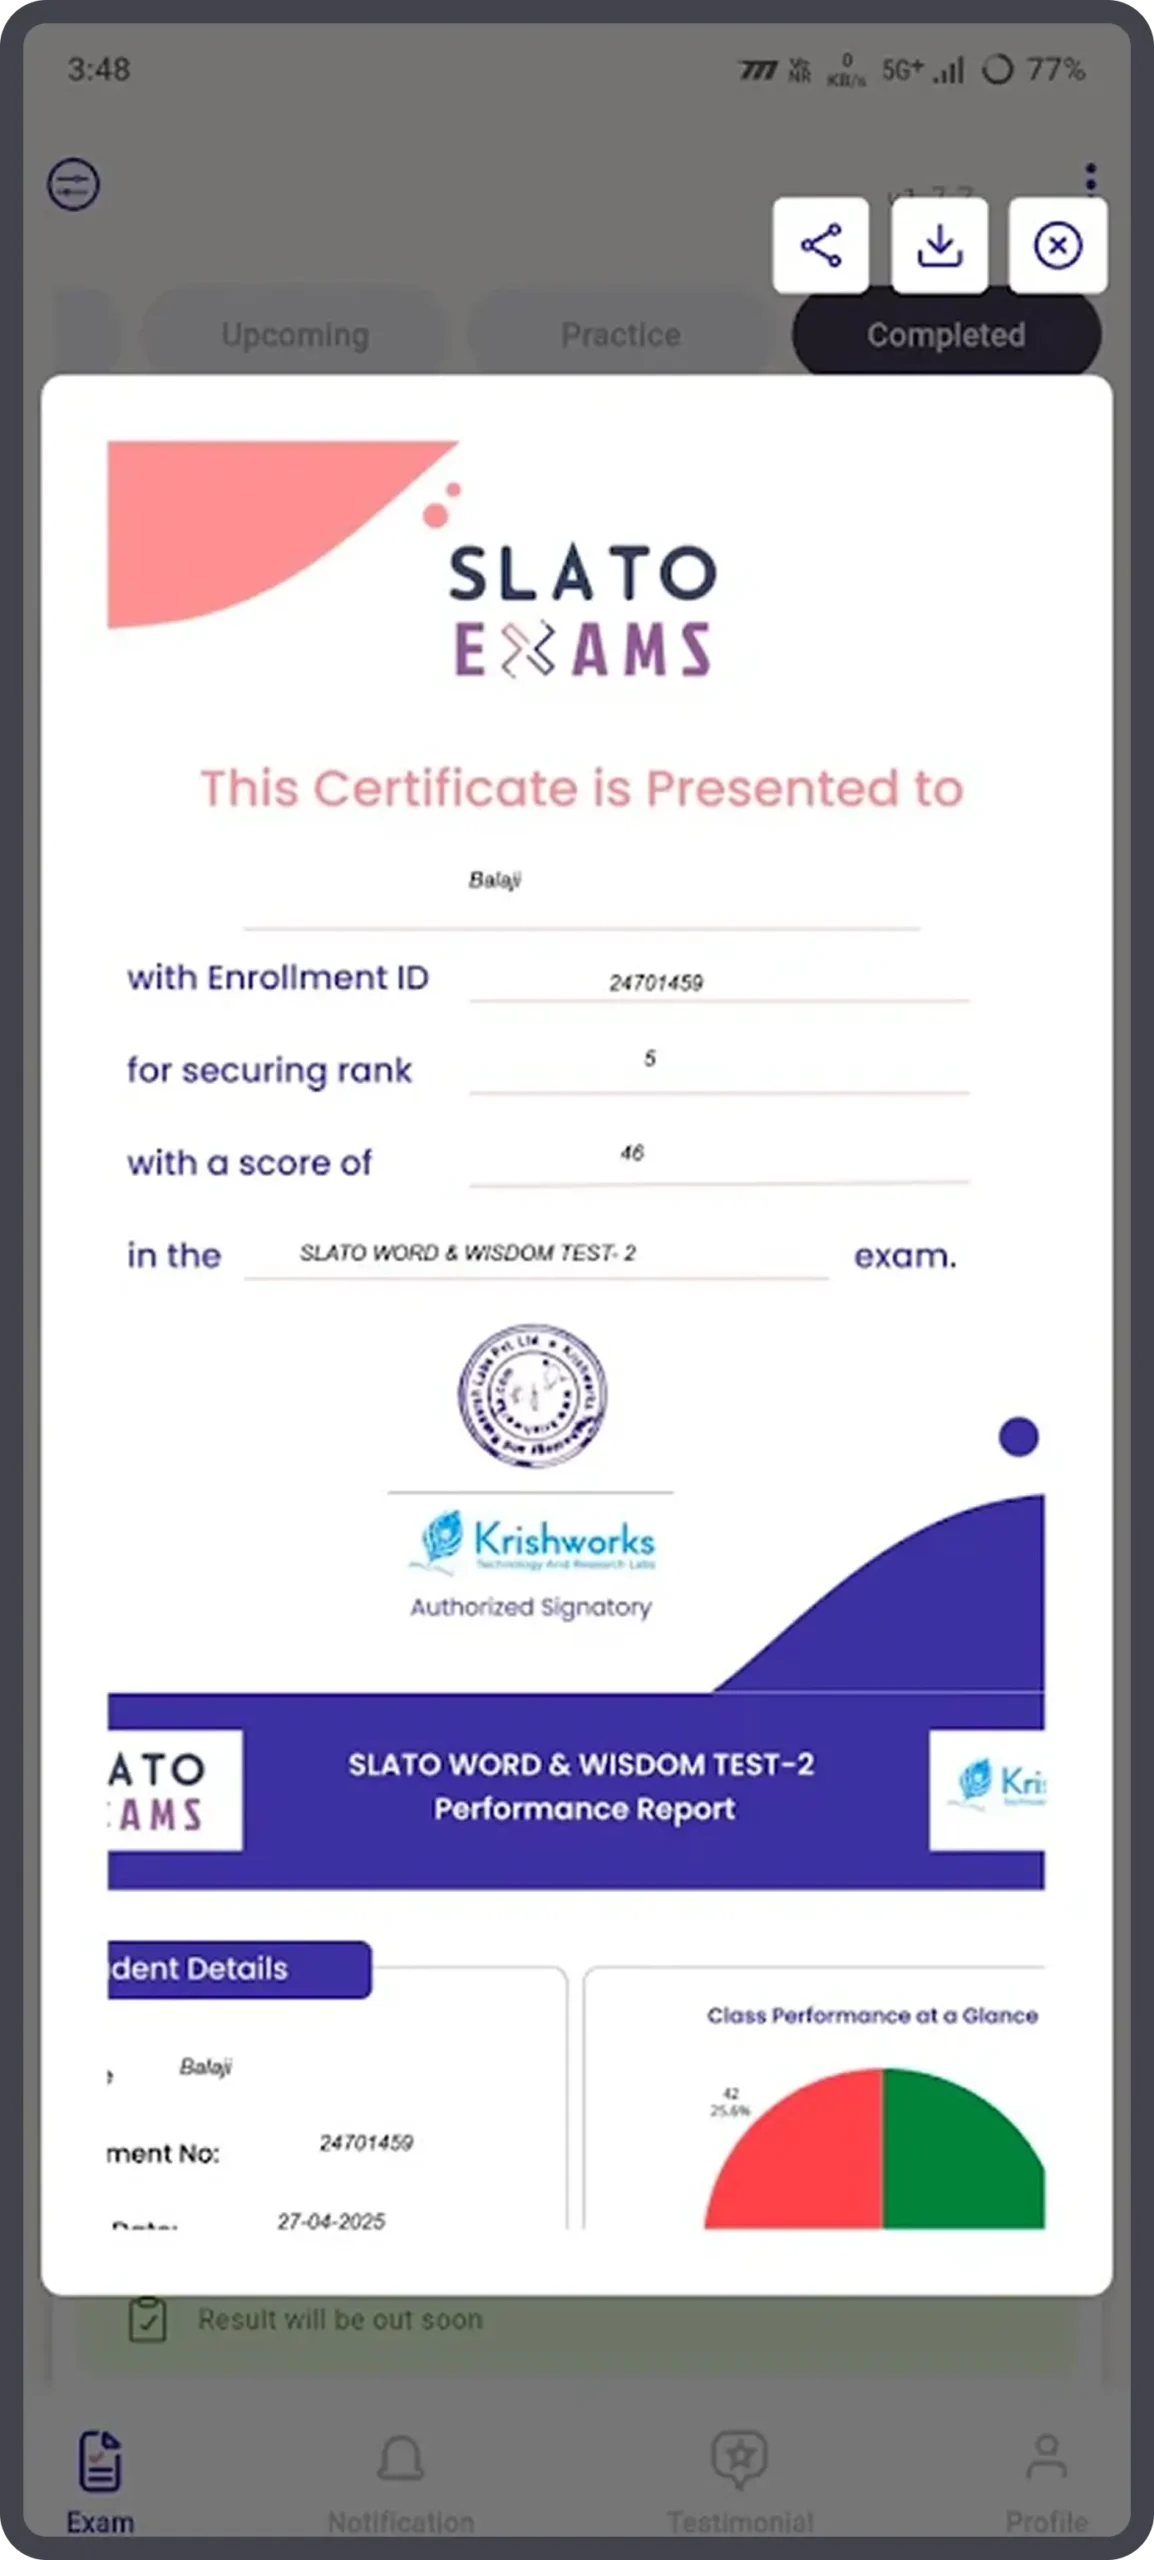
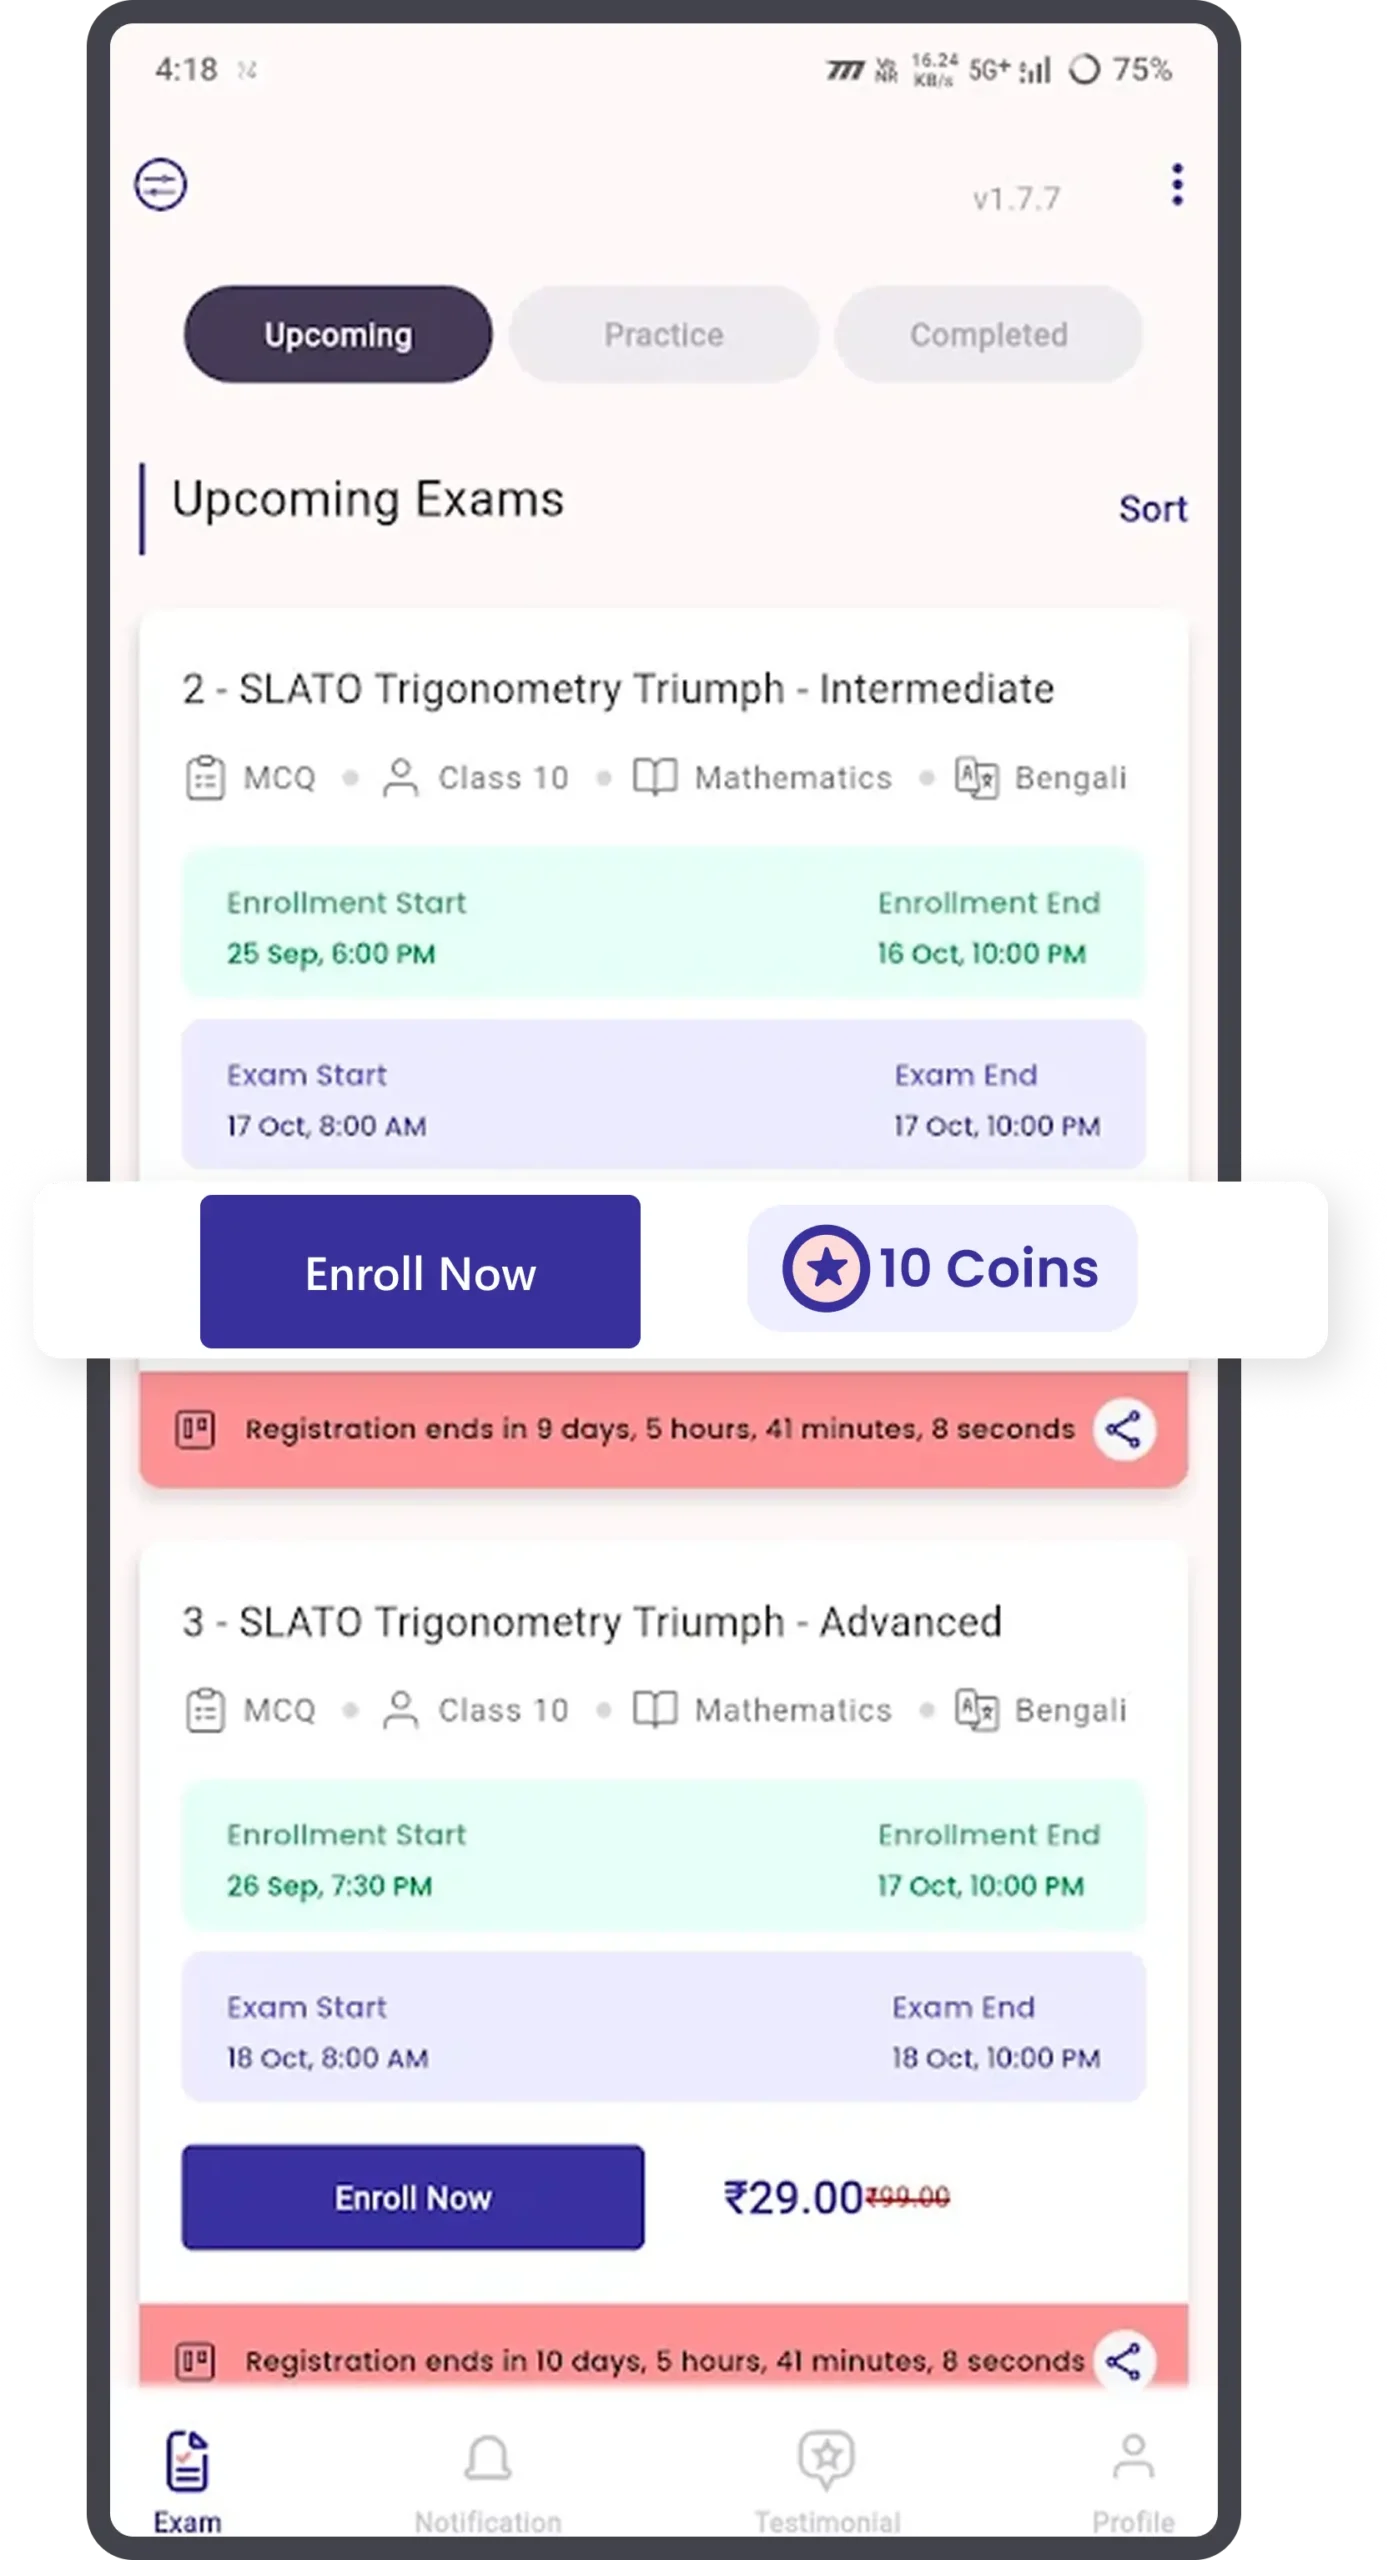
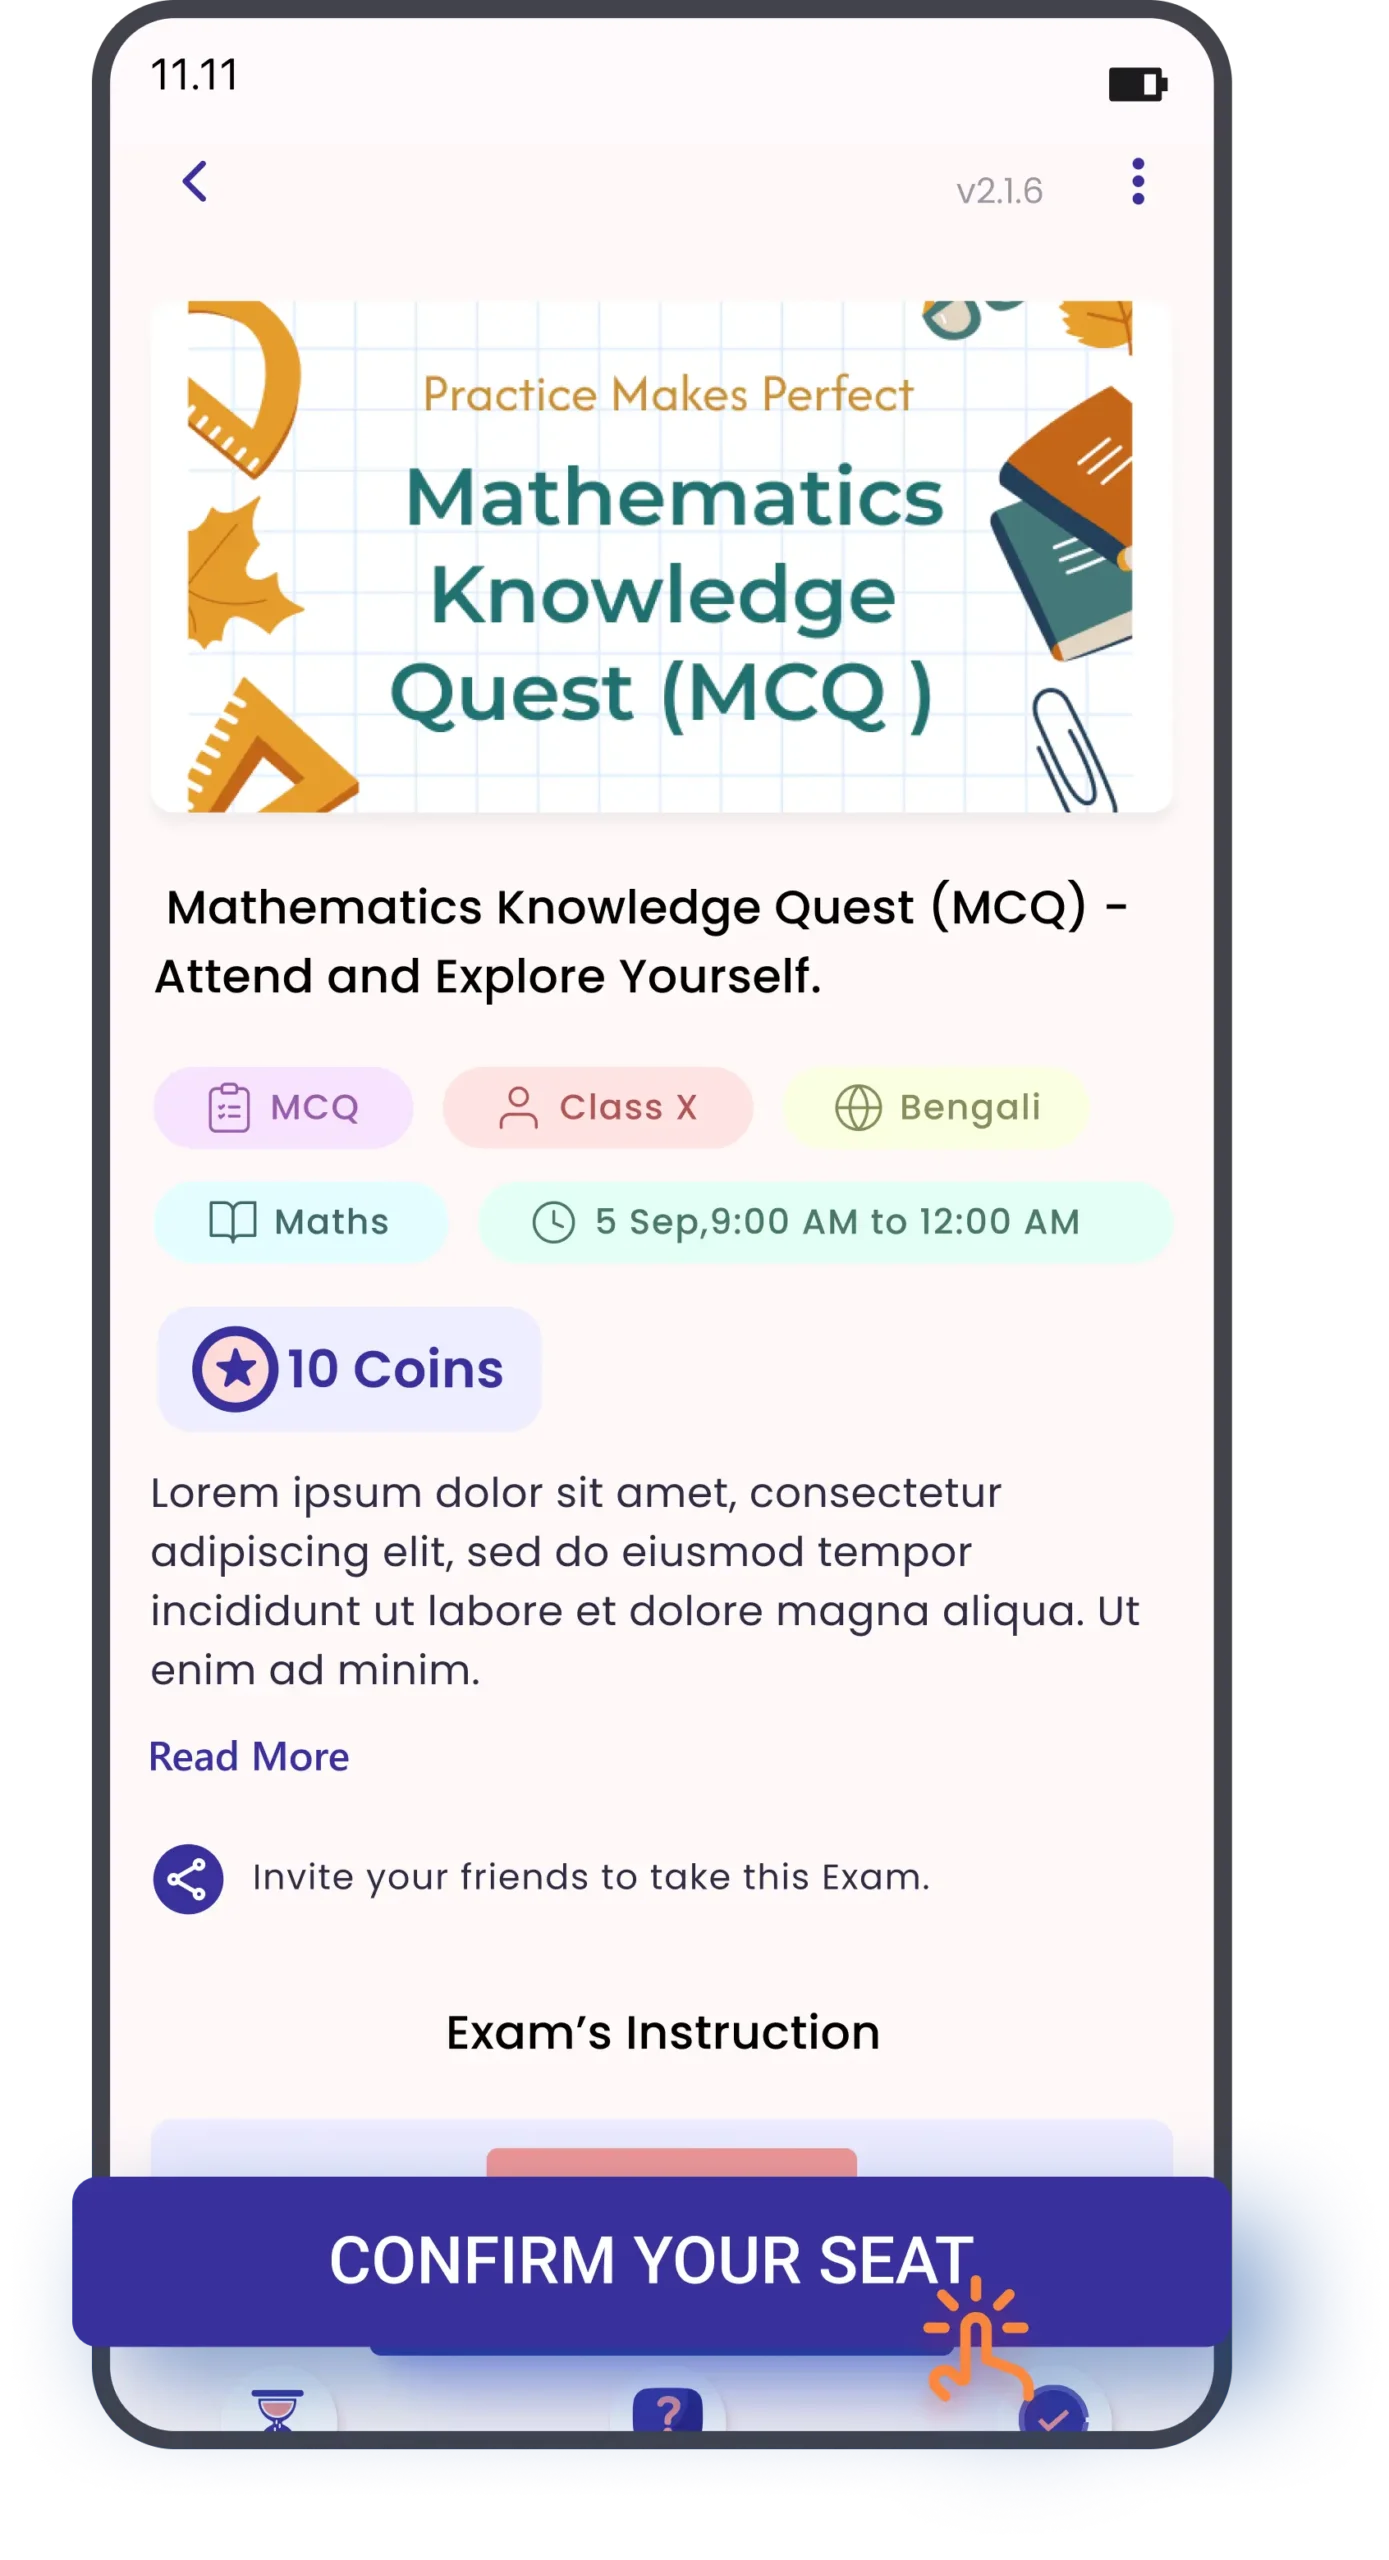
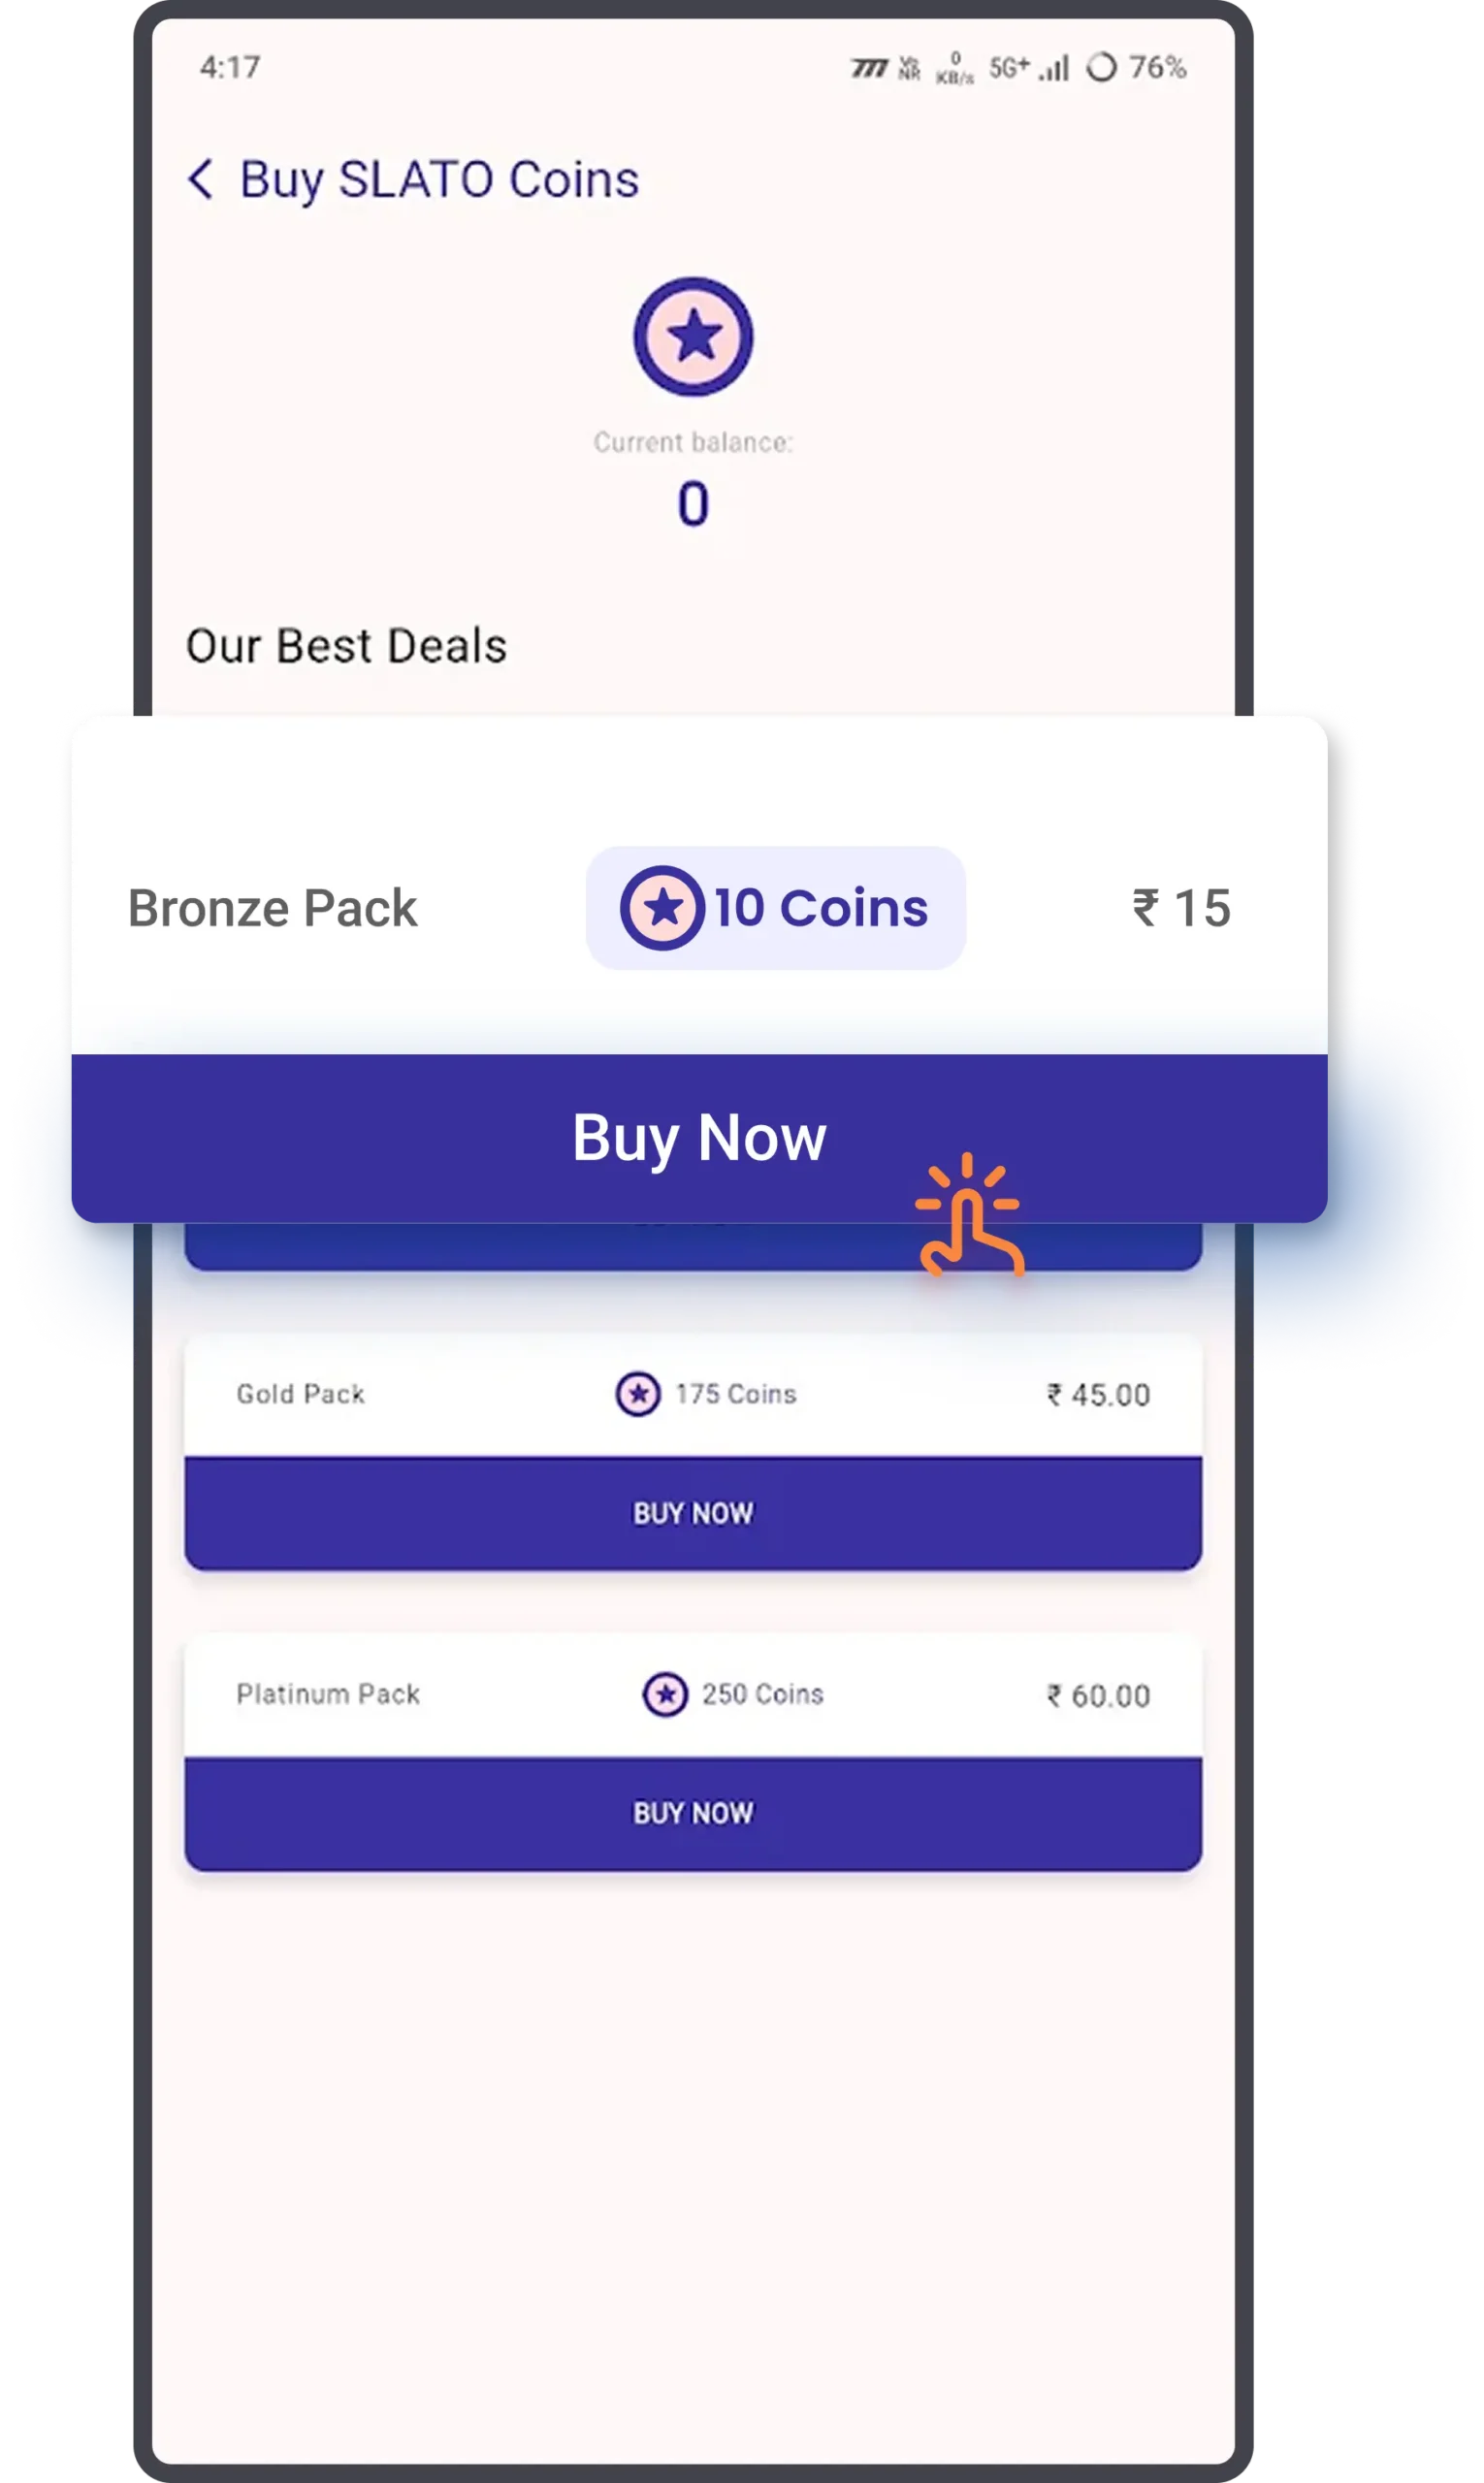
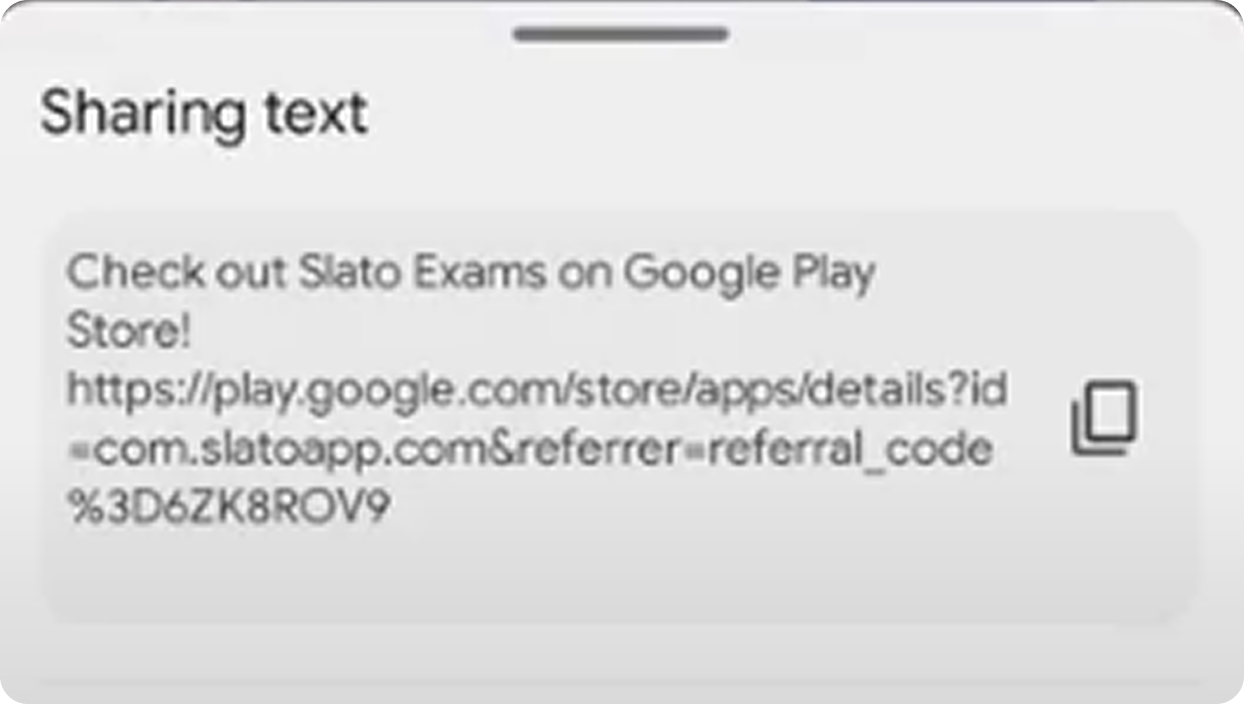
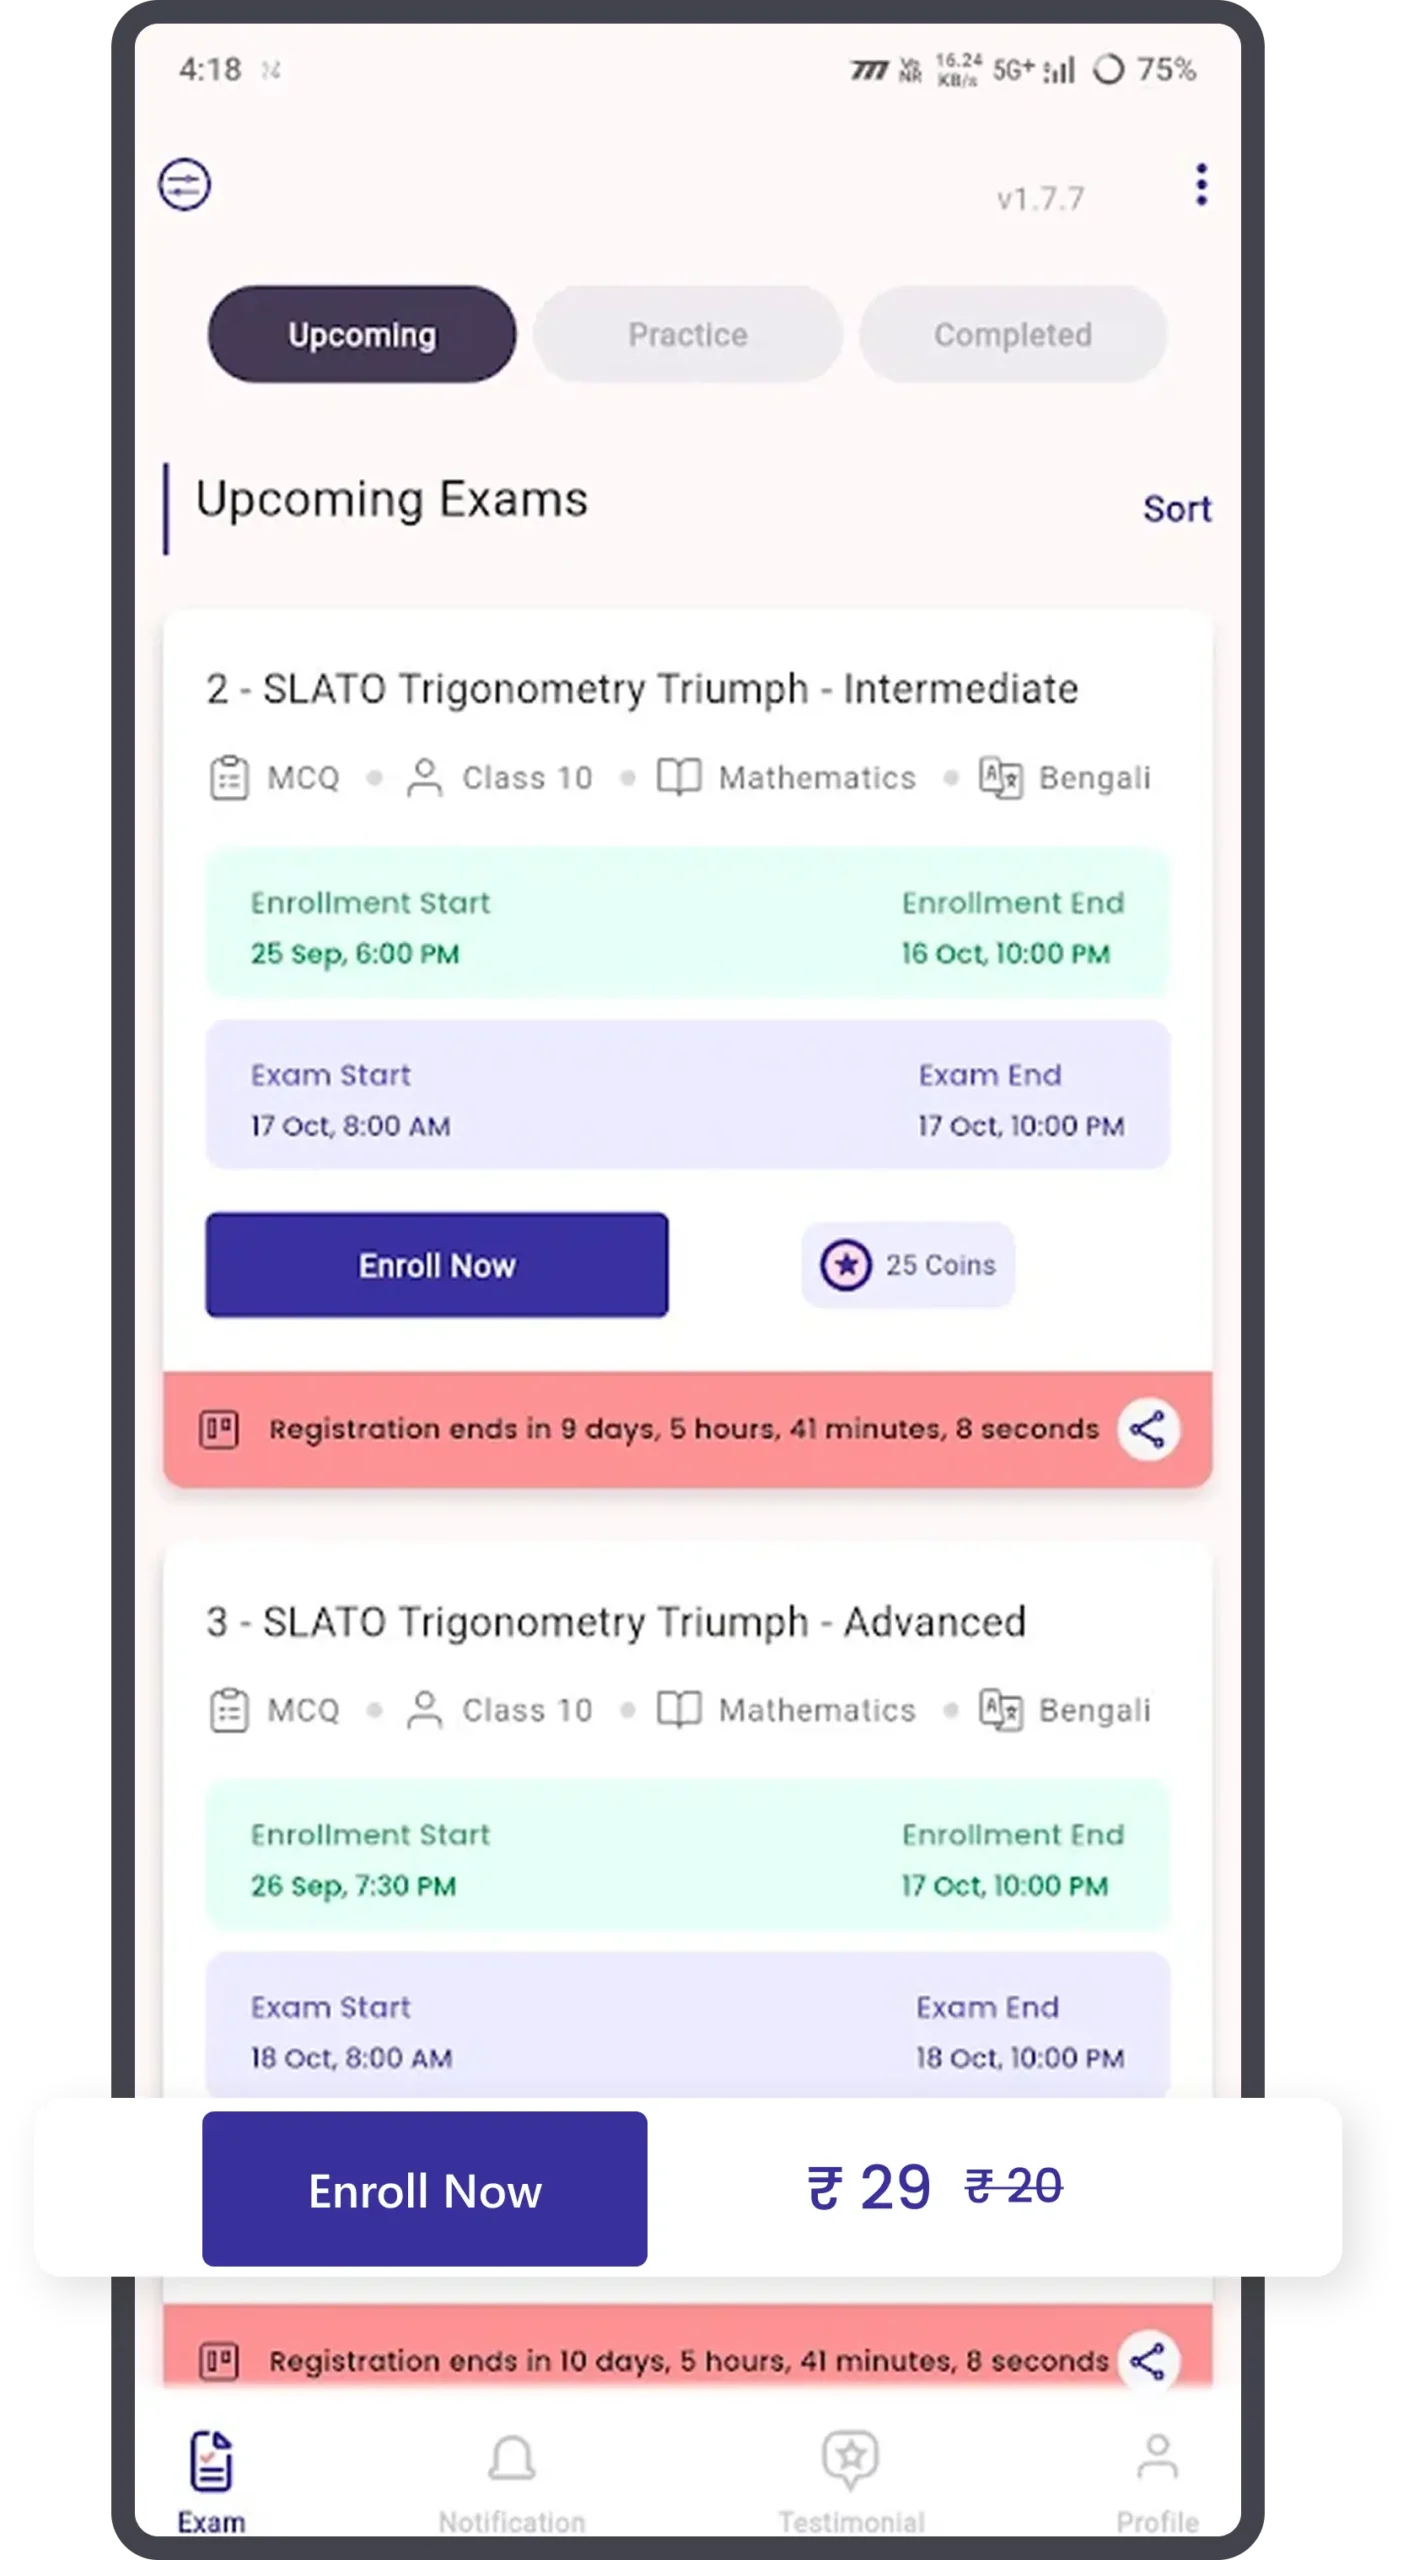
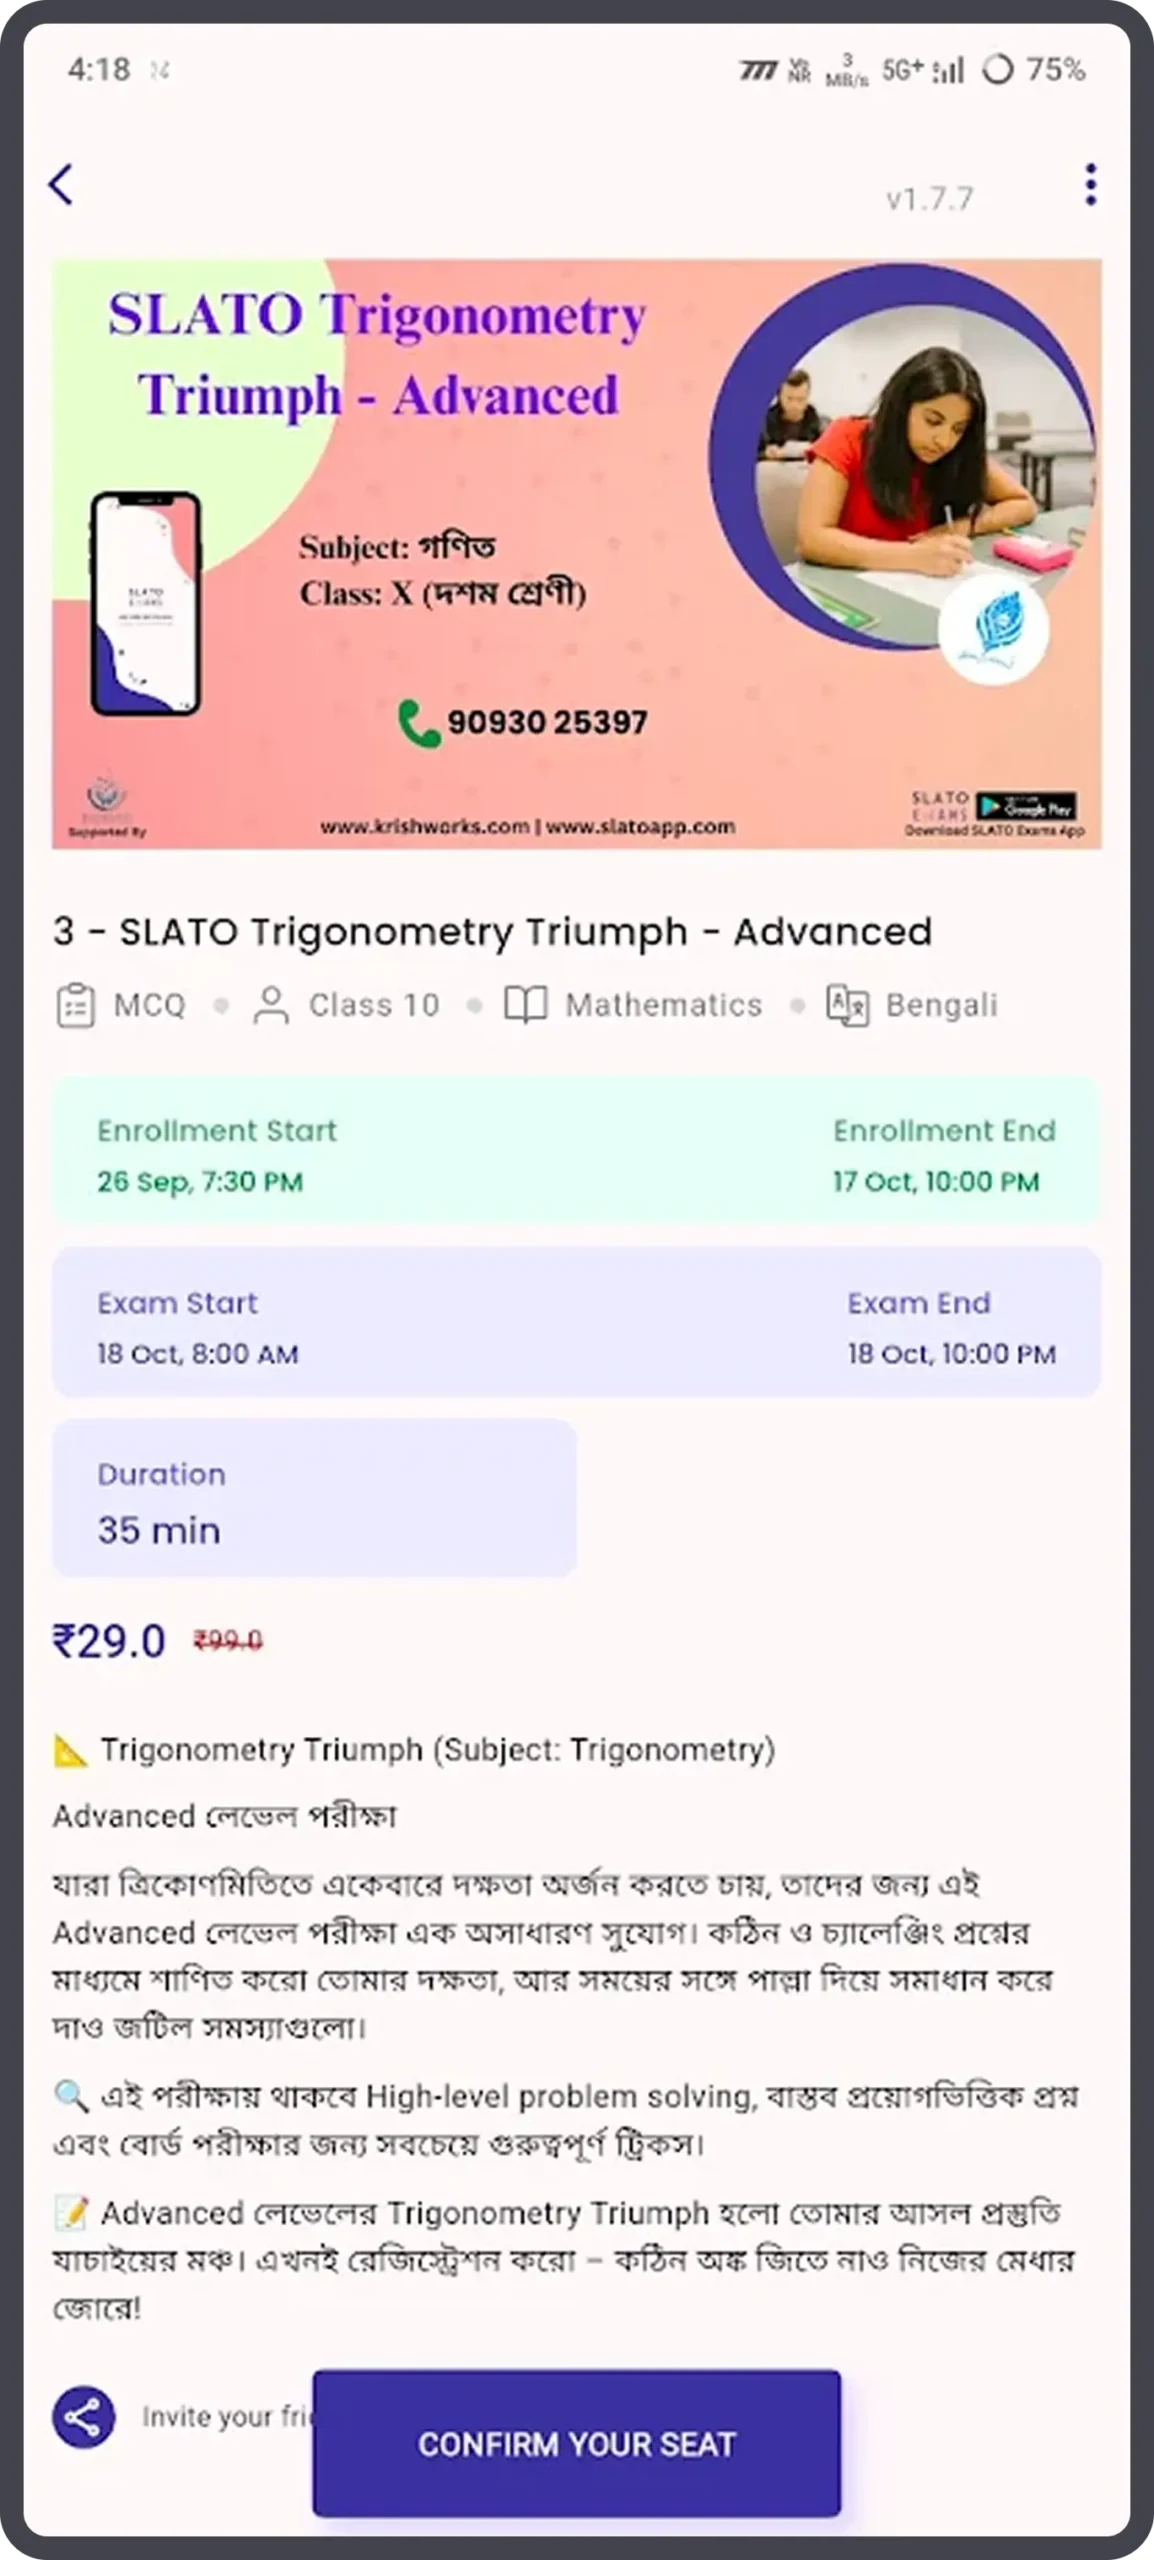
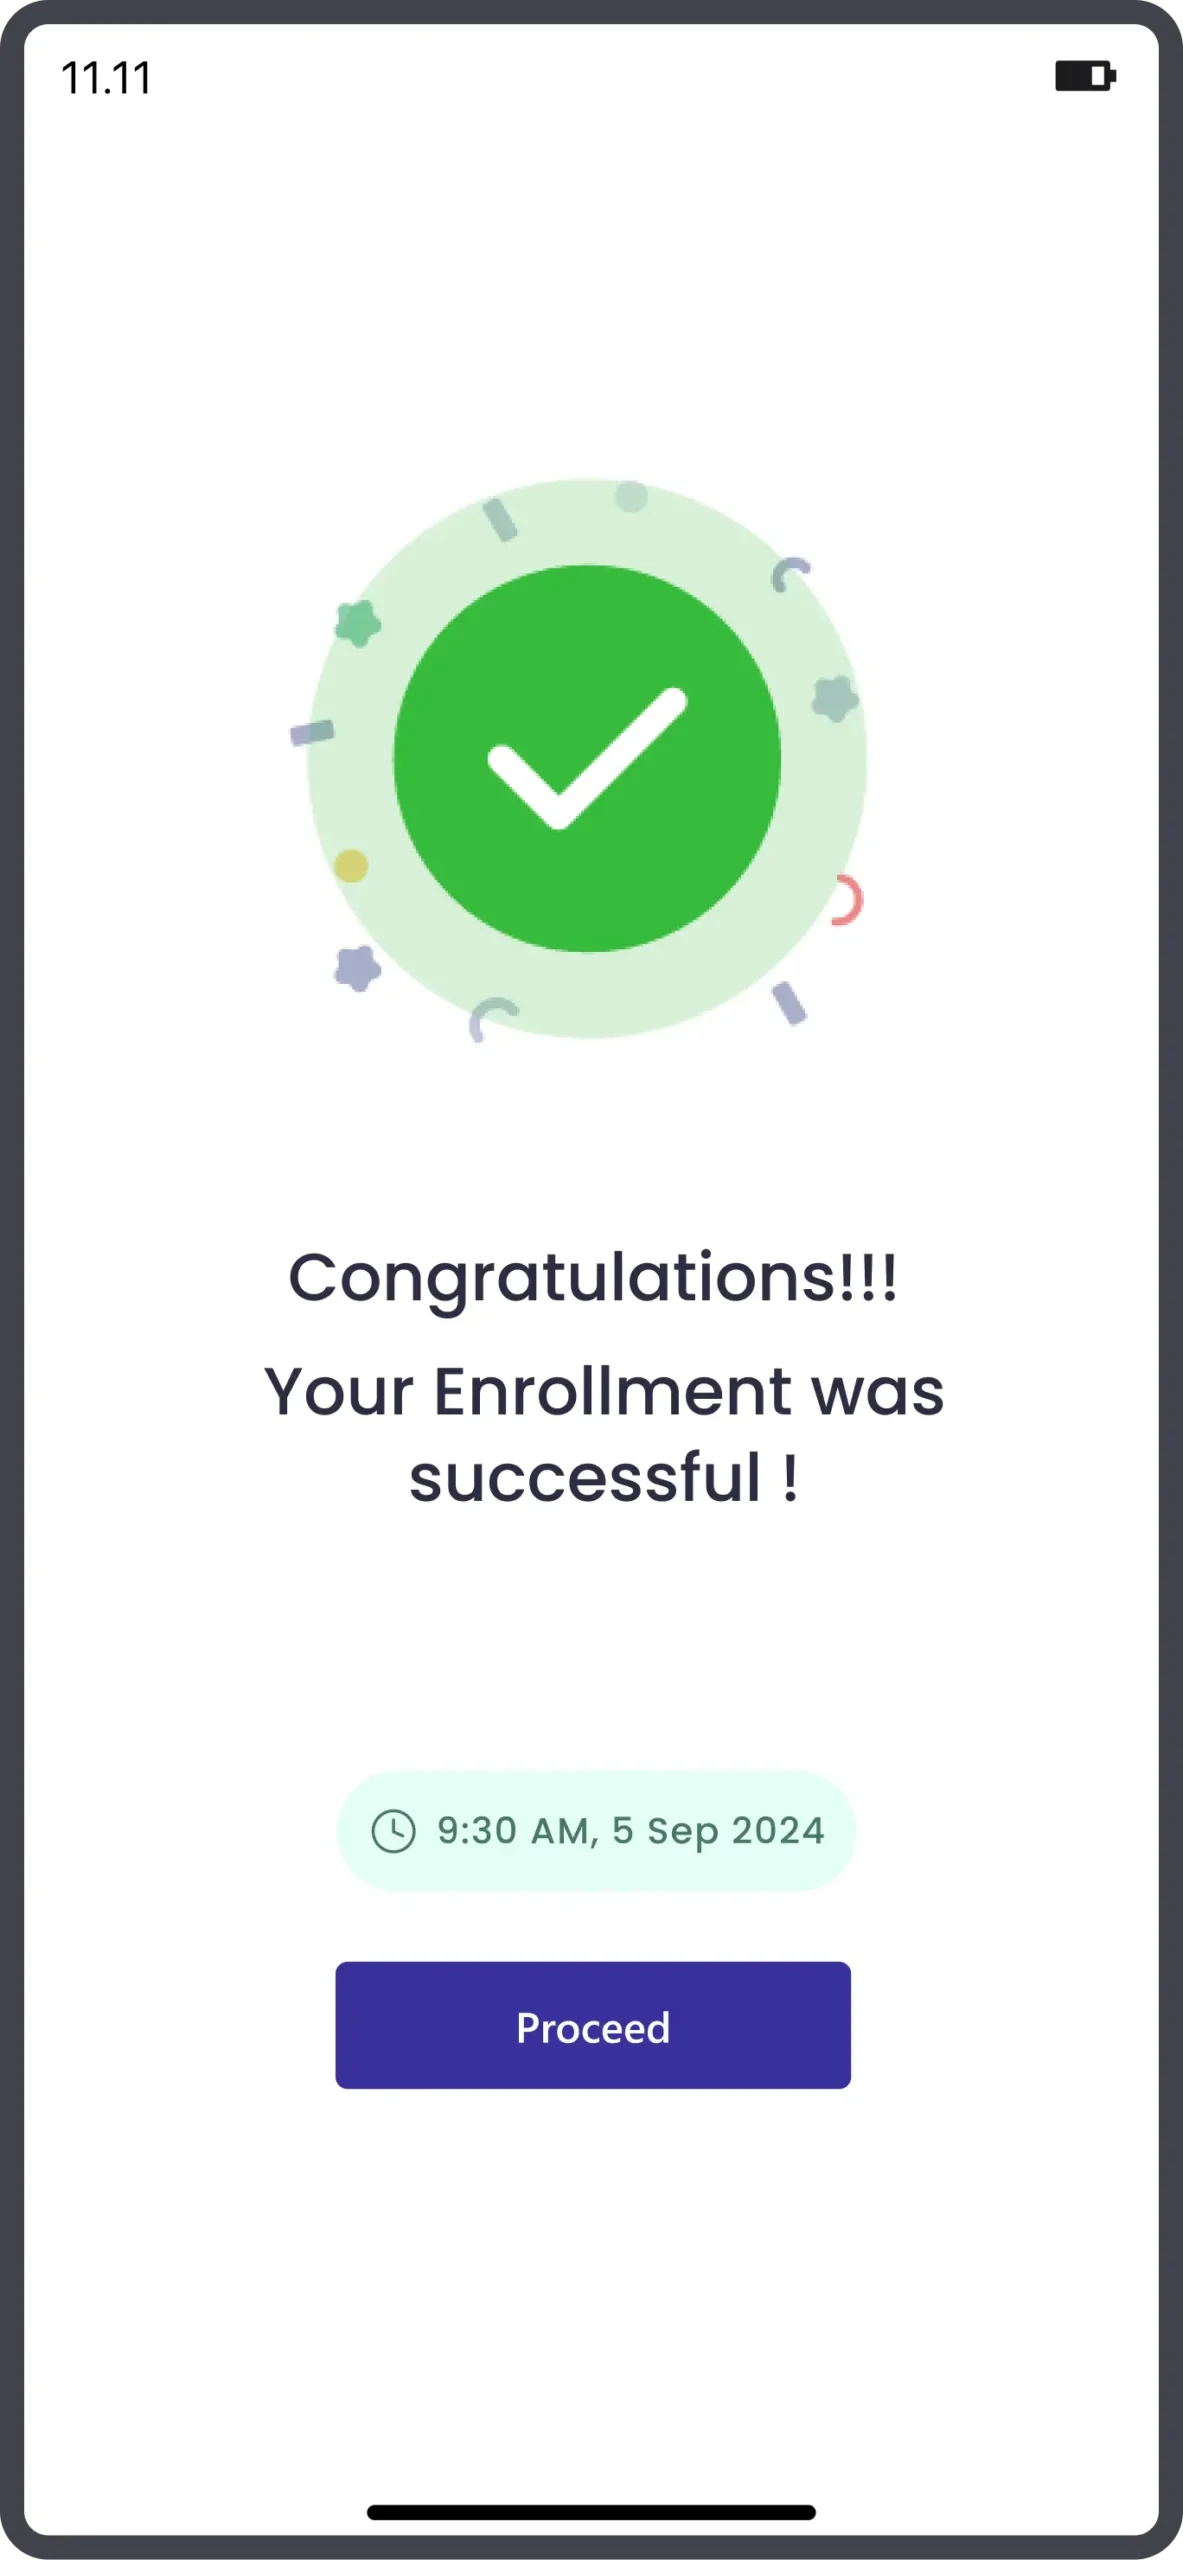
Start Your Exam Journey with Slato Install, sign in, complete your profile, and begin practising. Install SLATO Exams Install SLATO EXAMS AppInstall AppSign InHow to Link with GoogleComplete ProfileHome PagePractice Exams How to Take ExamsHow to Enroll for Free ExamHow to Start Your ExamHow to Answer Subjective ExamView Solution and Download SolutionView Result and Download Certificate Intermediate Exam & Advanced Exam SLATO Coin Based ExamHow to Buy SLATO CoinsHow to Invite Friends and Earn CoinsHow to attempt in Advanced Exams Install SLATO EXAMS App - Install App 1. Scan the QR Code provided. 2. The QR code will redirect you to the Google Play Store Slato Exams app page. 3. Tap on “Install” to download and install the Slato Exams application on your mobile device. 4. Once the installation is complete, Tap Open from the Play Store, or locate the Slato Exams icon on your home screen and tap to open it. 5. When you open the app for the first time, Slato Exams will ask you to enter your Mobile Number. 6. Enter your valid mobile number in the field provided. 7. Tap on Submit. Sign In Notification 8. You will receive a One-Time Password (OTP) on your mobile number. Enter the OTP to verify. 9. If the OTP verification is successful, you will be logged in to the Slato Exams Home Screen. 10. If OTP verification fails or is not received, after 30 seconds the app will automatically display the option “Sign in with Google.” Slato Exams App Home Page 11. Tap Sign in with Google, select your Google account, and grant the required permissions. 12. After successful Google login, you will be redirected to the Slato Exams App Home Screen. How to Link with Google 13. Pop-up Message A message will appear: “What is your email address?” Tap on Choose Google Account. 14. Select Your Account You will see a list of Google accounts already on your phone Tap on the email address you want to use. 15. Allow AccessA small screen may appear asking permission. Tap Allow to continue. 16. Linking in ProgressYou will see a list of Google accounts already on your phone. Tap on the email address you want to use. 17 .Success MessageYou will see: “Your email has been linked successfully.” Your chosen email will now appear in your Slato Exams profile. Complete Profile Completing Your Profile in Slato Exams Follow these steps to fill in your profile and link your email: 1. Open Profile Tap the profile icon at the top of the Home Page. You will see the User Name and Arrow 2. Add Details Enter your Name, Organization/School, Class/Grade, Postal Code, State, and District. 3. Confirm Phone Number 4 .Link Google Account Tap Link your Google account → select an account or Use another account by typing your email and password. (Refer- How to Link with Google Page no-5) 5. Select Gender Choose Male, Female, or Other. 6. Save Your Profile Tap the SAVE button at the bottom. Your profile is now complete Home Page 1. Header Tabs Slato Exams provides Four status filters to help you easily track your courses and exams: Enrolled – Shows the courses or exams you have already joined. Upcoming – Shows the courses or exams that are scheduled for the future. Completed – Shows the courses or exams you have finished successfully. Practice – A separate section where you can take practice tests to prepare before the actual exam. 2. Exam Title 3. Event Information Format: MCQ (Multiple Choice Questions) Class: Class X Subject: Maths Language: Bengali 4. Enrollment Period The Enrollment Period refers to the specific timeframe during which students can register or sign up for this mathematics exam. 5. Exam PeriodThe Exam Period refers to the specific timeframe during which students can actually take the exam after they've enrolled. 6. Enroll Now Large "Enroll Now" button for registration 2. Exam Title 3. Event Information Format: MCQ (Multiple Choice Questions) Class: Class X Subject: Maths Language: Bengali 5. Exam PeriodThe Exam Period refers to the specific timeframe during which students can actually take the exam after they've enrolled. 7. Urgency indicator "Enrollment ends in 1 DAY!" with a share icon 8. Bottom Navigation Three tabs: Exam (currently active), Notification, and Profile Practice Exams 1. Tap on the Practice tab at the top. (a) You will see a list of available practice exams shown as cards. 2. Each exam card tells you (b) Exam Name (e.g., Word, Number & Wonder Quest) Card Details (c)Format (e.g., MCQ – multiple choice questions) Class level (e.g., Class 4) Subjects covered (Math, English, Science, etc.) Language options (English, Bengali, etc.) If you already tried that exam, you will see your Result instead. (d) To begin, press the Start Exam button 3. Learn About the Exam When you tap on an exam card, the Exam Details page opens. Here you can read: What the exam is about. Why this exam is useful (fun, helps learning, real-life examples). The subjects, class, and language again. 3. Start the Exam The exam will start with MCQ (multiple choice) questions. Here’s how it works: Read the question carefully. Tap on the answer you think is correct. Submit your answer. Move to the next question. Continue until you finish all questions. How to Enroll for Free Exam 2. Confirm Your Seat After selecting the exam, you’ll see details such as: Exam Name & Subject (e.g., Mathematics Knowledge Quest). Language (e.g., Bengali). Date & Time (start and end). 1. Browse & Select Exam Open the app and go to the Exam tab. Exams are shown under Enrolled, Upcoming, and Completed sections. Select your exam from the Upcoming list. Check the Exam Start and Exam End dates before enrolling. Tap Confirm Your Seat to proceed with enrollment. How to Start Your Exam Step 2: Gender Select your gender: Male or Female. Tap Next. Step 4: PIN Code Enter your PIN Code. Tap Next. 3. Completing Your Profile You will be directed to the Complete Your Profile form Step 1: Personal Details Name: Enter your full name. (This will appear on certificates, so ensure it is correct.) Tap Next. Step 3: School Name Enter your School Name. Tap Next. 4. Enrollment Confirmation Once you confirm, a success screen appears: “Your Enrollment was Successful!” Shows the exam date and time. 5. Start the Exam On the exam day, go to the Enrolled tab. Note: You’ll also see exam reminders like “Exam starts in 1 Day!” The question paper will be downloaded automatically to your device. If the question paper is not downloaded automatically, you can download it manually: Tap on the Download Question Paper button. The file will be saved on your phone for offline use. 6. Exam Instructions Screen Before starting, read the Exam’s Instructions carefully. 7. Tabs available About – General guidelines. Marking Scheme – How marks are calculated. Tutorials – Extra help (if provided). 1. Timer (top): Shows how much time is left for the exam. 3. Question Number: Example: 1/10 means you are on Question 1 out of 10. 5. Answer Options: Tap the circle to select your answer. 2. Section Info: Current section name and total marks. 4. Question Text: The question you need to answer. 6.Navigation Buttons: Previous → Go back to the earlier question. Next → Move to the next question. 8. Attempt Questions Answering Questions At the top, you will see a timer showing how much time is left. Each section will show the total marks and the marks for each question. The question number tells you which question you are on. For MCQ (multiple-choice questions) Answering Questions Read the question carefully. Tap on the option (a, b, c, or d) that you think is correct. Press Next to save your answer and move forward. If you want to check or change, tap Previous to go back. 9. Submit Exam Make sure every answer is saved. Tap on the option (a, b, c, or d) that you think is correct. When the timer runs out, the exam will auto-submit. If you finish early, you can tap Submit Exam yourself. How to Answer Subjective Exam Step 2: Take Photo of Your Answer Sheet Camera will open automatically. Place your sheet on a flat surface with good lighting. Tap the white circle button to capture. If the photo is not clear, tap Cancel / Retake and click again. Step 4: Preview Answer Sheet Your photo will be shown as a preview. If you have multiple pages: Tap the + button and repeat the capture process. Once all pages are added, tap Upload. 1. Open Question Each question will be displayed on the screen. To upload your handwritten answer, click on “Upload Answer”. Step 3: Crop Adjust frame → Tap Next. Step 5. Upload & Continue Wait till upload bar reaches 100%. Green tick = Upload successful. If needed, tap Re-upload. Then tap Save & Next to move to the next question. Repeat for all questions. View Solution and Download Solution 1. Open Completed Exams Go to the Exam tab → Select Completed. Choose your test (e.g., SLATO WORD & WISDOM TEST-1). You’ll see: Result: Marks scored in the test. Result: Marks scored in the test. Enrollment ID: A unique ID for your exam attempt. Tap View Solutions to check correct answers with detailed explanations. 2. Select Exam Tap on your completed exam → Choose View Solutions. The solution screen opens with: Section & Marks: Example – Section A [1×5=5]. Question Text: Shown in your exam language. Your Answer vs Correct Answer: Red = Wrong answer Green = Correct answer Feedback / Explanation: Step-by-step reasoning for the correct answer. 3. Navigation Use Previous and Next buttons to move between questions. Review every question with detailed feedback. 4. Download Solution (PDF) On the Solution screen, tap the Menu (⋮) icon. Select Download Solution to save the full answer key as a PDF file. The downloaded PDF includes all questions, answers, and explanations for offline review. View Result and Download Certificate 3. Download Certificate If the exam is successfully completed and results are published, a Certificate button will appear next to "View Solutions". Tap Certificate to open your certificate preview. 1. Access Completed Exams Open the app and tap Exam (bottom navigation bar). Select the Completed tab at the top. You will see a list of all exams you have completed. 2. View Result For each exam, the result will be displayed: Not Attempted → Red label. Result Pending → Green label with result date. Published Result → Shows Score / Grade and Rank. Tap View Solutions to see detailed answers and explanations. SLATO Coin Based Exam 1. Open the Slato Exams app Find the Slato Exams app icon on your phone and tap it to open. 2. Go to the Exams / Upcoming Exams screen From the app home, tap Exam or Upcoming Exams in the top menu. You will see a list of upcoming exams with dates and a ENROLL NOW button on the exam card. 3. Choose the exam Find the exam you want (look for the title, date and time). If your account already has enough SLATO coins: The app will use those coins and confirm your seat immediately. You should see a confirmation message or the exam card change to show it’s enrolled. How to Buy Slato Coins 5. Confirm the purchase A small box may appear showing the amount and how many SLATO coins you will receive. Check the amount shown (example: ₹15 for 50 coins). Tap Confirm to proceed with payment, or Cancel if you want to choose a different pack. If you see an Insufficient Coins message: Tap Buy Coins on the popup to buy SLATO coins. 4. Buy SLATO Coins (choose a pack) On the Buy SLATO Coins screen you will see coin packs (for example Bronze, Silver, Gold) with prices. Read the number of coins and the price for each pack. Tap BUY NOW on the pack you prefer. 6. Choose a payment method You will see a Payment Options screen. Common options are: UPI (Google Pay, PhonePe, etc.) — easiest if you already use UPI Cards (debit/credit) Netbanking Wallets For UPI: tap the UPI option (for example UPI – Google Pay), then tap Continue. 7. Enter UPI ID or Phone Number Some screens ask for your UPI ID or linked mobile number. Example: yourname@bank or the number linked to your UPI. Tap Continue. 8. Approve Payment Your UPI app (PhonePe / Google Pay, etc.) will open automatically. Check the merchant name (should show Slato Exams / Razorpay). Approve and complete the payment. 9. Wait for Confirmation You’ll see a “Payment Successful” message within seconds. Return to the SLATO app if not redirected automatically. 10. Payment Successful You’ll see a green screen with a tick mark and message: “Congratulations! Your enrollment was successful.” Tap Proceed to continue. How to Invite Friends and Earn Coins 1. Go to Profile Open the app and tap Profile (bottom right corner). Look for the Slato Coins box. You will see how many coins you have now. Tap Invite a. Coin Balance → The number (example: 25) shows how many coins you currently have. b. Buy Coin → Tap here if you want to purchase extra coins with real money. c. Invite → Share the app with friends. If they install it, you will get 100 free coins. d. Coin History → Shows the full list of coins you earned or spent. e. Reward → Shows your rewards and how you earned coins. 2. Share the Link Tap Invite Friend → choose WhatsApp, SMS, or Email. Your friend gets an install link. Once they install and join, you get 100 coins instantly. 3. Track Your Rewards In Coin History, you’ll see: +100 for inviting a friend. –25 for enrolling in an exam. Date and details of each transaction. How to attempt in Advanced Exams 1. Open the SLATO App Tap Exams → choose Upcoming Exams. 2. Find the Exam and Tap Enroll Now Review title, format, class, and date. Example: Mathematics Knowledge Quest (MCQ). 3. Confirm Your Seat Tap Confirm Your Seat to proceed with payment. 4. Select Payment Method Choose your preferred option: UPI (Google Pay, PhonePe, etc.) Card (Credit/Debit) Netbanking Wallet 5. Enter UPI ID or Number Enter your UPI ID or linked mobile number. Tap Continue. 6. Approve Payment in UPI App Approve payment in your UPI app. Check details and confirm. 7. Payment Successful You’ll see a confirmation message and amount paid.. Tap Proceed — your seat is confirmed! ☰ ✖